










Super Nice! Crochet Simple Skirt Tutorial For Beginners
Introduction to Crochet Skirts: Why Every Beginner Should Try One
Crocheting your own clothing is one of the most rewarding experiences a fiber artist can embark on, and a simple skirt is arguably the perfect starting point for anyone new to garment making. Unlike complex sweaters or fitted tops, a basic crochet skirt works in a forgiving, flowing silhouette that allows for flexibility in sizing and tension. The rhythmic repetition of stitches makes the process meditative and enjoyable, even when you are still building confidence with your hook and yarn. Whether you are picking up crochet for the first time or transitioning from making smaller accessories, this project will teach you foundational skills that carry forward into every future creation.
What makes crochet skirts particularly appealing for beginners is how quickly the fabric grows. Using a medium to bulky weight yarn with a larger hook means you see progress after just one or two rows, which provides tremendous motivation to keep going. The visual reward of watching a garment take shape in your hands is unlike anything else in the crafting world. Many beginners report that finishing their first wearable crochet item changed their relationship with the craft entirely, transforming it from a casual hobby into a genuine passion.
Beyond the creative satisfaction, a handmade crochet skirt is also a deeply practical and sustainable fashion choice. In a world increasingly aware of the environmental cost of fast fashion, creating your own garment from carefully chosen yarn means you have complete control over quality, fiber content, and ethical sourcing. You can select organic cotton for a breathable summer skirt, soft merino wool for a cozy autumn layer, or a budget-friendly acrylic blend when you are first practicing the pattern. The result is a one-of-a-kind piece tailored precisely to your measurements and style preferences, something no fast-fashion brand can ever truly offer.
Understanding the Appeal of Handmade Fashion
Handmade fashion carries with it a story, a texture of intention that mass-produced clothing simply cannot replicate. When you wear a skirt you crocheted yourself, every stitch represents a moment of focus, creativity, and personal craftsmanship. Friends, family, and even strangers on the street often notice handmade garments because they have a warmth and uniqueness that stands out in a crowd of identical store-bought pieces. This kind of personal expression through clothing is becoming increasingly valued in contemporary culture, making handmade crochet garments both fashionable and meaningful.
There is also a growing online community of crochet enthusiasts who share patterns, tips, and finished project photos on platforms like Pinterest, Instagram, and YouTube. Joining this community as a beginner opens doors to encouragement, troubleshooting advice, and endless inspiration. Tutorials shared on Pinterest in particular have introduced millions of people to crochet garments, with simple skirt patterns consistently ranking among the most saved and shared content. This reflects just how universal the desire to create wearable art truly is, spanning all ages, backgrounds, and skill levels.
Materials and Tools You Will Need
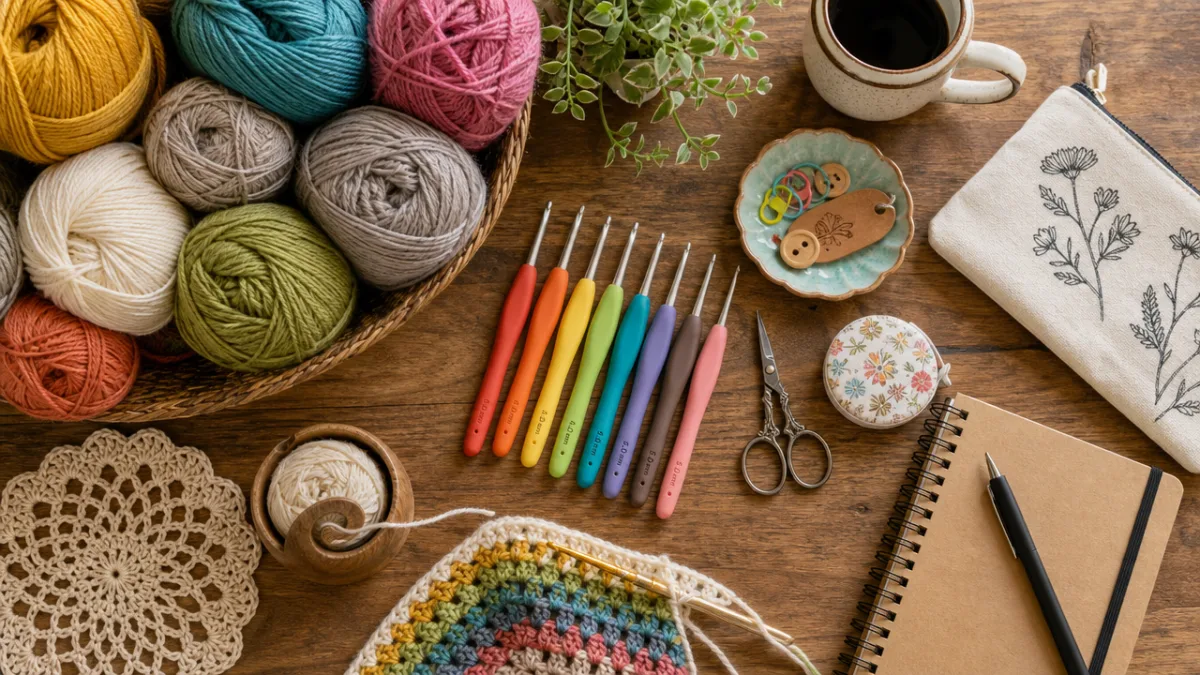
Before you cast on your first stitch, gathering the right materials is essential to a smooth and enjoyable crochet experience. The good news is that a simple crochet skirt requires very few tools, making it an accessible project even on a modest budget. At its core, you will need yarn, a crochet hook, scissors, a yarn needle for weaving in ends, and a measuring tape. Having everything laid out before you begin means you can enter a state of creative flow without interruptions to hunt for supplies mid-project.
Yarn selection is arguably the most important decision you will make for this project. For a beginner-friendly skirt, a smooth, light-colored yarn in a worsted or DK weight is highly recommended. Smooth yarns allow you to see your stitches clearly, which is invaluable when you are learning to count rows and identify mistakes early. Light colors, while perhaps less dramatic visually, make every stitch visible and help you understand the structure of your fabric as it develops. Once you are comfortable with the pattern, you can experiment freely with textures, gradients, and deep jewel tones.
Hook size should be matched to your yarn according to the label recommendations, but many crocheters find going up one hook size from the recommendation creates a slightly looser, drapier fabric that is ideal for skirts. A stiff or dense fabric does not move well on the body and can feel uncomfortable to wear, so erring on the side of a more open, fluid fabric is usually the better choice for garments. A size 5.0mm or 5.5mm hook is a common starting point for worsted weight yarn when making skirts, but always crochet a small swatch first to check your gauge against the pattern.
Essential Supply Checklist
- Worsted or DK weight yarn in your chosen color, approximately 400 to 800 yards depending on skirt length and size
- Crochet hook sized appropriately for your yarn, typically 4.5mm to 6.0mm
- Measuring tape for checking dimensions and adjusting fit throughout the project
- Sharp scissors for clean yarn cuts at the beginning and end of your work
- Blunt-tipped yarn needle for weaving in loose ends neatly when the skirt is finished
- Stitch markers to help you track round beginnings or key increase points
- Elastic or a drawstring for the waistband, measured to your waist size
- Optional: a row counter or notebook to track your progress across multiple sessions
Understanding Basic Crochet Stitches for the Skirt
The beauty of a beginner crochet skirt pattern is that it typically relies on just two or three foundational stitches, which you will practice so repeatedly throughout the project that they become completely intuitive. The chain stitch forms the foundation of your work and is always the very first thing you learn. The single crochet is the tightest and most structured stitch, great for waistbands and edges. The double crochet is taller, works up faster, and creates a beautiful open fabric that drapes elegantly, making it the most popular choice for skirt bodies.
If you have never crocheted before, spending thirty minutes practicing each stitch on a small swatch before starting the skirt will save you significant frustration later. Muscle memory plays a huge role in crochet, and the more your hands practice holding the hook and yarn comfortably, the more effortless the actual project will feel. Many beginners find that their tension improves dramatically within just a few rows as their hands relax and find their natural rhythm. Do not be discouraged if your first few rows look uneven; this is entirely normal and expected, and the improvement comes quickly.
Most simple skirt patterns also incorporate increase rounds, where you add extra stitches at regular intervals to widen the skirt from the waist downward, creating that flattering A-line or flared silhouette. Understanding where and how to increase is a fundamental garment-making skill, and a skirt is one of the gentlest ways to learn it. The increases follow a simple mathematical logic: the more evenly you distribute them around the circumference, the smoother and more symmetrical your skirt will be. Once you grasp this concept, you will find it applies directly to hats, shawls, granny squares, and nearly every other crochet project you will ever undertake.
Stitch Guide Quick Reference
- Chain Stitch (ch): The foundation of all crochet. Create a slip knot, insert hook, wrap yarn over, and pull through the loop on your hook. Repeat for the desired chain length.
- Slip Stitch (sl st): Used to join rounds and move across stitches without adding height. Insert hook, yarn over, pull through both loops in one motion.
- Single Crochet (sc): Insert hook into stitch, yarn over, pull up a loop, yarn over again, pull through both loops. Creates a dense, firm fabric ideal for waistbands.
- Half Double Crochet (hdc): Yarn over before inserting hook, pull up a loop, then pull through all three loops. Produces a medium-height stitch with a pleasant texture.
- Double Crochet (dc): The most versatile garment stitch. Yarn over, insert hook, pull up loop, yarn over, pull through two loops, yarn over again, pull through remaining two loops.
Step-by-Step Tutorial: Crocheting Your Simple Skirt
Begin your skirt by creating a foundation chain that fits comfortably around your waist, adding a few extra chains to account for the natural stretch of crochet fabric. If your waist measures 28 inches, for example, a chain of approximately 80 to 90 stitches in worsted weight yarn will give you a starting circumference close to that measurement, though the exact count depends on your gauge. Join the chain into a ring with a slip stitch, being careful not to twist the chain before joining, as a twisted foundation is one of the most common and frustrating beginner mistakes. Once joined, you have a neat circular base from which your entire skirt will grow.
Work the first several rounds in single crochet to create a firm, structured waistband that will hold its shape and support the weight of the skirt below it. Most patterns suggest working four to six rounds of single crochet for the waistband, though you can adjust this height to your personal preference. At the end of the waistband section, you will typically work a row of chain spaces or eyelets through which you can thread elastic or a decorative drawstring. This waistband technique is simple, effective, and creates a clean, professional-looking finish that is easy enough for complete beginners to achieve on their very first garment.
Once your waistband is complete, transition to double crochet stitches for the skirt body and begin working your increase rounds. A common formula for a gently flared A-line skirt is to increase by adding one extra double crochet in every eighth stitch for the first two rounds, then every tenth stitch for the next two rounds, and so on. This gradual increase creates a smooth, even flare rather than a sudden dramatic width. Continue working straight rounds without increases once your skirt has reached the desired width at the hem, and finish with a decorative border stitch such as a shell stitch or picot edge for a polished, intentional look.
Fitting and Adjusting as You Go
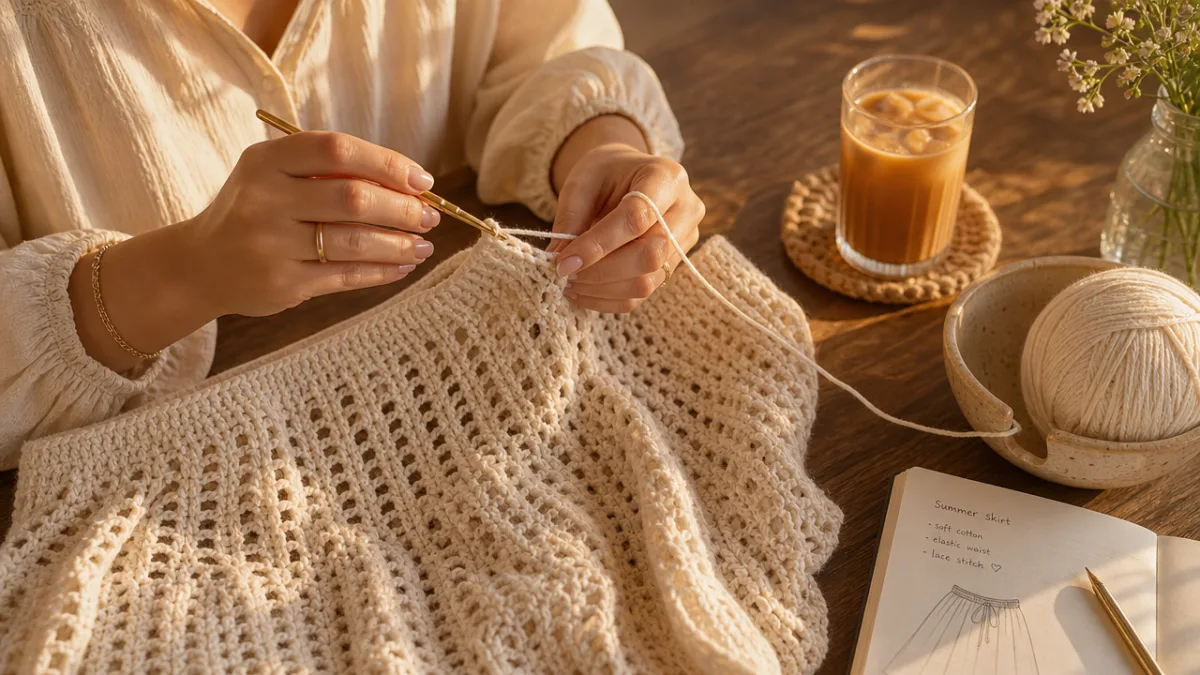
One of the great advantages of working a crochet skirt in the round from the top down is that you can try it on at any stage of the process to check the fit. Because crochet fabric has natural stretch and flexibility, minor variations in circumference can be corrected as you work. If the waistband feels too tight, you can carefully undo the joining slip stitch and add a few extra foundation chains before rejoining. If the skirt is flaring too quickly and looking more like a tutu than a flowing midi skirt, simply reduce the frequency of your increase rounds. This adaptability makes top-down construction particularly beginner-friendly and forgiving.
Length is entirely customizable and depends entirely on your vision and how much yarn you have available. A mini skirt might require only fifteen to twenty rounds of the body, while a flowing maxi skirt could involve fifty or more rounds. Keep trying the skirt on as you work, or lay it flat and measure against a garment you already own and love. The flexibility to make real-time adjustments is one of the defining joys of crochet garments compared to sewn clothing, where adjusting the finished length requires significantly more effort and expertise.
Finishing Techniques and Caring for Your Crochet Skirt
The finishing process is what transforms a collection of crocheted rounds into a polished, wearable garment, and it deserves just as much care and attention as the crocheting itself. Begin by weaving in all loose yarn ends using your blunt yarn needle, threading each tail through several stitches in different directions to secure it firmly. A poorly woven end can work its way loose with wear and washing, gradually unraveling your hard work, so take the time to anchor each one thoroughly. Trim the ends close to the fabric once secured, being careful not to cut into any of your actual stitches.
Blocking your finished skirt is a step many beginners skip but should absolutely not. Blocking involves wetting the finished piece, gently pressing out excess water, and laying it flat in its intended shape to dry. This process evens out uneven tension, opens up the stitch pattern to its full intended beauty, and helps the skirt hang and drape correctly when worn. Natural fibers like cotton and wool respond particularly dramatically and beautifully to blocking, often transforming a lumpy, uneven-looking piece into something that looks professionally made. Even synthetic fibers benefit from a light steam blocking with an iron held a few inches above the surface.
Inserting the waistband elastic or drawstring is the final functional step before your skirt is ready to wear. Cut your elastic to your exact waist measurement, subtract about one inch for comfortable snugness, and thread it through the channel you created in your waistband using a safety pin as a guide. Overlap the elastic ends by about half an inch and sew them together securely with a needle and thread. Alternatively, a decorative cotton rope or ribbon drawstring threaded through the same channel creates a bohemian, adjustable waistband that works beautifully with the handmade aesthetic of a crochet skirt.
Washing and Storage Tips
Caring properly for your handmade crochet skirt will ensure it stays beautiful for many years. Always check the care label on your yarn before washing, as different fibers have very different requirements. Most cotton yarns are machine washable on a gentle cycle in cool water, while wool requires hand washing or a dedicated wool cycle to prevent felting and shrinking. Lay your skirt flat to dry rather than hanging it, as the weight of wet yarn can cause a hanging garment to stretch significantly and lose its original shape over time.
Store your crochet skirt folded neatly rather than hung in a wardrobe for the same reason: gravity affects wet yarn most dramatically, but even dry heavy knits and crochet pieces can stretch out of shape when hung for extended periods. If you are storing the skirt seasonally, a breathable cotton bag or drawer is ideal, keeping dust away while allowing air circulation that prevents musty odors. Adding a natural cedar block or lavender sachet to your storage space will protect wool and other natural fibers from moth damage without the harsh chemicals of traditional moth repellents.
Troubleshooting Common Beginner Problems
- Twisted foundation chain: Always lay your chain flat and ensure all the loops face the same direction before joining into a ring. If you discover a twist after joining, it is best to start over rather than trying to work around it.
- Uneven tension: If some stitches look tight and others looser, focus on maintaining consistent yarn tension as you wrap. Blocking at the end will also help smooth out minor tension variations throughout the fabric.
- Skirt curling at the hem: A curling hem usually indicates the foundation edge is too tight. Adding a few extra stitches to your starting chain or working the first few rounds more loosely generally resolves this issue.
- Running out of yarn mid-row: Always join new yarn at the beginning of a round rather than mid-round to keep your joins invisible. Leave a six-inch tail on both the old and new yarn for easy weaving.
- Skirt not flaring evenly: Count your increase stitches carefully at the end of each increase round using stitch markers. Even one missed increase can cause a visible asymmetry in your silhouette after several rounds.
Styling and Inspiring Ideas for Your Finished Crochet Skirt
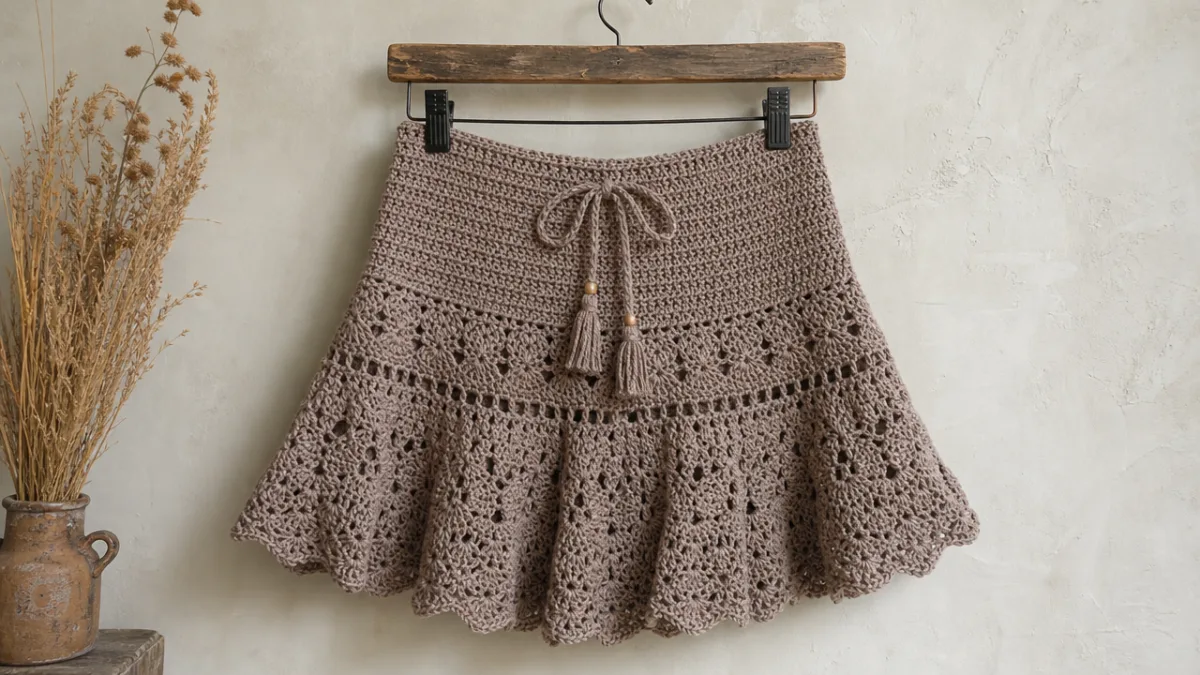
Once your crochet skirt is finished, blocked, and ready to wear, the real fun begins: styling it into outfits that reflect your personal aesthetic. A simple double crochet skirt in a neutral cotton yarn pairs beautifully with a tucked-in linen blouse for a relaxed, bohemian daytime look. The open texture of crochet fabric makes it naturally breezy and perfect for warm weather, so pairing it with lightweight natural fiber tops keeps the overall outfit feeling airy and effortless. Add woven sandals, a straw bag, and minimal jewelry, and you have an outfit that looks thoughtfully curated without trying too hard.
For a more elevated evening look, a crochet skirt in a rich jewel tone like deep teal, burgundy, or mustard becomes a statement piece when paired with a fitted silk or satin camisole. The contrast between the artisanal texture of crochet and the smooth luxury of silk creates a sophisticated interplay of materials that feels genuinely fashion-forward. Block-heeled mules or strappy heeled sandals complete the look beautifully, elevating the handmade skirt from casual to cocktail-appropriate. This versatility is one of the most compelling arguments for investing time in making a quality crochet skirt.
The skills you build making your first simple skirt also open the door to an entire wardrobe of crochet garments. Once you understand how to work in the round, increase for shape, and create a waistband, you are equipped to tackle more complex patterns including wide-leg crochet trousers, fitted bodices, and layered tiered skirts with decorative stitch panels. Many experienced crochet designers trace their entire career back to one simple beginner project that clicked, revealing the logic and possibility of the craft in one transformative creative session. Your simple skirt may very well be that project for you.
Pattern Variations to Try Next
Once you are comfortable with the basic skirt pattern, there are countless variations to explore that introduce new techniques without overwhelming complexity. A tiered skirt adds multiple layers of ruffles by dramatically increasing stitch counts at set intervals, creating a romantic, voluminous silhouette popular in bohemian and cottage-core fashion aesthetics. A granny square skirt assembles individual motifs into a patchwork design, letting you play with color in a completely different way and practice joining techniques that are useful across all of crochet. A wrap skirt uses a rectangular panel rather than working in the round, making it perhaps the most beginner-friendly garment of all.
Stitch pattern substitutions also offer a wonderful way to give a familiar silhouette a completely fresh look. Replacing standard double crochet with a shell stitch creates an elegant scalloped fabric full of movement and texture. A waffle stitch or basketweave pattern adds dimensional interest that makes a simple silhouette look intricate and sophisticated. Even just changing your yarn weight dramatically alters the character of the finished piece: a lace-weight cotton produces an ethereal, delicate fabric while a chunky roving yarn creates a thick, sculptural statement piece. The same basic pattern becomes an entirely different garment through these creative choices.
The crochet community is endlessly generous with knowledge, inspiration, and encouragement, and sharing your finished skirt on social media or crafting platforms is a wonderful way to connect with fellow makers around the world. Tag your project with relevant hashtags, leave reviews on the pattern you used, and consider writing up your own notes about adjustments you made for your unique size and yarn choice. These contributions help future beginners navigate their own first garment projects with greater confidence and success. The craft grows stronger when everyone shares freely, and your experience and perspective as a beginner are genuinely valuable to the community as a whole.








What do you think?
It is nice to know your opinion. Leave a comment.