










No Sew Crochet Turtle Amigurumi Plush: The Complete Guide to Making Your Own Adorable Handcrafted Companion
What Is Amigurumi and Why Turtles Make the Perfect Project
Amigurumi is the beloved Japanese art of crocheting or knitting small, stuffed yarn creatures — typically animals, mythical beings, or even inanimate objects given a charming, anthropomorphic appearance. The word itself combines the Japanese terms “ami,” meaning crocheted or knitted, and “nuigurumi,” meaning stuffed doll. The craft has roots in Japan’s broader kawaii (cute) culture and gained enormous international popularity in the early 2000s, spreading through online communities, craft blogs, and social platforms like Pinterest where makers proudly share their colorful creations.
Among all amigurumi subjects, the turtle stands out as a particularly satisfying choice for crafters at every skill level. Turtles have a naturally geometric, structured silhouette that translates beautifully into crochet form. The domed shell offers an opportunity for texture play, color contrast, and even decorative surface stitching, while the rounded head and stubby limbs are forgiving shapes that look endearing even when proportions are slightly imperfect. This makes the turtle an ideal amigurumi project for beginners who want something achievable, and for intermediate crafters who want room for creative embellishment.
What makes this particular pattern even more appealing is its no-sew construction approach. Traditional amigurumi patterns require joining individual pieces — head, body, legs, tail — by sewing them together with a tapestry needle and yarn. This finishing stage can be tedious, time-consuming, and frustrating for crafters who prefer to keep their hands moving with hook and yarn rather than needle and thread. The no-sew method integrates smart join techniques directly into the crochet process, allowing the maker to attach limbs as they work, producing a seamless, polished result without a single stitch of sewing.
Gathering Your Materials and Tools Before You Begin
Before casting on a single stitch, successful amigurumi crafters know that preparation is everything. Having the right materials assembled and understood before you begin saves enormous frustration mid-project. For a no-sew crochet turtle amigurumi plush, your material list is refreshingly short, but each item plays an important role in the final outcome. The beauty of amigurumi is that it does not require large quantities of yarn — most projects use small amounts from your existing stash — making it a wonderfully economical craft.
For yarn, choose a smooth, medium-weight worsted yarn (typically labeled as size 4) in the colors you envision for your turtle. A classic combination features a rich forest green or teal for the body and limbs, paired with a warm sandy brown, olive, or patterned variegated yarn for the shell. Amigurumi crafters often favor cotton yarn for its stitch definition and slight firmness, which helps pieces hold their shape, though acrylic yarn works equally well and comes in a broader color palette. Avoid fluffy or textured yarns for your first attempt, as they obscure your stitches and make counting difficult.
Beyond yarn, you will need a crochet hook sized slightly smaller than the yarn label recommends — typically a 3.5mm or 4mm hook — because working with a tighter tension produces a denser fabric that prevents stuffing from showing through the finished piece. Other essentials include polyester fiberfill stuffing, a pair of safety eyes (6mm to 9mm work well for a small turtle), stitch markers to track your rounds, scissors, and a tapestry needle for weaving in yarn ends. Optional embellishments include embroidery floss for adding a smile or decorative shell lines, buttons, and small felt pieces for extra detail.
- Yarn: Worsted weight (size 4) in green, teal, brown, or olive — two to three coordinating colors
- Crochet Hook: 3.5mm or 4mm, depending on your tension and yarn weight
- Safety Eyes: 6mm to 9mm black or colored safety eyes, two per turtle
- Polyester Fiberfill: Standard craft stuffing available at any hobby or fabric store
- Stitch Markers: Locking markers or simple loops of contrasting yarn to mark round beginnings
- Scissors and Tapestry Needle: For trimming yarn tails and weaving in ends neatly
- Optional: Embroidery floss, felt pieces, buttons, or surface slip stitch yarn for shell detailing
Understanding the Core Stitches and Techniques
If you are new to amigurumi or returning to crochet after a break, a brief review of the fundamental stitches and techniques used in this pattern will set you up for success. The great majority of amigurumi projects, including this turtle, are worked entirely in single crochet — one of the most basic and stable crochet stitches. Single crochet produces a tight, even fabric that holds its shape well when stuffed, making it the undisputed workhorse stitch of the amigurumi world. Once you are comfortable with single crochet, you have the essential skill needed to complete virtually any amigurumi pattern you encounter.
Amigurumi pieces are almost always worked in continuous rounds rather than joined rows. This means you crochet in a spiral around a central starting point without ever turning your work or joining rounds with a slip stitch — unless the pattern specifically instructs otherwise. The result is a seamless, tube-like fabric that closes naturally into a three-dimensional shape when stuffed. To keep track of where each round begins and ends, always use a stitch marker at the first stitch of each new round, moving it up as you go. Forgetting this step is one of the most common beginner mistakes and leads to confused stitch counts very quickly.
The magic ring — also called a magic circle or adjustable loop — is the standard starting point for amigurumi pieces. It allows you to begin crocheting in the round with a tight, closed center that leaves no hole, which is exactly what you want for a stuffed toy. To make a magic ring, loop your yarn into a circle, insert your hook through the loop, pull up a loop of working yarn, chain one to secure it, then work your starting stitches into the ring before pulling the tail to close it. Increases (working two single crochets into one stitch) and decreases (crocheting two stitches together) are the shaping tools that create the curves and forms of your turtle’s body, head, and shell.
Step-by-Step Construction of Your Turtle Plush
Now that your materials are ready and your technique foundation is solid, it is time to build your turtle from the ground up. Most no-sew turtle amigurumi patterns follow a logical sequence: begin with the legs and tail so they are ready to be joined during the body construction, then crochet the body while incorporating the limbs, and finally create and attach the shell on top. This order of operations is what makes the no-sew method work so elegantly — you join as you go, eliminating the pile of separate pieces that would otherwise need to be sewn together at the end.
Start by crocheting the four legs and the tail in your chosen body color. Each leg is typically a small tube worked in the round: make a magic ring, work six single crochets into it, increase to twelve stitches, then work several even rounds before leaving the piece open and setting it aside with the yarn attached. Make four identical legs and one narrower, shorter tail. These pieces will be folded flat and held in position against the body as you work. When the pattern instructs you to join a limb, you simply crochet across the opening of the flat-folded leg as though it were a row of regular stitches — the leg becomes permanently incorporated into the body fabric without any sewing required.
For the body itself, begin a new magic ring in your body color and increase outward over several rounds to form a flat circle — this will become the turtle’s belly. Continue adding stitches to expand the circle until it reaches your desired diameter, typically around 18 to 24 stitches depending on the size of turtle you want. At this point, position your legs at evenly spaced intervals around the perimeter and join them as described above, then begin working the walls of the body upward, decreasing gradually to close the top opening. Stuff the body firmly and evenly with fiberfill as you work, adding stuffing incrementally rather than all at once so it distributes without lumping.
The head is worked separately using the same magic ring and increasing technique, beginning small and expanding to a rounded sphere shape. After inserting your safety eyes at the appropriate point — typically when you have closed the piece to about one-third — stuff the head firmly and close it. Attach the head to the body using the no-sew join technique: hold the head against the body front, then use your hook and the yarn tail from the head to single crochet or slip stitch directly through both layers around the join point. This creates a visible but charming stitched border that gives the finished toy a tactile, handcrafted character many crafters find even more attractive than an invisible sewn join.
Crafting and Attaching the Signature Turtle Shell
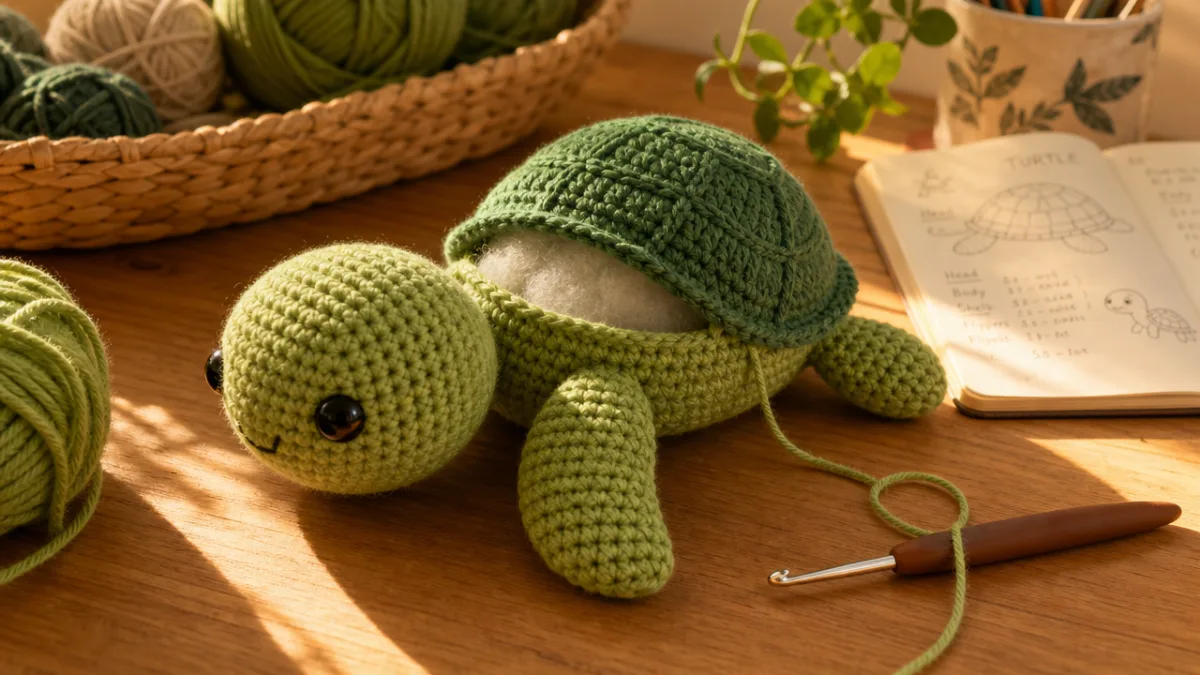
The shell is arguably the most exciting part of the entire turtle amigurumi project, and it is what instantly signals “turtle” to everyone who sees your finished creation. A well-made shell transforms a generic rounded amigurumi body into something unmistakably reptilian and delightful. The shell is typically worked in a contrasting color — think warm brown, olive, deep teal, or even a bold patterned variegated yarn — and shaped into a slightly domed oval or circle that sits proud of the body, creating that characteristic hump that gives real turtles their iconic silhouette.
To crochet the shell, begin once more with a magic ring and work outward in increasing rounds just as you did for the body, but stop increasing sooner to create a smaller, more domed shape rather than a flat disc. Many patterns introduce a few rounds of even single crochet before decreasing the edges slightly, which creates the natural curvature of a real turtle shell. Surface embellishment is where you can truly personalize your turtle: use a tapestry needle and contrasting yarn or embroidery floss to work the classic hexagonal or star-shaped scute pattern across the top of the shell, either with whip stitches, running stitches, or chain stitch embroidery. This detail elevates the toy from cute to genuinely impressive.
Attaching the shell using the no-sew method follows the same principle as attaching the head. Position the shell on top of the body where it looks most natural and balanced. Using your hook and the yarn tail left on the shell, work slip stitches or single crochets through the edge of the shell and the corresponding stitches on the body top, working all the way around the perimeter until the shell is firmly secured. Stuff lightly through the opening as you go to maintain that domed profile, then close and secure your yarn. The result is a shell that sits firmly, stays in position through years of play, and requires absolutely no needle and thread to attach.
- Make the magic ring and work your initial six single crochets to begin the shell base.
- Increase over four to five rounds until the shell reaches your target diameter, roughly 60 to 70 percent of the body width.
- Work two to three even rounds without increasing to build the domed sidewall of the shell.
- Add surface embellishment using embroidery floss in gold, cream, or contrasting color for a realistic scute pattern.
- Position the shell on the body top and use a slip stitch join with your hook to attach it cleanly all the way around.
- Stuff lightly before closing to preserve the dome shape, then secure and weave in all remaining yarn ends.
Finishing Touches, Customization Ideas, and Care Tips
With your turtle’s body, head, limbs, and shell all assembled, the final finishing touches are what bring the personality to life. The facial features in particular have an enormous impact on the overall character of the finished toy. Safety eyes give a classic, shiny, and secure finish, but you can alternatively embroider simple French knot eyes using black embroidery floss for a softer, safer option if the toy is intended for very young children or babies. A tiny curved embroidered smile using a single strand of black or dark brown floss is all it takes to make your turtle look blissfully content, mischievous, or sleepy, depending on the curve’s angle and placement.
The world of amigurumi customization is genuinely limitless once you understand the core construction. Your turtle does not need to be green — coral, purple, turquoise, and even pastel rainbow-variegated turtles are equally charming. You can scale the pattern up by using bulky yarn and a larger hook to create a pillow-sized turtle plush, or scale it way down with fingering weight yarn and a 2mm hook to produce a tiny keychain-sized charm. Adding a miniature flower, bow, or crochet hat to your turtle’s head instantly personalizes it as a gift. Some crafters even crochet a tiny baby turtle to nestle against the larger one, creating an irresistible mother-and-child pair.
Amigurumi plush toys are durable but do benefit from thoughtful care to keep them looking their best. For toys made with acrylic yarn, machine washing on a gentle cold cycle in a mesh laundry bag is generally safe, though always check the yarn label first. Cotton yarn turtles may be hand washed gently in cool water and reshaped while damp before air drying. Avoid placing amigurumi toys in the dryer, as heat can distort the fiberfill stuffing and cause pilling on the yarn surface. Store finished plushies away from direct sunlight to prevent color fading over time, and inspect safety eyes periodically to ensure they remain firmly secured, especially for toys used by young children.
Sharing Your Work and Finding Your Creative Community
One of the greatest joys of making amigurumi — perhaps second only to the making itself — is sharing your finished creations with others. The amigurumi and crochet communities online are among the most warm, encouraging, and generous creative spaces you will find anywhere on the internet. Platforms like Pinterest, Instagram, Ravelry, and dedicated Facebook groups are filled with makers at every level who celebrate each other’s work, offer troubleshooting advice, swap patterns, and find genuine inspiration in one another’s creativity. Posting your finished turtle plush is an invitation to connection, and the response from fellow crafters is almost always enthusiastically positive.
Photography makes a significant difference in how your handmade work is received and appreciated online. Natural daylight is always your best ally — photograph near a window during morning or afternoon hours rather than under harsh overhead artificial light, which flattens texture and distorts color. A simple, uncluttered background allows the details of your crochet work to take center stage. Props that complement the handmade nature of the piece — a wooden surface, a linen cloth, a small potted plant — add context without competing with the turtle itself. Shooting from slightly above at a three-quarter angle typically shows both the top surface of the shell and the turtle’s expressive face in a single image.
Beyond social media sharing, handmade amigurumi plushies make extraordinarily meaningful gifts for friends, family members, and children who will treasure them for years. A custom turtle made in someone’s favorite colors, or sized to be a genuine snuggly pillow companion, communicates care and effort in a way that no purchased toy ever quite can. Many amigurumi crafters also discover that their hobby can become a small creative business through platforms like Etsy, local craft fairs, and farmers markets, where handmade toys command thoughtful appreciation and fair pricing. Whether you keep your turtle, gift it, or sell it, the skill and care that went into its creation make it genuinely one of a kind — and that is the whole beautiful point of making things by hand.








What do you think?
It is nice to know your opinion. Leave a comment.