










Crocheted Pizza Slice: The Ultimate Guide to Your Next Adorable Amigurumi Project
Introduction to the Crocheted Pizza Slice Project
If you have ever wanted to combine your love of food with your passion for crochet, the crocheted pizza slice project is exactly the creative outlet you have been searching for. This delightfully whimsical amigurumi-style creation captures all the cheesy, saucy glory of everyone’s favorite comfort food in yarn form, resulting in a plush, squishy toy that is as fun to make as it is to display or gift. Whether you are a seasoned crocheter or someone who has only recently picked up a hook, this project offers just enough challenge to keep things interesting without becoming overwhelming.
The crocheted pizza slice has taken the crafting community by storm, appearing across Pinterest boards, Instagram feeds, and Etsy shops in a dizzying array of colors and styles. Some crafters prefer a classic Margherita look with red yarn sauce, cream-colored cheese, and little green herb accents, while others go wild with rainbow toppings that defy culinary logic entirely. The beauty of this project lies in its versatility: once you understand the basic construction, you can customize your slice to reflect whatever kind of pizza speaks to your soul, or more importantly, to the soul of whoever you are making it for.
Beyond being simply adorable, crocheted pizza slices serve a surprising number of practical and emotional purposes. They make exceptional gifts for children who love plushies, for pizza-obsessed friends who have everything, or for kitchen decoration that adds a playful touch to your home. Many crafters report that the meditative quality of working through this project provides genuine stress relief, and the satisfaction of completing a recognizable, charming object keeps motivation high from the very first stitch to the final woven-in end. This guide will walk you through everything you need to bring your crocheted pizza slice to life.
Materials and Tools You Will Need
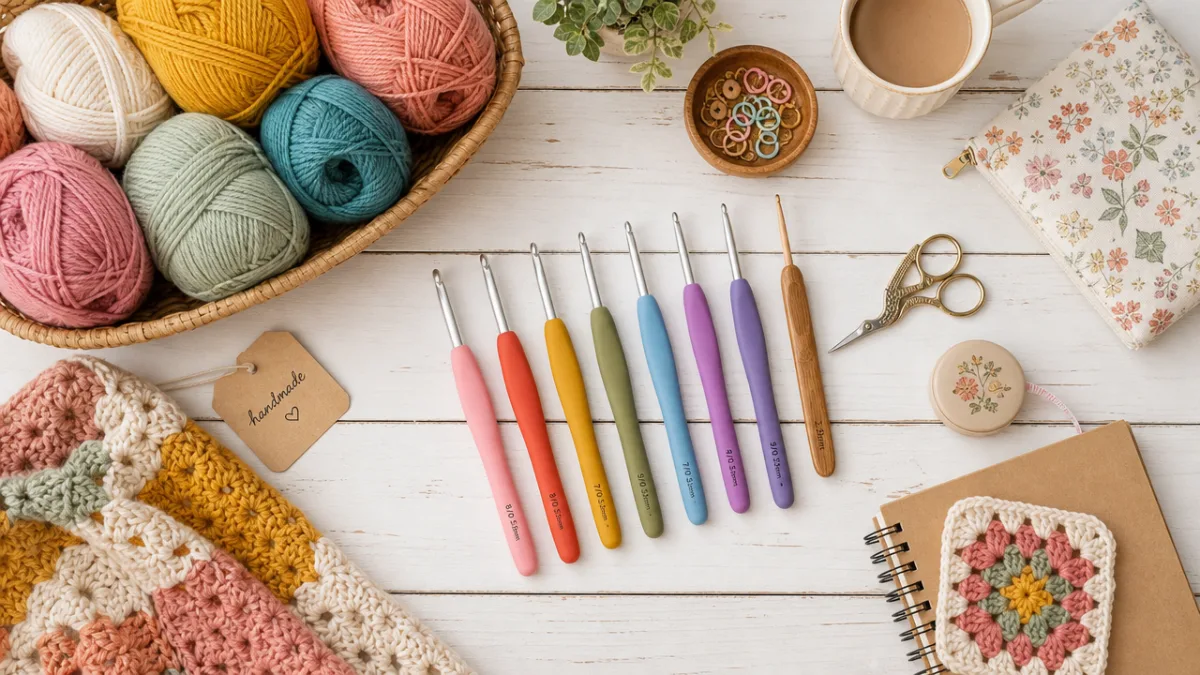
Before you cast on a single stitch, gathering the right materials will make your crocheted pizza slice project run smoothly from start to finish. The yarn selection is arguably the most important decision you will make, and for this particular project, worsted weight yarn strikes the ideal balance between structure and softness. You will want to choose colors that approximate the look of a real pizza slice, which typically means a warm golden yellow or tan for the crust, a rich tomato red for the sauce, a creamy off-white or pale yellow for the melted cheese, and then whatever colors you fancy for your chosen toppings.
In terms of specific tools, you will need a crochet hook sized appropriately for your chosen yarn, which for standard worsted weight is typically a 4mm or 5mm hook. Many crafters find that going down one hook size from the yarn’s recommendation creates a tighter fabric that holds the stuffing in place more effectively and gives the finished piece a firmer, more sculptural quality. You will also need a yarn needle for sewing pieces together and weaving in ends, sharp scissors, and a good quantity of polyester fiberfill stuffing to give your pizza slice that plump, satisfying three-dimensional shape.
Additional embellishments can take your crocheted pizza slice from charming to absolutely spectacular. Consider picking up small amounts of specialty yarns in olive green, dark brown, or deep red to simulate olives, mushrooms, or pepperoni. Felt fabric in corresponding colors can be cut into tiny circles and ovals to create flat toppings that sit neatly on the cheese surface. Safety eyes, while not traditional for food amigurumi, can add a kawaii character to your slice if you want to give it a face. Some crafters also use fabric stiffener spray on the crust section to give it a more rigid, bread-like quality that contrasts beautifully with the softer cheese and topping areas.
- Worsted weight yarn in golden tan or yellow (crust), tomato red (sauce), and creamy white or pale yellow (cheese)
- Additional yarn colors for toppings: dark red for pepperoni, olive green for basil or peppers, brown for mushrooms
- Crochet hook, size 4mm to 5mm depending on yarn brand and personal tension
- Polyester fiberfill stuffing, enough to fill the slice firmly
- Yarn needle with a blunt tip for seaming and weaving in ends
- Sharp scissors for trimming yarn tails cleanly
- Optional: felt fabric, safety eyes, fabric glue, and stiffener spray
Understanding the Basic Construction and Pattern Structure
The crocheted pizza slice is built around a triangular shape that mimics the iconic wedge silhouette of a classic New York-style slice. Most patterns approach this shape by working in rows rather than rounds, increasing stitches at the wide end and decreasing toward the pointed tip to create that characteristic tapering form. The flat triangle is typically worked twice to create a front panel and a back panel, which are then joined together along the edges with a seam stitch while stuffing is added before the final closure, producing a three-dimensional pillow-like slice.
Understanding increases and decreases is essential for achieving the correct triangular shape, and if you are newer to crochet, spending a few minutes practicing these techniques on a small swatch before beginning the actual project will pay dividends later. The most common stitch used throughout this type of pattern is the single crochet, valued for its tightness and durability, though some patterns incorporate half-double or double crochet stitches in the crust section to create a thicker, loftier texture that mimics the airy interior of a real pizza crust. Reading your pattern carefully before beginning will help you understand where each transition occurs.
The crust is typically worked as a separate piece or as a continuation of the main triangle, attached either as the project progresses or sewn on at the end. Many crafters prefer to make the crust as a long rectangular tube, stuffed firmly and then curved and pinned into place along the wide edge of the triangle before stitching it down. This approach gives maximum control over the final shape and allows you to adjust the thickness and puffiness of the crust independent of the rest of the slice. The sauce layer is often embroidered or surface-stitched onto the cheese panel rather than crocheted separately, which saves time and creates a more organic, splotchy look that resembles actual tomato sauce spreading across the surface.
Step-by-Step Construction Process
Begin your crocheted pizza slice by creating the cheese panel, which forms the visible top surface of your finished slice. Start with a magic ring or a foundation chain, then work your rows of single crochet with careful increases at the beginning of each row until you reach the desired width at the crust edge. Keep your tension consistent throughout this panel, as any unevenness will be highly visible on the finished project since this is the most prominently displayed surface. Once your cheese panel is complete to your satisfaction, set it aside and repeat the process for the back panel, which can be worked in a slightly simpler fashion since it will be largely hidden when the slice is displayed.
Next, construct the crust by working a long rectangular strip in your chosen golden tan or yellow yarn. This strip should be long enough to span the entire wide edge of your triangle and thick enough to create a satisfying, puffy rim when stuffed. Work it in the round or flat and seamed, whichever technique you find more comfortable, and begin stuffing it as you go to make the process easier. Once stuffed and closed, curve the crust gently and pin it to the wide edge of your cheese panel with locking stitch markers, making sure the seam is positioned toward the interior where it will not be visible on the finished piece.
With your main panels and crust ready, it is time to begin assembly. Place the cheese panel and the back panel with their wrong sides facing each other, and use a slip stitch or whip stitch worked through both layers to join the two side edges of the triangle from the tip toward the crust. Leave the crust edge open for now and use this opportunity to stuff the interior of the slice generously with fiberfill, pushing the stuffing into the tip of the triangle with a pencil or stuffing tool to ensure the point is nicely filled. Once stuffed to your liking, close the crust edge by stitching the crust piece in place simultaneously, enclosing all the raw edges neatly within the seam.
- Crochet the front cheese panel in pale yellow or cream yarn, working rows with increases to form a triangle
- Repeat the triangle construction for the back panel in the same or a contrasting color
- Work the crust as a long stuffed rectangle or tube in golden tan yarn
- Join the side edges of both panels using a slip stitch or whip stitch seam
- Stuff the interior firmly with fiberfill before closing
- Attach the crust along the wide edge, enclosing all raw edges
- Add toppings by crocheting small circles for pepperoni or embroidering details directly onto the cheese surface
- Embroider sauce streaks in red yarn across the cheese panel using a running stitch or backstitch
- Weave in all ends securely and trim tails close to the fabric
Adding Toppings and Personalizing Your Pizza Slice
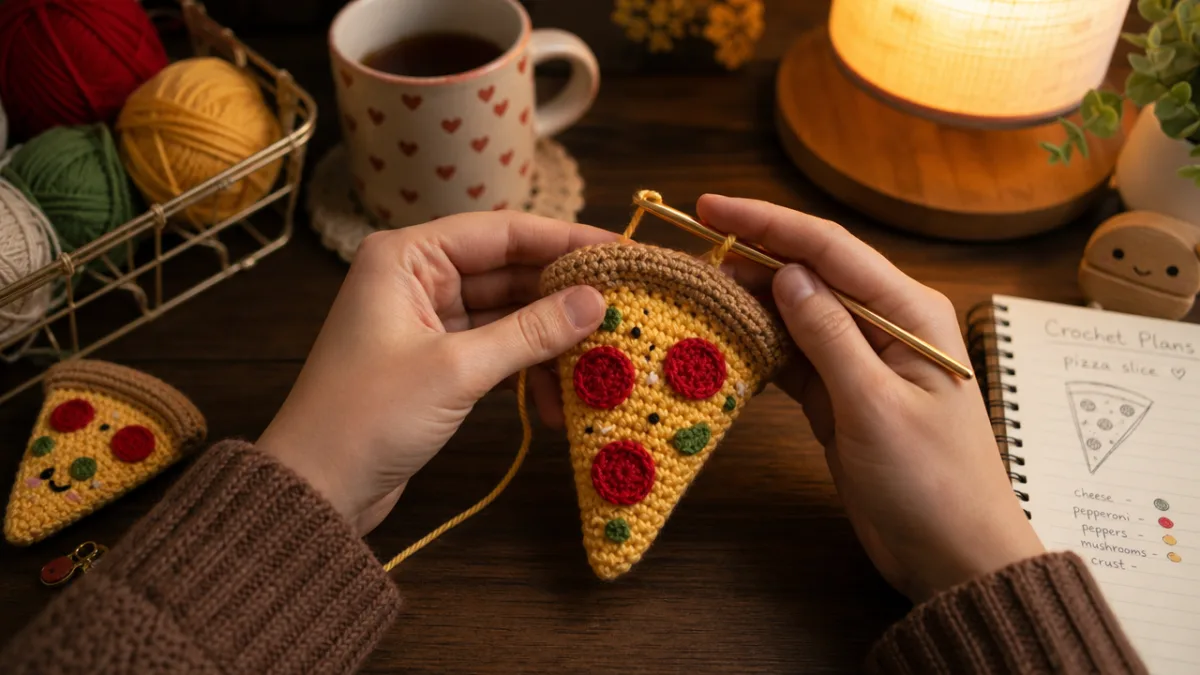
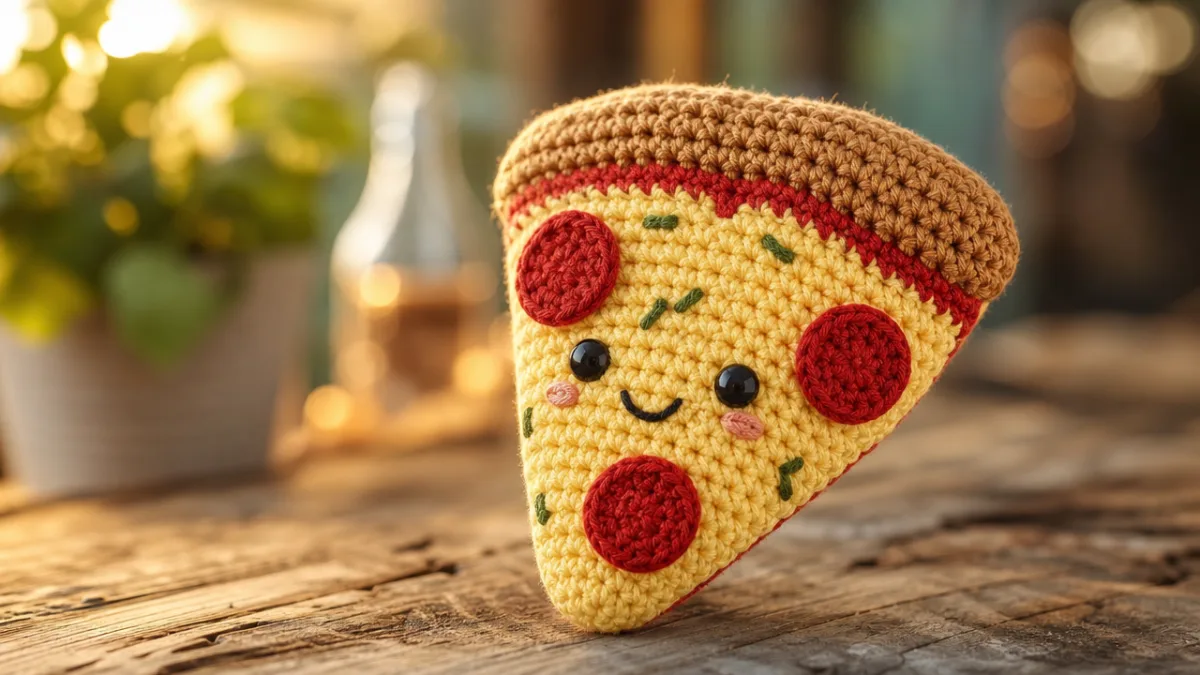
The toppings stage is where your crocheted pizza slice truly comes to life, and it is also the stage where your personal creativity has the most room to run. For pepperoni, the most beloved and recognized of all pizza toppings, crochet small flat circles in deep red or dark crimson yarn using a magic ring as your starting point, working a single round of single crochets, and then closing off. These little discs can be stitched flat onto the cheese surface in a scattered, organic arrangement that mimics how pepperoni looks when it tumbles off a fresh-cut slice. Slightly cupping the edges before attaching them creates a realistic curled-pepperoni effect that experienced pizza lovers will immediately recognize and appreciate.
For vegetable toppings, the technique varies depending on the topping you are simulating. Tiny crocheted green ovals make convincing basil leaves, especially when worked in a slightly variegated green yarn. Bell pepper strips can be approximated with small crocheted rectangles in red, yellow, or orange. Mushroom slices are perhaps the most challenging to render in yarn but can be suggested effectively by crocheting small tan-colored fans or semicircles and attaching them with their flat edge against the cheese surface. Olives can be made as tiny crocheted tubes in black or green yarn, closed at both ends and attached upright for maximum visual impact and dimensional appeal.
Beyond traditional toppings, consider adding special finishing details that elevate your pizza slice from craft project to genuine art object. A thin layer of fabric glue applied to the cheese surface and then dusted with yellow or orange glitter can simulate the sheen of freshly melted mozzarella catching the light. A few strategically placed brown embroidery stitches on the crust edge suggest the characteristic charring that happens in a hot pizza oven. If you want to go the extra mile, a drop of vanilla or pizza-scented essential oil dabbed onto the stuffing before final closure gives your crocheted slice an amusing and unexpected olfactory dimension that invariably delights everyone who picks it up.
Finishing Techniques and Display Ideas
Once all your toppings are attached and your seams are secure, the finishing process ensures your crocheted pizza slice will look polished and professional rather than homemade in the pejorative sense. The most important finishing step is weaving in all yarn ends thoroughly, burying them deep within the body of the work by threading your yarn needle through several stitches in different directions before trimming the tail close to the fabric. Ends that are only woven in a single direction have a tendency to work their way loose over time, especially in a toy or decorative item that will be handled frequently, so taking extra time at this stage protects all the work you have invested in the project.
Blocking your finished pizza slice can make a surprising difference in the overall neatness and dimensional quality of the piece. Even though blocking is more commonly associated with knitting or flat crochet items, a light spritz of water and gentle reshaping by hand, followed by allowing the piece to dry completely on a flat surface, can relax the stitches, even out any uneven tension areas, and help the triangular shape maintain its crisp geometry. If you used fabric stiffener on the crust, apply it at this stage as well, brushing it on with a foam brush and allowing it to dry thoroughly before handling the finished piece. The difference in the final look can be quite striking.
As for display and gifting, your crocheted pizza slice is remarkably versatile. A single completed slice makes a wonderful plush toy for children or an endearing desk ornament for the pizza-obsessed adult in your life. For a truly impressive gift, consider making a full set of six or eight slices and arranging them in a circular formation inside a real cardboard pizza box, complete with a handwritten note that reads something like “Sorry this pizza is not edible, but it will last forever.” This presentation never fails to generate an absolutely delighted reaction from the recipient and photographs beautifully for social media sharing. Alternatively, adding a keyring attachment to the tip of the slice transforms it into a bag charm or keychain that carries a little slice of joy everywhere it goes.
Tips for Success and Common Mistakes to Avoid
Every crafter who has tackled the crocheted pizza slice project has encountered a handful of recurring challenges, and knowing about them in advance allows you to sidestep the frustration and keep your creative momentum going. The single most common issue is achieving an even triangular shape, which requires careful attention to where increases and decreases are placed within each row. If you find your triangle curling at the edges, your tension may be too tight, and loosening your grip on the yarn slightly or moving up one hook size should resolve the problem without requiring you to start over entirely.
Stuffing the slice appropriately is another area where many crafters either overdo it or underdo it on their first attempt. Too little stuffing results in a flat, floppy slice that does not hold its shape and looks rather sad when displayed. Too much stuffing can cause the seams to gap and may even stress the yarn to the point of distorting the stitch definition. Aim for a stuffing level that feels firm when you press on the slice from the outside but does not cause any visible strain on the stitches. Adding stuffing incrementally and checking the feel after each addition, rather than trying to push in one large handful, gives you far more control over the final result.
Color fastness is a practical consideration that many crafters overlook when selecting their yarns, particularly if the finished pizza slice will be given to a young child who might mouth or drool on it. Always check the yarn label to confirm that the fibers are colorfast and washable, and when in doubt, test a small piece of yarn by dampening it and pressing it against a white cloth to see if any dye transfers. Acrylic yarns are generally the safest choice for children’s items from a colorfast and washability perspective, and many high-quality acrylics have a lovely soft hand that makes them genuinely pleasant to work with. Cotton yarns are another excellent option, particularly for the cheese and sauce sections where color accuracy is most visually important.
Sharing Your Work and Joining the Crochet Community
Completing your crocheted pizza slice is a genuine achievement worthy of celebration, and sharing your finished project with the broader crafting community is one of the most rewarding aspects of the hobby. Pinterest, Instagram, and Ravelry are all excellent platforms for showcasing your work, reaching fellow yarn enthusiasts who will appreciate the craft and effort that went into your creation. When photographing your finished slice for social media, natural light is your best friend: position your pizza slice near a window during the morning or late afternoon and use a simple, uncluttered background like a wooden cutting board, a white plate, or a rustic linen cloth to let the colors of the yarn really pop without competition.
Engaging with the online crochet community around food amigurumi specifically opens up a wonderful world of inspiration, free pattern sharing, and technique exchange. There are dozens of dedicated Facebook groups, Reddit communities, and Discord servers where crafters post their food-themed crochet creations and offer constructive feedback on each other’s work. Many experienced crafters in these communities are extraordinarily generous with their time and knowledge, willing to troubleshoot shaping problems, recommend yarn substitutions, or simply cheer on a newer crafter who is working up the courage to try something new. Do not hesitate to post in-progress photos as well as finished ones, because the community genuinely loves seeing the process unfold.
If your crocheted pizza slice turns out beautifully and you find yourself wanting to make more, consider turning your craft into a small creative business by opening an Etsy shop or selling at local craft fairs and markets. Food amigurumi items consistently perform well in these venues because they appeal to a broad demographic that extends well beyond committed crafters, drawing in gift shoppers, collectors, and impulse buyers who simply cannot resist the combination of humor and craftsmanship that a perfect little crocheted pizza slice represents. Whatever path you choose with your finished project, the most important thing is that you experienced the joy of creating something delightful from nothing more than yarn, a hook, and your own imaginative hands.








What do you think?
It is nice to know your opinion. Leave a comment.