










Chevron Crochet Stitch: A Complete Guide to Mastering the Zigzag Classic
Introduction to the Chevron Crochet Stitch
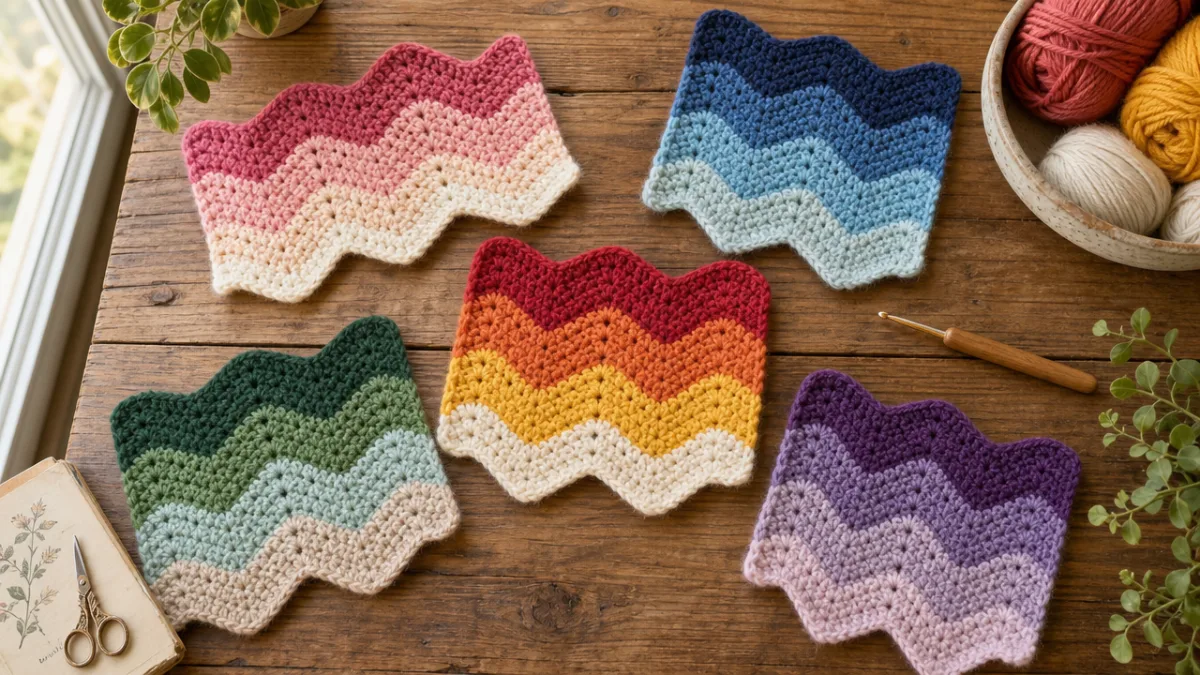
The chevron crochet stitch — you might also know it as the ripple stitch — is one of those patterns that just about every crocheter falls in love with at some point. That signature zigzag shape is everywhere: blankets, scarves, bags, wall hangings, you name it. And honestly, it’s been that way for generations. Whether you’re brand new to crochet or you’ve been at it for years and want to add something fresh to your skills, the chevron stitch has this wonderful quality of feeling both approachable and deeply satisfying at the same time.
Part of why this stitch has stuck around so long is how incredibly versatile it is. Swap out your yarn weight, change your hook size, try a completely different color palette — and suddenly the same basic stitch pattern looks like a totally different project. Chunky wool gives you those bold, cozy waves that are perfect for a winter throw, while fine cotton produces something much more delicate, like a summer shawl or a pretty table runner. The stitch really does shape itself to whatever you’re going for.
There’s also a practical reason to love the chevron stitch beyond just how it looks: it’s genuinely great for building core crochet skills. To work it well, you need consistent tension, careful stitch counting, and a comfortable rhythm with both increases and decreases. Those are exactly the skills that show up again and again across all kinds of crochet projects. Once the logic of peaks and valleys clicks for you — how they’re created, why they stay put — you’ll start finding that reading patterns in general feels a lot less intimidating.
Understanding the Basic Structure and Mechanics
Here’s the core idea behind the chevron stitch: you’re deliberately adding stitches at the peaks and deliberately removing stitches at the valleys. The peaks are formed by working multiple stitches into the same stitch at the top of each wave, and the valleys are formed by crocheting stitches together at the lowest point. Because you’re both adding and removing the same amount, your total stitch count stays consistent from row to row — and that’s what keeps your fabric flat and even instead of growing or shrinking on you.
The most popular version uses double crochet, though you’ll also see plenty of single crochet and half double crochet chevrons out there. In a typical double crochet chevron, you’d work three double crochets into the peak stitch and then crochet several stitches together at the valley. The number of stitches you work between each peak and valley is what controls how wide or narrow your waves look — which gives you a lot of room to play with the final look of your project.
Before you cast on a single stitch, it’s worth taking a moment to understand the foundation chain. Chevron patterns need a very specific stitch multiple to work out correctly, so your starting chain has to be calculated with some care. Most patterns run on a set multiple plus extra stitches for the edges and turning chain. For a basic double crochet chevron, a common multiple is 14, with a few additional chains tacked on. It takes maybe two extra minutes to count your foundation chain before you start — and it can save you a lot of frustration (and frogging) down the road.
Materials and Tools You Will Need
Getting your materials right from the start makes the whole learning process so much smoother. When it comes to yarn, beginners really can’t go wrong with a smooth, light-colored worsted weight. You’ll be able to see exactly where each stitch lands, catch mistakes early, and actually enjoy the process instead of squinting at your work. Try to steer clear of fuzzy or highly textured yarns when you’re first learning — and very dark colors too — since they can hide your stitches and make counting a real headache.
For hook size, most worsted weight yarns play nicely with a 5mm or 5.5mm hook, but it’s always worth checking the yarn label and being willing to adjust for your own tension. If you tend to crochet tight, you might need to go up a size; if you crochet loose, try sizing down. This is exactly why working a gauge swatch before diving into a bigger project is such good advice — a few minutes upfront can save you from finishing something the wrong size.
Besides yarn and a hook, a few small extras will make things go a lot more smoothly:
- Stitch markers to flag your peak and valley stitches, especially while you’re still getting the rhythm down
- A row counter or a notepad and pen to track your rows, which really matters on a large blanket
- A blunt-tipped yarn needle for weaving in ends once you’re done
- Sharp scissors for clean cuts between color changes
- A tape measure or ruler for checking gauge and tracking your project’s dimensions as you go
Good materials matter, but you really don’t need to break the bank to get started. Plenty of affordable acrylic yarns are genuinely excellent for learning — they’re durable, easy to wash, and come in so many colors it can be hard to choose. As you get more comfortable, you can branch out into cotton, bamboo, merino wool, alpaca, and all the wonderful natural fibers out there. Half the fun of growing as a crafter is discovering how different materials feel under your hands and how dramatically they change the character of the finished piece.
Step-by-Step Guide to Working the Chevron Stitch
Start with your foundation chain. For a practice swatch, chain 46 with worsted weight yarn and a 5mm hook — that’s a multiple of 14, plus 4 extra chains for the edges and turning chain. Before you do anything else, count your chain. Seriously, count it twice. An error in the foundation chain will ripple through every single row after it, so it’s worth the extra few seconds to be sure. A stitch marker in the first chain from the hook can help you keep your bearings as you work across.
For row one, chain 3 and turn — this counts as your first double crochet. Work 2 more double crochets into the fourth chain from the hook to create your first peak. Then work one double crochet into each of the next 5 chains. When you reach the valley, work a decrease by crocheting 3 stitches together. Follow that with 5 more single double crochets, then a 5-stitch cluster into the peak stitch, and keep repeating that sequence across. Finish the row with 3 double crochets into the last chain to form a half peak at the edge.
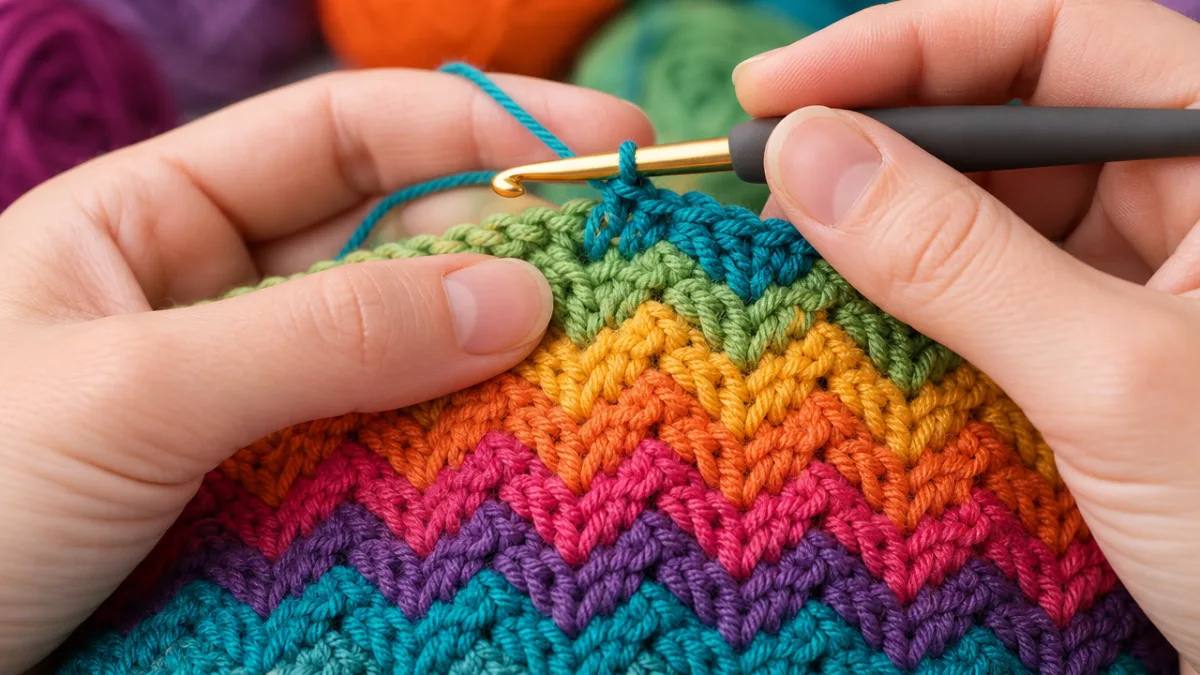
For every row after that, chain 3 and turn. Work 2 double crochets into that very first stitch to start your edge peak, then follow the same pattern of 5 single stitches, a decrease at each valley, and an increase cluster at each peak. The key thing to hold onto is this: your increases always land over the increases from the row below, and your decreases always land over the decreases. Once that rhythm settles into your hands, you’ll find yourself moving through rows almost automatically — and that meditative, almost hypnotic quality is honestly one of the best things about chevron crochet.
Color changes are where the real magic happens. To switch colors at the end of a row, work your last stitch until the final pull-through, then grab your new yarn and use it to complete that pull-through. Cut the old color with a 6-inch tail and keep going with the new one. Done right, this gives you those crisp, clean color transitions that define the classic striped chevron look. When you’re finished, weave those ends in carefully with your yarn needle so they stay hidden and secure from the front of your work.
Common Mistakes and How to Fix Them
The mistake you’ll see most often with new chevron crocheters is losing track of their stitch count, which causes the edges to slowly drift — getting wider or narrower in a way that’s hard to pin down until it’s already gone pretty far. This usually happens when the peaks and valleys start to wander between rows because a stitch got accidentally added or skipped somewhere. The fix? Stitch markers at every peak and valley while you’re learning. Move them up with each new row and always check that your increases and decreases are landing in exactly the right spots before you continue.
Tension is the other big hurdle for beginners, and it’s genuinely one of those things that just gets better with time. If your fabric looks puckered in some spots and stretched in others, the most likely culprit is holding your hook and yarn too tightly — which is incredibly common when you’re still figuring things out. Try loosening your grip a little, take a breath, and see if your stitches even out. If you end up with a finished project that’s slightly uneven, blocking can work wonders: just wet it gently, pin it out to the right shape, and let it dry. You’ll often be surprised how much smoother it looks afterward.
Curling edges tend to show up most in single crochet chevron projects. If your work won’t lie flat, tension is almost always the cause, and bumping up your hook size by half a millimeter or a full millimeter can make a real difference. Adding a simple border of single crochet or slip stitches around the finished edges can also tame the curl beautifully while giving your project a clean, polished look. And if your early projects aren’t perfect — that’s completely fine. Every experienced crafter has a stack of early work that taught them something important.
Creative Project Ideas and Variations
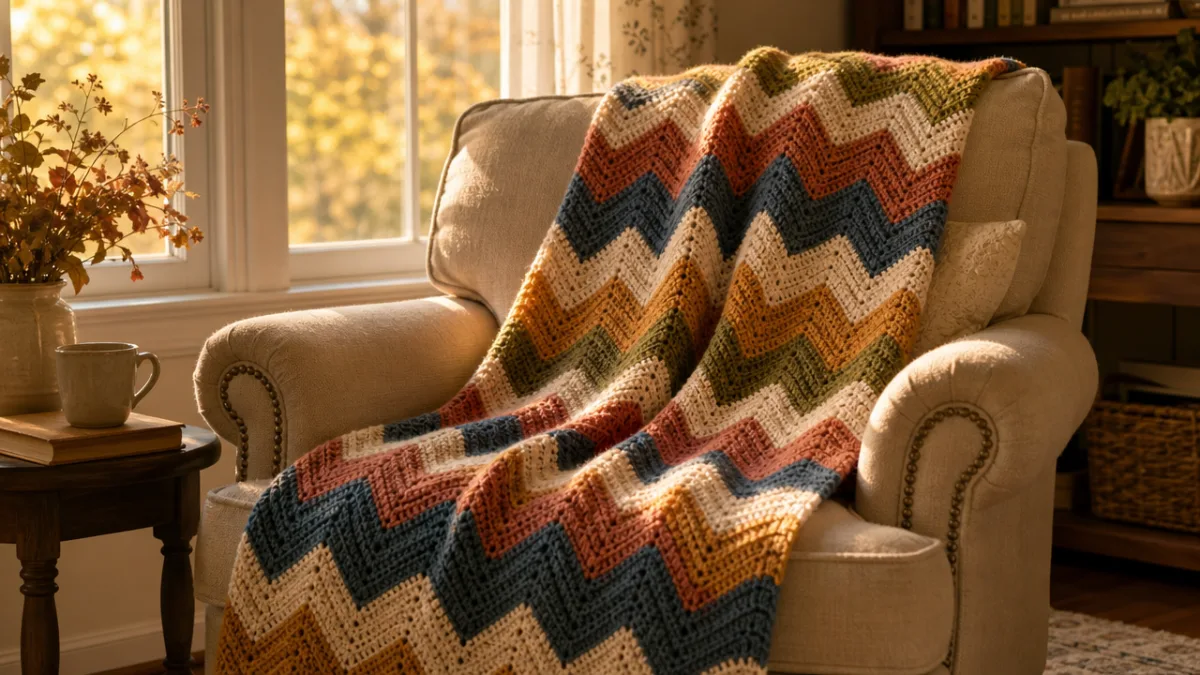
If there’s one project the chevron stitch was practically born for, it’s the classic ripple blanket. For a lot of people, a chevron throw is the first really big crochet project they ever take on — and it’s such a good one, because once you find your rhythm, the rows add up faster than you’d expect. Watching bright color stripes stack up one after another is genuinely satisfying in a way that’s hard to describe until you’ve experienced it. A bold throw in five or six contrasting colors can become a real showpiece in a room, and the kind of thing that gets passed down in a family.
The stitch works beautifully for wearables too. Chevron scarves and cowls have a lovely drape and a visual interest that feels more polished than the simplicity of the construction deserves. If you work a chevron scarf in a gradient or ombre yarn, the way the color shifts interact with the wave pattern creates something really special. Cotton chevron market bags and tote bags are another great option — practical, good-looking, and the kind of handmade gift that actually gets used rather than tucked away in a drawer.
For home décor, the options are almost endless. Small chevron squares can be assembled into a patchwork pillow cover; a chevron table runner in neutral tones has a lovely, simple aesthetic; pot holders, coasters, and cotton dishcloths in chevron are quick satisfying makes that are genuinely useful around the house. Chunky yarn wall hangings with bold color combinations have become a real thing in contemporary interior design, and the chevron stitch is a perfect fit for that kind of project.
Once you’ve got the basic chevron down and you’re ready for something new, there are some really exciting directions to explore. The spike chevron pulls in long spike stitches that reach down into rows below the current one, adding real depth and dimension to the fabric. The textured chevron uses post stitches worked around the posts of stitches in previous rows rather than through the top loops, giving you a sculptural, embossed surface that’s incredibly tactile. And the wavy chevron uses gentler increases and decreases for softer, more rounded waves — less geometric and angular, more organic and flowing.
Tips for Advancing Your Chevron Crochet Skills
Once the basic chevron feels comfortable, the best way to keep growing is to experiment with intention. Try working the same stitch pattern in at least three different yarn weights and pay attention to how the results differ. A chevron in super bulky yarn on a big hook has a completely different personality from one worked in fine lace weight — bolder, chunkier, faster versus delicate, intricate, slow. Getting familiar with those differences makes you a much more flexible and resourceful maker, whether you’re following someone else’s pattern or designing your own.
Learning to read and adapt chevron patterns is one of the most valuable things you can invest time in. Start by following patterns exactly as written, but keep notes on the adjustments you find yourself wanting to make. Over time you’ll build up a real intuition for how to resize projects by changing stitch multiples, how to swap yarn weights without losing the spirit of a design, and how to remix color sequences to match your own taste. That moment when you stop just following instructions and start actually making decisions — that’s when crochet becomes truly yours.
It also helps enormously to find your people. Online crochet communities on Ravelry, Instagram, and various Facebook groups are full of crafters who genuinely love sharing what they know, helping troubleshoot frustrating problems, and cheering each other on. Posting photos of your chevron projects, asking questions, and engaging with what others are making is a great way to stay motivated and keep discovering new ideas. Crochet is one of those crafts where the community really does add something to the experience — and it’s nice to share something that brings a little calm and joy into everyday life.








What do you think?
It is nice to know your opinion. Leave a comment.