










DIY Lavender Citrus Candles: A Complete Guide to Crafting Your Own Aromatic Masterpiece
Introduction to Lavender Citrus Candle Making
There is something deeply satisfying about filling your home with a fragrance you created entirely from scratch. Lavender citrus candles represent one of the most beloved combinations in the world of DIY aromatherapy, blending the calming, floral depth of lavender with the bright, energizing lift of citrus notes like lemon, orange, or grapefruit. The result is a scent profile that feels both grounding and uplifting at the same time, making it perfect for living rooms, bathrooms, and bedrooms alike.
Candle making has surged in popularity as a home craft over the past decade, and for good reason. It offers a creative outlet that produces genuinely useful results, and the process itself is meditative and rewarding. Unlike many DIY projects that require expensive equipment or specialized skills, candle making is remarkably accessible. With a modest investment in materials and a few hours of your time, you can produce beautiful, long-lasting candles that rival anything you would find in a boutique shop or specialty store.
The lavender citrus combination is particularly special because both fragrance families carry well-documented mood-enhancing properties. Lavender has long been associated with relaxation, stress relief, and better sleep, while citrus scents are linked to increased energy, mental clarity, and a general sense of positivity. Together, they create a balanced atmosphere in any room, making these candles ideal for use during everything from morning yoga sessions to late-night reading rituals. Crafting them at home also means you control every ingredient, ensuring a cleaner, more natural burn experience.
Why Make Your Own Candles?
Store-bought candles, even premium ones, often contain synthetic fragrances, paraffin wax derived from petroleum, and wicks coated in metals that can release trace toxins when burned. By making your own lavender citrus candles, you step into full control of the ingredient list. You can choose natural soy wax or beeswax, use pure essential oils instead of fragrance oils, and select cotton or wood wicks that burn cleanly and safely. This transparency is one of the most compelling reasons people make the switch to DIY.
Beyond the health and safety benefits, homemade candles make extraordinarily thoughtful gifts. A beautifully poured candle, presented in an elegant jar with a handwritten label, communicates a level of care and effort that no purchased item can easily replicate. They are perfect for holidays, housewarmings, birthdays, or simply as a heartfelt gesture for someone who deserves a little extra warmth in their life. Personalization is easy too — you can adjust the scent intensity, the wax color, or the vessel to suit the recipient perfectly.
There is also a compelling economic argument for DIY candle making. A single high-quality lavender candle from a specialty retailer can easily cost thirty to fifty dollars or more. With the same amount spent on supplies, a home crafter can produce five to eight candles of comparable quality. Once you have the basic equipment, subsequent batches become even more economical, and you will find yourself with a satisfying stockpile of gorgeous candles that would have cost hundreds of dollars to purchase commercially.
Gathering Your Materials and Equipment
Before you begin, assembling all your materials is essential. Candle making is a flowing, time-sensitive process once the wax is melted, and having everything within arm’s reach prevents costly mistakes. The primary material you will need is wax, and for a natural, clean-burning lavender citrus candle, soy wax is the most popular choice among home crafters. It is derived from soybeans, burns cooler and longer than paraffin, and holds fragrance exceptionally well. Coconut wax is another excellent option with an even creamier finish, though it comes at a slightly higher price point.
For fragrance, you have two main paths: pure essential oils or fragrance oils. For a truly natural candle, lavender essential oil and a citrus essential oil such as lemon, sweet orange, or bergamot are ideal. Bergamot is a particularly sophisticated choice, as it sits between floral and citrus on the scent spectrum and blends seamlessly with lavender. Fragrance oils, while sometimes synthetic, are specifically designed for candle use and offer stronger, more consistent scent throw — meaning the aroma you smell when the candle is burning and filling the room. Many crafters use a combination of both for optimal results.
Your wick choice matters more than most beginners realize. The wick diameter must be matched to the diameter of your container; a wick that is too small will create a tunnel of wax down the center, while one that is too large will produce excessive smoke, soot, and an uneven burn. Cotton wicks are the standard for most soy candles, while wooden wicks offer a delightful crackling sound reminiscent of a fireplace and tend to pair beautifully with the warm, botanical nature of lavender citrus fragrances. Most candle supply retailers provide wick sizing charts based on vessel diameter.
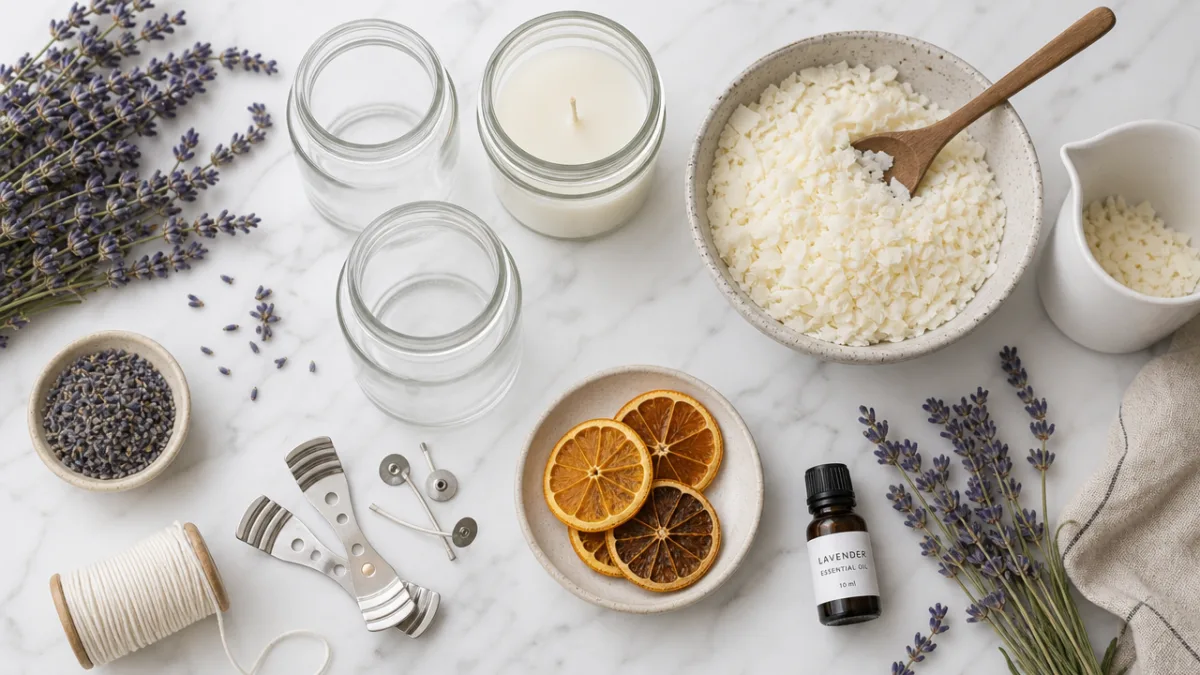
Essential Supplies Checklist
- Soy wax flakes or coconut wax — approximately 1 pound per standard 8-ounce candle jar, accounting for shrinkage and top-off pours
- Lavender essential oil or fragrance oil — high-quality, ideally cosmetic or candle-grade
- Citrus essential oil (lemon, sweet orange, grapefruit, or bergamot) — fresh and potent
- Pre-tabbed cotton or wooden wicks sized to your container diameter
- Glass jars, tins, or heat-safe ceramic containers for pouring
- A double boiler or a heat-safe pouring pitcher and a saucepan
- A digital kitchen thermometer for monitoring wax temperature
- Wick holders, clothespins, or chopsticks to keep wicks centered during cooling
- A kitchen scale for measuring wax and fragrance by weight
- Rubbing alcohol and paper towels for cleanup
Preparing Your Workspace and Safety Considerations
Candle making involves working with hot wax, and proper preparation of your workspace is both a practical and safety necessity. Choose a surface that is easy to clean, such as a countertop covered with a silicone mat or layers of newspaper. Heat-safe surfaces are important because spilled wax can be difficult to remove from porous materials, and the pouring pitcher will be extremely hot during the process. Keep a fire extinguisher accessible, though the risk of fire is low if you work carefully and never leave melting wax unattended on direct heat.
Temperature control is one of the most critical factors in successful candle making, and this is where beginners often run into trouble. Soy wax should be melted to approximately 170 to 185 degrees Fahrenheit. Your fragrance oils should be added when the wax has cooled to around 140 to 150 degrees Fahrenheit — adding them too hot causes the volatile aromatic compounds to dissipate before the candle even sets, resulting in a weak scent throw. The wax should be poured into containers at approximately 135 to 140 degrees Fahrenheit for the smoothest surface finish with soy wax.
Ventilation is another important consideration that is easy to overlook. Even with natural essential oils, working in a well-ventilated space reduces your inhalation of concentrated aromatic compounds during the crafting process. Open a window, run a kitchen fan, or work outdoors on a calm day. This is especially important when using citrus oils, which can be mildly irritating to the respiratory system in concentrated, unburned form. Keep pets out of the workspace as well, since many essential oils, including certain citrus varieties, can be toxic to cats and dogs even in small amounts.
Setting Up for Success
Lay out your supplies in the order you will use them before you turn on any heat source. Place your jars on the prepared surface and fix your wicks in place using wick stickers or a small dot of hot glue on the wick tab, pressing it firmly to the center of the jar bottom. Thread the top of each wick through a wick holder, chopstick, or a pair of clothespins resting across the mouth of the jar to keep it perfectly centered. Wicks that drift off-center produce uneven burns and can even cause the flame to press against the glass, creating a safety hazard.
Pre-warm your glass jars slightly before pouring hot wax into them. Cold glass can cause the wax to shrink and pull away from the sides rapidly, leading to unsightly tunneling or surface cracking, sometimes called “wet spots” in candle making terminology. You can warm the jars briefly in a low oven set to around 150 degrees Fahrenheit, or simply set them near your workspace where ambient warmth from the melting process will raise their temperature gently. This small step makes a noticeable difference in the finished appearance of your candles, giving them a polished, professional look.
Measure all your fragrance oils in advance and have them ready in small measuring cups before you begin melting the wax. Once the wax reaches pouring temperature, the window for adding fragrance and completing the pour is relatively short, and fumbling with bottles and droppers while managing hot liquid is both stressful and imprecise. For a standard 8-ounce candle, a fragrance load of six to ten percent by weight is typical for soy wax, meaning roughly 0.5 to 0.8 ounces of total fragrance oil per candle. You can adjust this ratio based on your personal scent preference.
The Candle Making Process Step by Step
Begin by measuring your soy wax flakes on a kitchen scale. A useful rule of thumb is that one pound of soy wax flakes yields approximately 20 fluid ounces of melted wax, so calculate accordingly based on how many candles and what size containers you are working with. Place the wax flakes in your double boiler or heat-safe pouring pitcher set over a saucepan of simmering water. Never use direct heat on a single pot of wax, as this dramatically increases the risk of scorching the wax or, in a worst-case scenario, exceeding the flash point of your fragrance oils.
Stir the wax gently as it melts, using a dedicated silicone spatula or a metal spoon that you don’t mind dedicating to candle crafting purposes. Monitor the temperature with your thermometer and remove the wax from heat once it reaches 175 to 185 degrees Fahrenheit. Allow it to cool, stirring occasionally, until it drops to 140 to 150 degrees. At this point, add your pre-measured fragrance oils — start with the lavender and then add your citrus oil. A ratio of roughly sixty percent lavender to forty percent citrus creates a beautifully balanced blend, though you should feel free to experiment based on your preferences.
Stir the fragrance oils into the melted wax slowly and deliberately for a full two minutes. Thorough incorporation prevents fragrance pockets in the finished candle and ensures an even scent throw throughout the entire burn life of the candle. Once fully blended, allow the wax to cool further to your pouring temperature of around 135 to 140 degrees Fahrenheit. Pour slowly and steadily into your prepared jars, filling to about half an inch below the rim. The slow pour minimizes air bubbles and surface imperfections. Set the candles aside on a level surface undisturbed for a minimum of 24 hours before trimming the wicks and lighting.
Troubleshooting Common Issues
Even experienced candle makers encounter occasional imperfections, and understanding the causes helps you improve with each batch. Sinkholes — small craters or depressions that appear on the surface as the candle cools — are extremely common with soy wax and are caused by the wax contracting as it solidifies. The solution is to perform a second top-off pour once the initial pour has cooled and set, filling in any depressions with a small amount of remelted wax poured at a lower temperature of around 120 degrees Fahrenheit to avoid disturbing the already-set layer.
Frosting is another common cosmetic issue with soy wax, appearing as a white, powdery film or crystalline texture on the surface of the finished candle. While it looks like a flaw, it is actually a natural characteristic of pure soy wax and is considered by many crafters to be a sign of quality and naturalness. It does not affect the performance or scent of the candle in any way. If frosting bothers you aesthetically, you can minimize it by pouring at slightly lower temperatures and avoiding drafts during the cooling process.
Weak scent throw is perhaps the most frustrating problem for new candle makers, and it almost always comes down to one of three causes: fragrance added at too high a temperature, an insufficient fragrance load by weight, or wicks that are too small for the container diameter. If your lavender citrus candle smells faint when burning, try increasing your fragrance load to eight or ten percent on your next batch, ensure you are adding fragrance at the correct temperature, and consider sizing up your wick. Always test your candles by burning them in a controlled setting before gifting or using them throughout your home.
Customization, Decoration, and Presentation
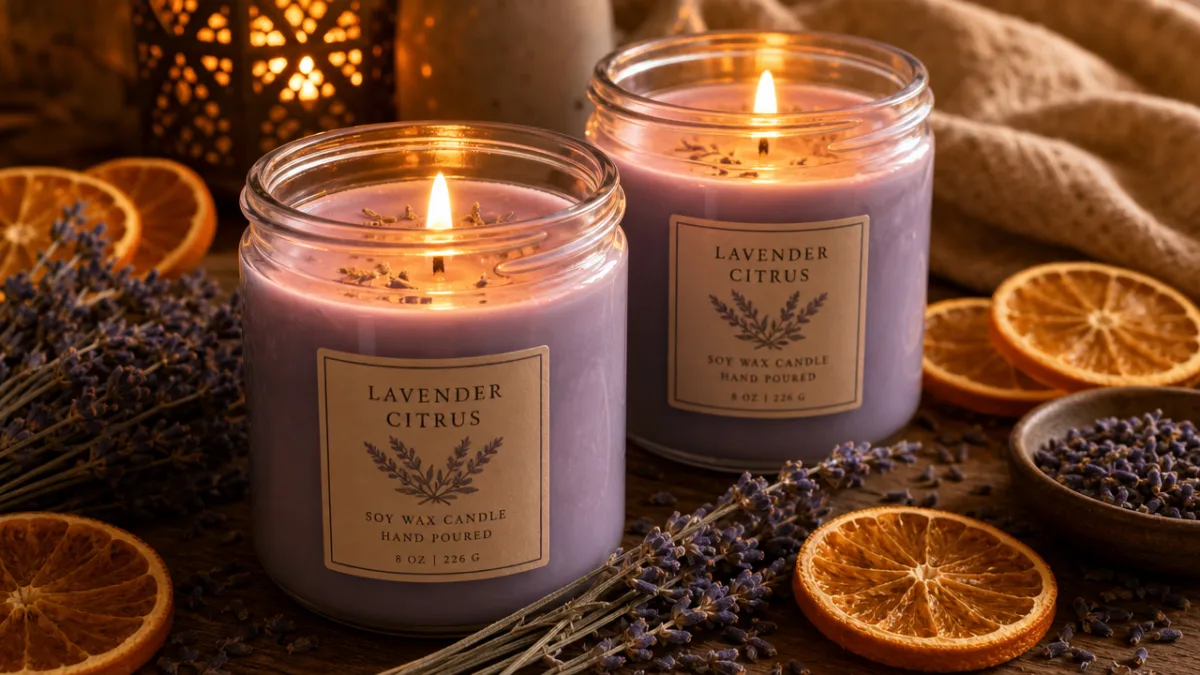
One of the great joys of making your own candles is the virtually unlimited room for customization. Beyond the scent itself, you can personalize your lavender citrus candles in countless ways to match your aesthetic, suit a recipient’s taste, or create a cohesive collection of home fragrance products. Natural botanicals are a beautiful addition — dried lavender buds pressed gently against the inner walls of the jar before pouring create a stunning visual effect, and thin slices of dried lemon or orange can be arranged on the surface of a partially cooled candle for an artisan finish that looks professionally made.
Wax color is another dimension of customization that requires minimal effort for a significant visual impact. Candle dye chips or liquid candle colorants blend easily into melted soy wax and require very small amounts to achieve beautiful results. For a lavender citrus candle, consider a soft pale purple or lilac shade to complement the lavender component, or a warm golden yellow to evoke sunshine and citrus groves. Natural alternatives include small amounts of cosmetic-grade mica powder, which creates a subtle shimmer particularly lovely in candlelight. Keep colorant amounts modest, as heavy pigmentation can sometimes interfere with the wick’s ability to draw wax efficiently.
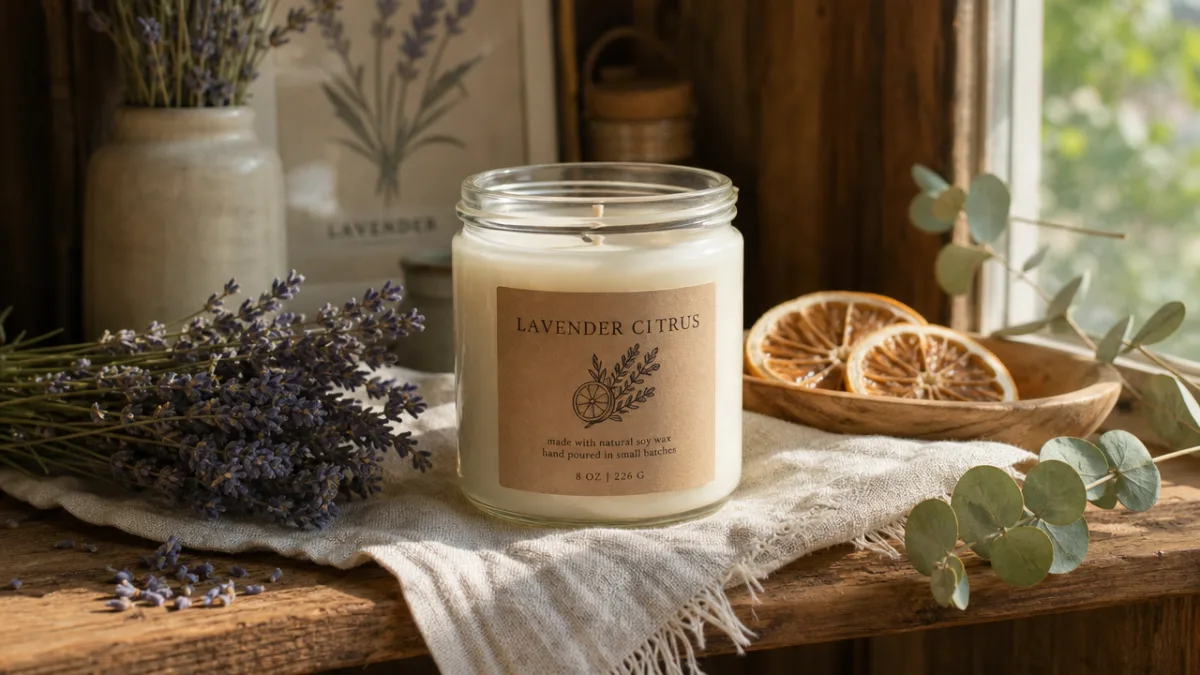
Labeling transforms a homemade candle into a finished product. Even a simple kraft paper label with handwritten text reading “Lavender Citrus” and the date it was poured adds warmth and character. For a more polished look, free design tools make it easy to create printable labels with custom fonts, botanical illustrations, and your own brand name if you plan to share or sell your creations. Include the key ingredients on the label for the benefit of anyone with sensitivities, and add a suggested burn time and basic candle safety instructions. These small touches demonstrate care and professionalism.
Gift Packaging Ideas
- Nest the finished candle in a kraft paper gift box with shredded tissue in complementary colors of purple and yellow, tied with natural twine and a sprig of real dried lavender
- Place two or three small votive candles in a linen drawstring bag alongside a small card describing the scent blend and its mood-enhancing properties
- Pair a candle with a small bottle of homemade lavender citrus room spray using the same essential oil blend, packaged together as a home fragrance set
- For holiday gifting, place a large candle in a decorative tin with a personalized label, wrapped in a square of linen fabric secured with a wax seal
- Create a candle-making kit gift by pairing a finished candle with a small pouch of leftover wax, a fresh wick, and a handwritten recipe card so the recipient can remake it themselves
Storage and curing time are two factors that significantly affect the quality of your finished candles and are worth understanding before you begin distributing or displaying them. Soy wax candles benefit from a curing period of at least 48 to 72 hours, and ideally a full week, before their first burn. During this time, the fragrance molecules continue to bind with the wax, developing a stronger, more complex scent throw. Store curing candles in a cool, dark place away from direct sunlight, which can cause discoloration and accelerate fragrance fade. Properly stored, a soy candle has a shelf life of one to two years before the fragrance begins to noticeably diminish.
Burning Your Candles Safely and Getting the Most From Each One
The first burn of a new candle is the most important one, and how you approach it determines the quality of every subsequent burn. Candles have what is called a “memory” — the wax will only melt as far across the surface as it did on the first burn. If you extinguish a new candle before a full melt pool has formed across the entire diameter of the jar, the wax will continue to tunnel straight down in a narrow column for the life of the candle, wasting the majority of your fragrant wax along the walls. Always allow a new candle to burn long enough for the melt pool to reach the edges before blowing it out.
Wick maintenance is another key practice that many candle users overlook. Before every burn, trim your wick to approximately one quarter of an inch. A wick that is too long produces a larger, flickering flame that generates excess soot, burns through the wax too quickly, and can overheat the container. Wick trimmers are inexpensive tools specifically designed for this task, though a pair of small scissors works perfectly well. For wooden wicks, break off any charred remnants before relighting to ensure a clean, even flame that produces that characteristic soft crackling sound.
Never burn a candle for more than four hours at a time, as extended burns can overheat the wax and the container, potentially warping the jar or causing the fragrance to burn off too rapidly. Allow the candle to cool and fully solidify between burn sessions. Always burn candles on a heat-resistant surface, away from drafts, curtains, and flammable materials, and never leave a burning candle unattended. These common-sense precautions keep your home safe while ensuring that your handcrafted lavender citrus candle delivers the maximum enjoyment across its entire burn life, which for a well-made eight-ounce soy candle should be between forty and fifty hours.
Repurposing Your Candle Jars
One of the most sustainable aspects of making candles in glass jars is what happens after the wax is spent. Once your candle has burned down to the last half inch of wax — do not attempt to burn it further, as the jar can crack from the heat — you can reclaim the jar for reuse. Place the jar in the freezer for an hour, and the remaining wax will contract and pop free easily, or run it briefly under warm water to loosen the wax and wick tab. Wash the jar with hot soapy water, and you are left with a beautiful, clean glass vessel ready for a new purpose.
Repurposed candle jars make excellent small planters for succulents and herbs, particularly fitting given the botanical nature of a lavender citrus candle. They also work beautifully as desk organizers for pens and small tools, bathroom storage for cotton swabs and hair pins, or as elegant vessels for overnight oats and layered parfaits in the kitchen. With a fresh label, they can even be filled with a new batch of homemade candle wax, continuing the sustainable, circular lifecycle of your craft. This zero-waste philosophy is increasingly central to the DIY candle-making community and adds an extra layer of meaning to the process.
Making lavender citrus candles at home is far more than a craft project — it is an invitation to slow down, engage your senses, and create something genuinely beautiful with your own hands. From the moment the fragrance oils hit the warm wax and that first wave of lavender and citrus rises in the air, to the quiet satisfaction of watching a finished candle glow warmly on a winter evening, the experience rewards you at every stage. Whether you are making candles for yourself, for loved ones, or as the beginning of a small creative business, the skills and sensory pleasure you develop will serve you for a lifetime of fragrant, flame-lit moments.








What do you think?
It is nice to know your opinion. Leave a comment.