










Air Dry Clay Candle Holder Tutorial: Easy DIY for Beginners
Introduction to Air Dry Clay Candle Holders
Air dry clay has become one of the most beloved crafting materials for beginners and experienced artists alike, and it is easy to understand why. Unlike traditional pottery clay, air dry clay requires no kiln, no special equipment, and no professional training to work with. You simply shape it, let it dry at room temperature, and finish it however you like. This accessibility makes it the perfect medium for anyone who wants to bring a handmade, artisan touch to their home décor without investing in expensive tools or studio time.
Candle holders are among the most satisfying projects you can create with air dry clay, offering a beautiful blend of function and aesthetics. Whether you prefer a minimalist Scandinavian style, a rustic organic look, or something boho and textured, clay candle holders can be shaped and finished to match almost any interior design theme. The warm glow of candlelight passing through or reflecting off a handmade clay piece creates an atmosphere that simply cannot be replicated by store-bought décor.
This tutorial is designed specifically with beginners in mind, walking you through every step of the process from gathering your materials to displaying your finished piece. Even if you have never worked with clay before, you will find that the techniques involved are forgiving, intuitive, and genuinely enjoyable. By the end, you will have a beautiful, one-of-a-kind candle holder that reflects your personal style and makes a wonderful gift for friends and family as well.
Why Air Dry Clay Is Perfect for Home Décor Projects
Air dry clay stands apart from other crafting materials because of its unique combination of workability and finish quality. When wet, it is soft and pliable enough to mold by hand, press into textures, or shape around molds and forms. As it dries, it hardens into a firm, durable material that can be sanded, painted, sealed, and decorated in countless ways. This versatility means that every project you make can look completely different, even if you use the same basic techniques.
Another major advantage of air dry clay for home décor is that it is widely available at craft stores and online retailers at very affordable prices. A single block of clay can yield several candle holders, meaning the cost per finished piece is remarkably low. Brands like Crayola Model Magic, DAS, and Amaco Stonex are popular among beginners for their smooth texture and reliable drying results. You do not need to spend a great deal of money to achieve beautiful, professional-looking results with this material.
The environmental footprint of air dry clay projects is also worth noting. Most air dry clays are water-based and non-toxic, making them safe for use in homes with children and pets. Because no heat source is required for curing, you save energy compared to kiln-fired ceramics. Some brands even offer eco-friendly formulations made from natural ingredients, giving crafters an option that aligns with sustainable living values. This combination of affordability, safety, and low environmental impact makes air dry clay a truly excellent choice for home décor DIY projects.
Materials and Tools You Will Need
Before you begin your candle holder project, it is important to gather all of your materials and set up a clean, organized workspace. Having everything within reach before you start will make the crafting process much smoother and more enjoyable. Air dry clay can dry out quickly when exposed to air, so minimizing interruptions once you begin working is helpful for achieving the best results. A kitchen table or craft desk covered with a silicone mat, parchment paper, or a smooth cutting board makes an ideal work surface.
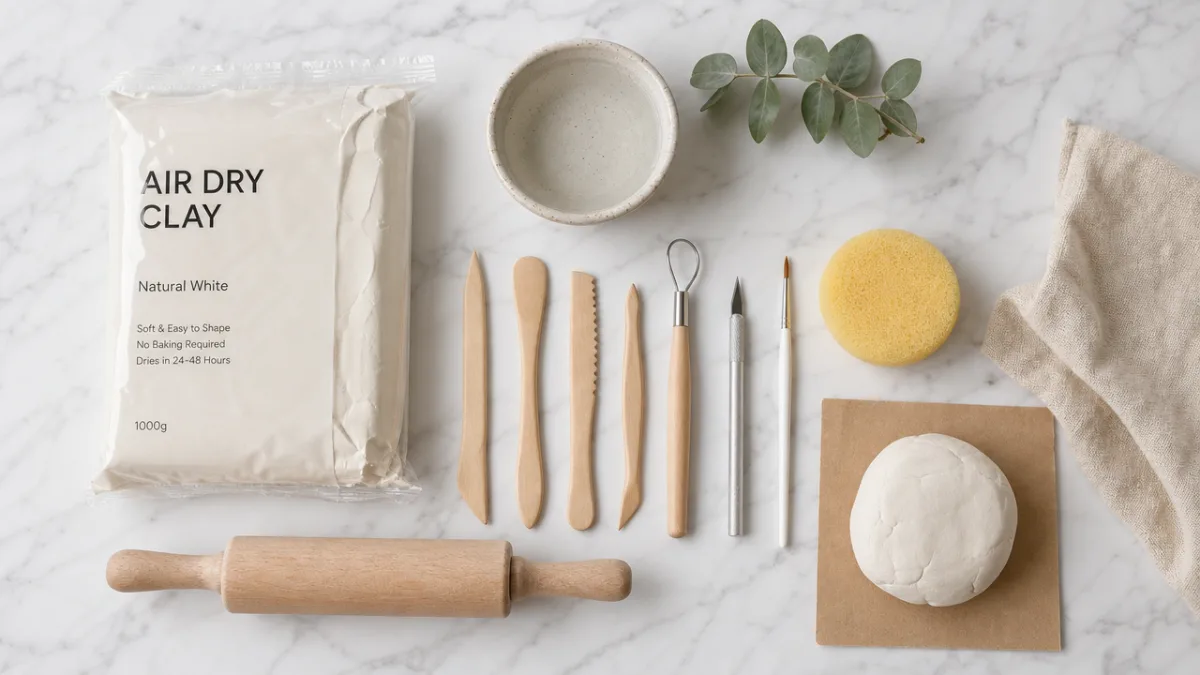
The primary material you will need is, of course, air dry clay. For a standard taper candle holder, approximately 200 to 300 grams of clay should be sufficient. For a tea light holder or pillar candle holder, you may need slightly more or less depending on your design. In addition to the clay itself, you will want a rolling pin or acrylic roller for flattening sections of clay, a sharp craft knife or clay cutting tool for trimming edges, and a set of sculpting tools for adding texture and detail if desired.
Other useful materials include a bowl of water for smoothing the clay surface and helping pieces adhere together, a taper candle or tea light to use as a sizing guide, sandpaper in a fine grit for smoothing dried clay, and acrylic paint and a sealant for finishing. Optional but helpful items include texture stamps, lace fabric, leaves, or other objects for pressing patterns into the clay, as well as a foam block or small cup to support your candle holder as it dries. Here is a simple checklist of everything you will need:
- Air dry clay (200–400 grams depending on design)
- Rolling pin or acrylic roller
- Craft knife or clay cutter
- Sculpting tools or toothpicks
- Small bowl of water
- Taper candle or tea light for sizing
- Fine-grit sandpaper (220 grit recommended)
- Acrylic paints and brushes
- Mod Podge, varnish, or clear sealant
- Parchment paper or silicone work mat
Setting Up Your Workspace for Success
A well-organized workspace is just as important as having the right materials when it comes to clay crafting. Find a spot with good natural or artificial lighting so you can clearly see what you are working on, especially when adding fine textures or details. Cover your work surface completely, as air dry clay can leave residue that is difficult to remove from certain surfaces once it dries. Keep your tools within easy reach but arranged so they do not clutter the space where you are actively working with the clay.
Temperature and humidity in your workspace will affect how quickly your clay dries during the making process. If the air is very dry or warm, your clay may begin to crack or develop a crust on the outside while you are still shaping it. To prevent this, keep a damp cloth nearby to cover your clay when you are not actively working with it, and mist your hands lightly with water to keep the surface of the clay moist. Avoid working in direct sunlight or near a heater, as these conditions accelerate drying in ways that can cause uneven curing and surface cracks.
It is also a good idea to have a few reference images or sketches of your intended design nearby as you work. Having a visual goal keeps you on track and helps you make design decisions more confidently as you go. Beginners especially benefit from planning their shape, texture, and color scheme in advance, even if loosely. That said, do not feel locked into your plan — one of the joys of clay work is that it is spontaneous and responsive, and some of the most beautiful results come from happy accidents discovered along the way.
Step-by-Step Tutorial: Shaping Your Candle Holder
Begin by conditioning your clay, which simply means working it in your hands until it becomes soft, warm, and pliable. Take a portion of clay roughly the size of a tennis ball and squeeze, fold, and roll it repeatedly for two to three minutes. This process eliminates air pockets that could cause cracking during drying and makes the clay much easier to shape smoothly. If your clay feels very stiff or crumbly, add a tiny amount of water and continue conditioning until you achieve a smooth, even consistency throughout.
For a classic taper candle holder, begin by rolling your conditioned clay into a thick cylinder. The base of the cylinder should be wider than the top to give your holder stability, so taper the shape slightly as you work, making the bottom roughly two inches in diameter and the top about one inch. Once you have a basic cylinder shape, press your taper candle gently into the top center of the clay to create a snug hole for it to sit in. Make sure the hole is deep enough — at least half an inch — to hold the candle securely, but do not push so deep that you break through the bottom.
After creating the candle hole, refine the overall shape of your holder. Use your fingers dipped lightly in water to smooth out any fingerprints or rough patches on the surface. You can leave the shape as a clean, minimal cylinder, or you can pinch and sculpt the walls to create a more organic, irregular form that gives your piece a handcrafted, artisanal character. If you want to add texture, now is the time — press lace fabric, a textured stamp, or the edge of a fork into the surface of the clay to create repeating patterns, ridges, or geometric designs.
Creating Different Styles and Variations
One of the most exciting aspects of making clay candle holders is the sheer variety of styles you can achieve using the same basic techniques. For a modern, minimalist look, keep your holder as a smooth, clean cylinder or geometric shape and finish it with white or neutral paint. For a more rustic or earthy feel, leave the surface textured and uneven and finish with raw clay tones or muted earth colors like terracotta, sage, or dusty rose. You can also press small dried flowers or leaves into the surface before drying to create delicate botanical impressions.
If you would like to make a tea light holder instead, the process is even simpler. Roll your clay into a ball, then use your thumb or a round tool to press a well into the center, leaving walls of even thickness around the sides. The walls should be thick enough to be sturdy — at least a quarter inch — but thin enough to allow a little light to glow through if you make small perforations. Using a toothpick or skewer, you can pierce small holes in a pattern around the sides of a tea light holder to create a beautiful lantern effect when a tea light is placed inside.
For those who want to make a set of matching candle holders in different heights, simply vary the length of your cylinder shapes while keeping the diameter and texture consistent. A grouping of three holders in varying heights makes a stunning centerpiece for a dining table or mantelpiece. You can also experiment with adding feet to the base of your holder by attaching small balls of clay to the bottom, giving it a raised, sculptural quality. The possibilities are genuinely limitless, and each variation you try will teach you something new about how the clay behaves.
Drying, Sanding, and Finishing Your Candle Holder
Once you are satisfied with the shape and texture of your candle holder, it is time to let it dry. Place the piece on a flat surface lined with parchment paper, making sure it is sitting level and will not tip over as it dries. Air dry clay typically takes 24 to 72 hours to dry completely, depending on the thickness of the clay, the humidity in the room, and the size of your piece. Thicker sections take longer to dry, and it is important to allow the clay to dry fully before proceeding to the finishing steps, as working on damp clay can cause crumbling or deformation.
To promote even drying and reduce the risk of cracking, turn your candle holder over gently halfway through the drying period so that the underside also gets adequate air circulation. If you notice small surface cracks developing as the clay dries, do not panic — these are common and can be repaired. Simply mix a small amount of fresh clay with water to create a smooth paste, then press it gently into the cracks with a clay tool or your fingertip. Allow the repair to dry fully before moving on. Most minor cracks become nearly invisible once the piece is painted and sealed.
Once completely dry, use your fine-grit sandpaper to smooth any rough edges or bumps on the surface of your holder. Sand gently in circular motions, paying special attention to the rim of the candle hole and the base, which are the most likely places to have uneven edges. After sanding, wipe away all dust with a slightly damp cloth and allow the piece to dry again for 30 minutes before painting. This preparation step makes an enormous difference in the final appearance of your piece, giving it a polished, professional finish that elevates it from a simple craft project to a genuinely beautiful decorative object.

Painting and Sealing for a Professional Look
Painting your clay candle holder is where your creativity really gets to shine. Acrylic paints are the best choice for air dry clay because they adhere well, dry quickly, and come in an enormous range of colors. Apply a base coat first, covering the entire exterior of the holder, and allow it to dry completely before adding any additional layers or decorative details. A base coat of white is particularly useful if you plan to paint the piece in a light or vibrant color, as it helps the color appear true and vivid rather than muted by the clay’s natural tone.
Once your base coat is dry, you can add decorative details using a fine brush, a sponge, or even your fingers. Techniques like dry brushing, where you apply a small amount of paint with an almost dry brush to create a soft, worn effect, are particularly well suited to clay candle holders and can give them a beautiful antique or metallic look. Gold or bronze accents applied over a dark base coat are perennially popular and look stunning on textured surfaces. You can also try color washing, where you thin your paint with water and apply it in a transparent layer to let the texture beneath show through.
Sealing your finished candle holder is an essential final step that should not be skipped. A coat of clear sealant, Mod Podge, or varnish protects your paint from chipping, gives the surface a finished look, and adds a degree of moisture resistance to the clay. Apply two thin coats, allowing each to dry fully between applications. Matte sealant gives a soft, natural finish while glossy sealant creates a more polished, ceramic-like appearance. Both are appropriate for candle holders — the choice simply comes down to the aesthetic you are going for with your particular design.
Safety Tips and Candle Use Guidelines
While air dry clay candle holders are beautiful and functional, it is crucial to understand and follow a few important safety guidelines to ensure they are used responsibly. Air dry clay is not a fireproof material, and this means that it should never come into direct contact with an open flame. Always use your clay candle holder with an appropriately sized candleholder insert, a glass votive, or a tea light in a metal cup to ensure that the flame never touches the clay directly. This simple precaution keeps both your holder and your home safe.
Taper candles should always be used in holders where they fit snugly and cannot tip over. Before lighting any candle in your handmade holder, test the fit carefully and ensure the candle stands completely upright. Never leave a burning candle unattended, and always place your candle holder on a heat-resistant surface such as a ceramic plate, a stone coaster, or a metal tray. It is also wise to keep burning candles away from drafts, which can cause uneven burning and increase the risk of the candle tipping. These are standard candle safety practices that apply to all candle holders, not just handmade ones.
Tea light holders made from air dry clay are among the safest designs because the tea light itself is contained in a metal cup that keeps the flame well away from the clay walls. However, even with tea lights, you should monitor the temperature of the clay walls during use and allow the holder to cool completely before handling it after a candle has been burning inside. If you notice any discoloration or warping of the clay around the candle opening, discontinue use and consider lining the interior with a small metal insert or foil to add an additional layer of protection between the flame and the clay.
Displaying and Gifting Your Handmade Candle Holders
Once your candle holders are finished and fully sealed, the fun of styling and displaying them begins. A grouping of three or five holders in varying heights creates a dynamic, curated vignette on a mantelpiece, bookshelf, or dining table. Mixing different finishes — matte white, metallic gold, and natural clay tones — within a single grouping adds visual interest and depth. Adding dried botanicals, smooth river stones, or small succulents around the base of your candle holders can further enhance the arrangement and tie it into the surrounding décor of your space.
Handmade clay candle holders also make exceptionally thoughtful and personal gifts for birthdays, housewarmings, weddings, and holidays. Because each piece is truly one of a kind, recipients appreciate the time, creativity, and care that went into making it. To gift a candle holder beautifully, place it in a simple kraft paper box with tissue paper and include a small card with a matching candle and a note about how the piece was made. This personal touch elevates the gift and makes it far more meaningful than anything purchased from a store.
As you gain confidence and experience with air dry clay, you will naturally begin to experiment with more complex designs, new finishing techniques, and different styles of candle holder. The skills you develop making your first simple cylinder holder — conditioning clay, smoothing surfaces, painting, and sealing — form the foundation for increasingly sophisticated projects. Many crafters find that their first air dry clay candle holder is just the beginning of a deeply satisfying and creatively fulfilling hobby that continues to grow and evolve with each new piece they make.








What do you think?
It is nice to know your opinion. Leave a comment.