










How to Make a Squash Arch: A Complete Guide to Vertical Gardening with Vining Squash
Introduction to Squash Arches and Why They Work
Growing squash vertically on an arch is one of the most rewarding and space-efficient techniques available to home gardeners. A squash arch transforms an ordinary garden path or bed border into a dramatic, productive living tunnel that produces an abundance of fruit while adding incredible visual interest to your outdoor space. Whether you have a small backyard plot or a sprawling kitchen garden, training squash up and over a sturdy arch maximizes your growing area and keeps the garden feeling open and accessible.
The concept behind a squash arch is elegantly simple: instead of allowing vining squash plants to sprawl across the ground horizontally, you redirect their natural climbing instinct upward along a curved or arched support structure. Squash plants are naturally vigorous climbers, equipped with curling tendrils that readily grip wire, twine, or mesh supports. When given a vertical framework to grow on, they respond enthusiastically, sending long vines upward and over the top of the arch before cascading down the other side in a lush, leafy curtain.
Beyond aesthetics, growing squash on an arch offers concrete practical benefits that make it a preferred method for experienced gardeners. Fruits are easier to spot and harvest because they hang freely in the air rather than hiding beneath dense foliage on the ground. Air circulation around the leaves and fruit is significantly improved, which reduces the incidence of fungal diseases like powdery mildew. Pest pressure from ground-dwelling insects and slugs is also reduced, and the elevated fruits are far less likely to rot from contact with damp soil.
Choosing the Right Squash Varieties for Arch Growing
Not all squash varieties are equally suited to growing on an arch, so selecting the right type is one of the most important decisions you will make before planting. Vining summer squash and winter squash varieties are the natural candidates, as they produce long, rambling stems that willingly travel many feet in any direction you guide them. Varieties like Delicata, Butternut, Spaghetti squash, Tromboncino, and many heirloom types are particularly well-suited to vertical growing because their vines are vigorous and their fruits remain manageable in size and weight.
When it comes to fruit weight, this is a critical factor to consider carefully. Very large, heavy squash varieties such as Hubbard or Atlantic Giant pumpkins are generally not ideal for arch growing without significant structural reinforcement and fruit-sling support, as the sheer weight of a mature fruit can pull vines free or even damage the arch itself. Smaller fruiting varieties in the one to five pound range are the sweet spot for arch growing, producing abundantly without placing undue stress on the structure or the plant’s stems and tendrils.
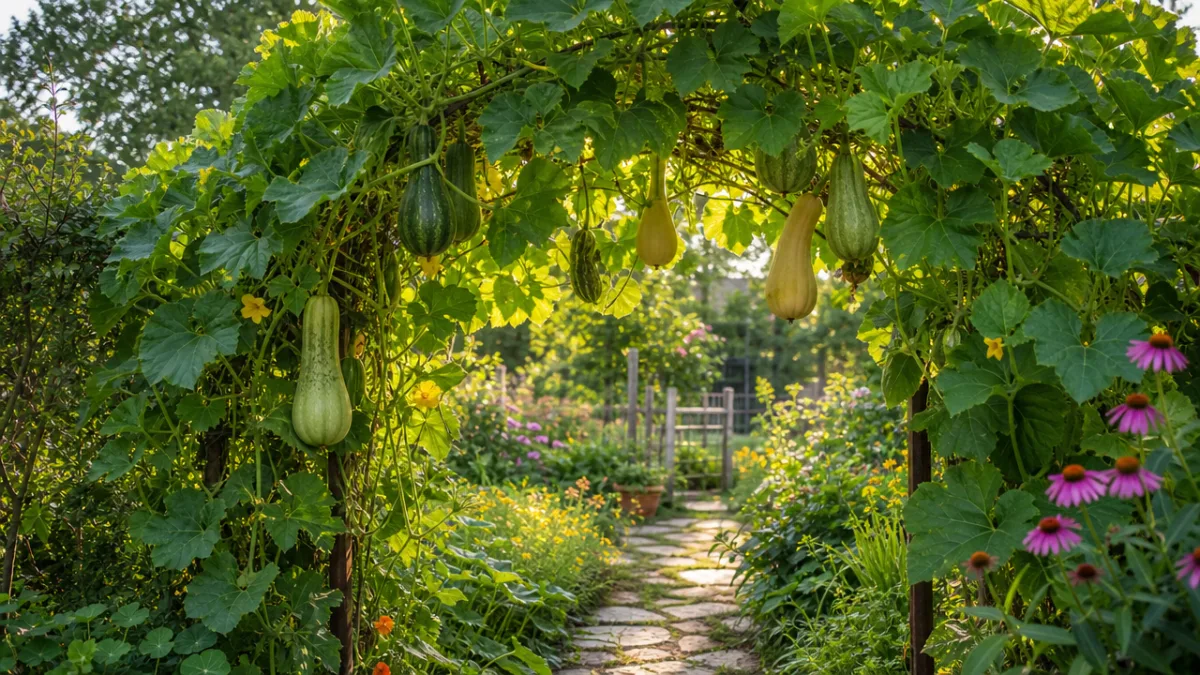
Summer squash lovers should not feel excluded from arch gardening either. Compact vining types of zucchini, pattypan, and yellow crookneck can be trained upward with some encouragement, though they tend to have shorter vines than dedicated winter squash. The Italian heirloom variety Tromboncino, also known as Zucchetta or Trombone squash, is arguably the single best variety for arch growing: it produces vigorous vines up to fifteen feet long, clings readily to supports, and bears long, curved fruits that hang dramatically and look stunning dangling from an overhead arch.
Materials and Tools You Will Need
Building a squash arch requires only a modest investment in materials, and many of the supplies may already be on hand if you are an active gardener. The foundation of a good squash arch is a sturdy support structure that can withstand both the weight of mature vines and the force of wind. Common structural options include heavy-gauge cattle panels or hog panels bent into an arch shape, metal conduit pipes bent with a pipe bender, wooden frames made from two-by-four lumber, or purpose-built metal garden arch kits available at most garden centers and home improvement stores.
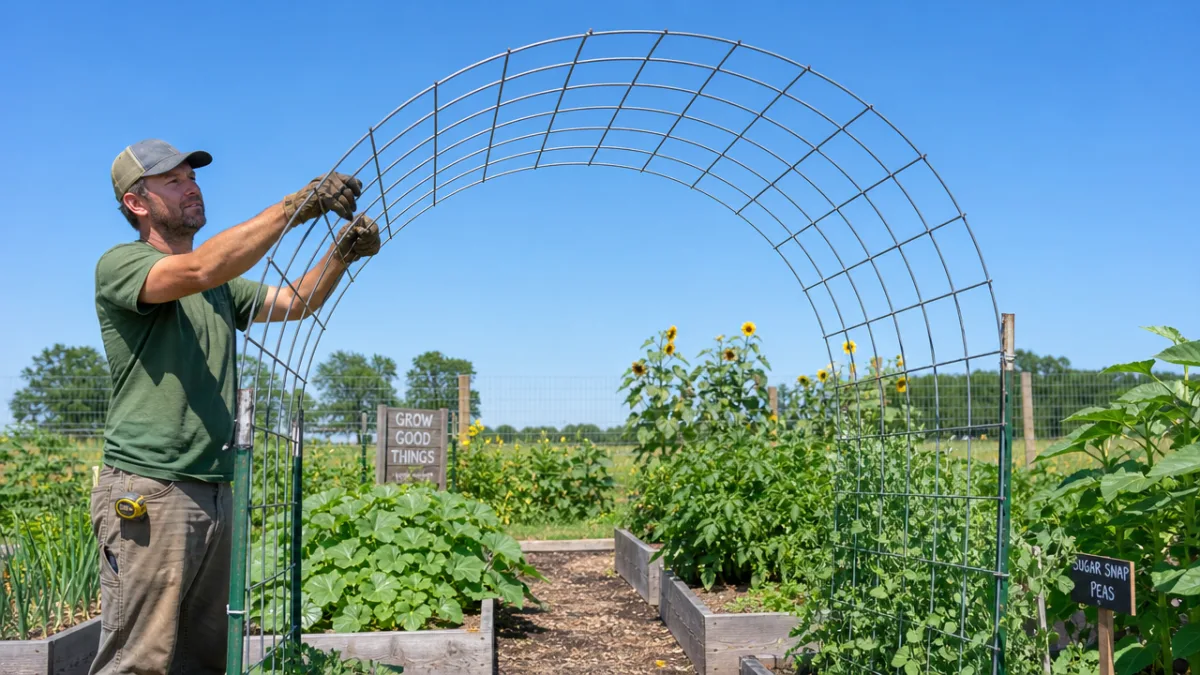
Cattle panels are widely considered the gold standard for DIY squash arches because they are extremely strong, already formed in a rigid grid pattern that vines can grip easily, and available in standard sizes that make arch construction straightforward. A single sixteen-foot cattle panel bent into an arch creates a structure approximately four feet wide and four to five feet tall at its peak, which is ideal for most gardeners. You will need a second person to help bend the panel safely, as they can be unwieldy to manage alone, and a pair of heavy work gloves is essential because the cut wire ends are sharp.
In addition to the main structural panel, you will need the following materials and tools to complete your squash arch build:
- T-posts or rebar stakes (four minimum, one for each corner of the arch) to anchor the structure firmly in the ground
- Heavy-gauge wire or zip ties to secure the arch panels to the corner stakes
- A wire cutter or bolt cutters if any trimming of the panel is necessary
- A rubber mallet or post driver to sink the stakes securely into the soil
- Garden twine or soft plant ties to train vines in the early stages of growth
- Old pantyhose, mesh bags, or fabric strips to create fruit slings for heavier varieties
- A measuring tape to ensure your arch placement aligns with your garden beds properly
If you prefer a more decorative appearance, wrought iron arch kits or cedar wood arch frames offer a polished, attractive look that suits formal or cottage-style gardens. These options require a bit more assembly time but reward you with a structure that looks intentional and refined even before the plants have grown to cover it. Whatever material you choose, the key quality requirements are structural rigidity, rust resistance or weather-treated wood, and a surface texture that vines can grip or to which you can easily attach twine.
Step-by-Step Instructions for Building Your Squash Arch
Begin by selecting and preparing the location for your arch. Squash needs a minimum of six to eight hours of direct sunlight daily, so choose a spot that receives full sun throughout the growing season. Consider the orientation of the arch carefully: positioning it so that it runs north to south will ensure that both sides of the arch receive adequate sunlight at different times of day, which promotes even growth and good fruit development on all vines. Mark out the footprint of your arch with stakes and string before you begin any construction, so you can visualize how it will sit in relation to your existing beds and paths.
Prepare the soil on both sides of the arch location before construction begins, as it is much easier to amend and work the soil when the structure is not yet in place. Squash is a heavy feeder that thrives in rich, well-draining soil with plenty of organic matter. Dig in a generous layer of aged compost or well-rotted manure to a depth of at least twelve inches on each planting side of the arch. If your soil is particularly clay-heavy or compacted, consider building up a slightly raised mound on each side, which improves drainage and warms the soil more quickly in spring.
To assemble a cattle panel arch, follow these steps carefully for the best result:
- Lay the cattle panel flat on the ground near the installation site and have a helper stand at the opposite end from you.
- Together, gently lift the panel and begin bending it into an arch shape, walking toward each other slowly until the desired curve is achieved.
- Drive your T-posts or rebar stakes into the ground at each of the four corners where the ends of the arch will rest, spacing them to match the width of your panel.
- Set the ends of the arched panel against the outside of the stakes and use wire or heavy-duty zip ties to lash the panel securely to each stake at multiple points.
- Check that the arch is level and stable by pushing gently on both sides; add additional stakes if there is any wobble or instability.
- If building a double-arch tunnel, repeat this process with a second panel positioned end-to-end with the first, connecting them with wire at the top for additional stability.
Once the structure is in place, attach horizontal lengths of garden twine between the vertical wires of the panel at roughly eight to twelve inch intervals up each side of the arch. These additional lines give young vine tendrils more contact points to grip in the early weeks before the vines are strong enough to find their own way. Walk through the arch passage after construction to make sure the height is comfortable and that there is adequate clearance; a finished arch should be at least six feet tall at its peak to allow comfortable passage and to accommodate the hanging fruits that will eventually dangle from the top.
Planting and Training Your Squash Vines
Squash can be started from seed either indoors two to three weeks before your last frost date, or sown directly into the prepared soil at the base of the arch once all danger of frost has passed and soil temperatures have reached at least sixty degrees Fahrenheit. Direct sowing is often preferred for squash because they dislike root disturbance and establish quickly in warm soil. Sow two or three seeds per planting hole at a depth of one inch, placing one or two holes on each side of the arch base, then thin to the strongest single seedling per position once the plants have developed their first true leaves.
In the first few weeks after germination, squash seedlings will grow rapidly but may need some gentle encouragement to begin climbing rather than spreading outward along the ground. As soon as vines reach six to eight inches in length, begin redirecting them toward the base of the arch and loosely tying them to the lowest wires with soft plant ties or strips of cloth. Check the vines every two to three days during the peak of the growing season, as squash can extend its reach by several inches in a single warm day. Gently weave new vine growth through the wire grid and redirect any stems that are growing away from the structure back toward it.
As the vines climb higher and begin to go over the top of the arch, they will increasingly support themselves through their own tendrils. The curling tendrils of squash plants are surprisingly strong grippers and will wind tightly around any wire or string they contact. Your main job at this stage transitions from active training to monitoring: watch for vines that escape sideways and redirect them, remove any dead or diseased leaves promptly to maintain good airflow, and watch for the development of female flowers, which are identifiable by the tiny proto-fruit at the base of each bloom. Pollinators such as bees will handle the rest, moving between the male and female flowers to ensure good fruit set.
Caring for Your Squash Arch Through the Season
Squash plants growing on a vertical arch require consistent, deep watering throughout the growing season. Because their roots are concentrated in the planting area at the base of the arch rather than spread over a large ground area, it is important to water deeply and regularly rather than with frequent shallow irrigations. A soaker hose laid around the base of each plant is ideal, as it delivers moisture directly to the root zone without wetting the foliage, which can contribute to disease. During hot summer weather, mature squash plants may need up to two inches of water per week.
Fertilizing arch-grown squash regularly is equally important, as these vigorous plants are among the heaviest feeders in the vegetable garden. Begin with a balanced granular fertilizer worked into the soil at planting time. Once the plants begin to flower, switch to a fertilizer that is lower in nitrogen and higher in phosphorus and potassium, which encourages fruit development rather than excessive leafy vine growth. Many gardeners find that a monthly application of liquid fish emulsion or compost tea, applied directly to the soil around the plant base, keeps vines healthy, green, and productive from midsummer right through the first frost.
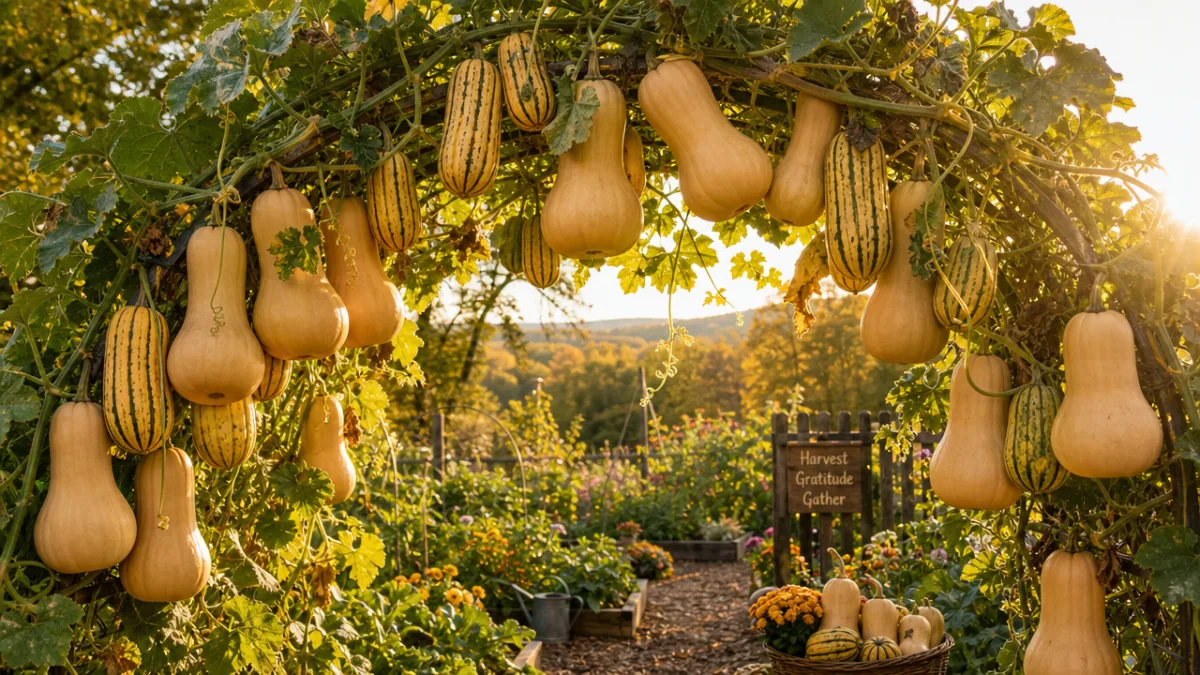
One of the most satisfying moments in arch squash growing comes when the first fruits begin to develop and hang freely in the air beneath the arch canopy. Most squash varieties growing on an arch will support their own fruits without any additional intervention, but larger or heavier fruits benefit greatly from the support of a simple sling. Old pantyhose work exceptionally well for this purpose: cut a section approximately twelve inches long, slip the developing fruit inside, and tie both ends to the wire arch above. As the fruit grows, the stretchy fabric accommodates its increasing size while supporting the weight and preventing the stem from breaking under the load.
Harvesting and End-of-Season Care
One of the greatest joys of growing squash on an arch is how easy the harvest becomes. Fruits hanging in mid-air are immediately visible and accessible without any need to crouch, search through dense ground-level foliage, or risk stepping on hidden fruits. Summer squash varieties should be harvested frequently and young, typically when fruits are six to eight inches long for zucchini types, as regular harvesting encourages the plant to continue setting new fruit throughout the season. Allowing a single summer squash to grow to full maturity on the vine signals the plant to slow production, so stay on top of the harvest for maximum yield.
Winter squash grown on the arch should be left to mature fully on the vine, which usually takes between eighty and one hundred ten days depending on variety. A mature winter squash will develop a hard, fully colored rind, the vine tendril nearest the fruit will dry out and turn brown, and the skin will resist puncture from a fingernail. Harvest winter squash before the first hard frost by cutting the stem cleanly with a sharp knife or pruners, leaving a few inches of stem attached to the fruit, which helps it store longer. Allow harvested fruits to cure in a warm, dry location for one to two weeks before moving them to cool storage.
At the end of the growing season, the arch structure itself requires minimal maintenance to be ready for next year. Once all harvesting is complete and the vines have died back after frost, pull the dead plant material free from the wire grid and add it to your compost pile. Inspect the arch for any bent, damaged, or loose sections and make repairs while the structure is clear and accessible. A well-built cattle panel arch can last many years with minimal care. Rotate your squash planting to the opposite sides of the arch in subsequent years, or move to a completely different garden location every two to three years, to reduce the buildup of soil-borne diseases and pest populations that target squash.
Troubleshooting Common Problems with Arch-Grown Squash
Even with the best planning and care, squash growers encounter challenges, and arch growing introduces a few unique considerations alongside the common ones. Poor fruit set is one of the most frequent complaints among squash growers, and it is almost always related to pollination. Squash produces separate male and female flowers on the same plant, and if pollinators are scarce in your garden, fertilization may not occur reliably. You can solve this quickly by hand-pollinating: use a small paintbrush or a cotton swab to transfer pollen from the center of a male flower (those on straight stems) to the center of a female flower (those with a tiny fruit at their base).
Powdery mildew is the other near-universal challenge for squash growers, appearing as a white, powdery coating on the upper surface of leaves, typically in late summer when nights begin to cool and daytime humidity rises. Arch growing significantly reduces mildew pressure compared to ground growing because of the improved air circulation around elevated foliage, but it does not eliminate the problem entirely. At the first sign of infection, remove the most heavily affected leaves and apply a diluted solution of one tablespoon of baking soda mixed with one teaspoon of horticultural oil in one gallon of water, sprayed on all leaf surfaces weekly as a preventive and treatment measure.
Vine borers are a serious pest in many regions that can devastate squash plants with little warning. The adult squash vine borer moth lays tiny reddish eggs at the base of squash stems, and the hatching larvae burrow inside the vine where they are protected from most insecticide applications. Monitor the base of your arch-grown plants carefully throughout early summer for the telltale sawdust-like frass that indicates a borer infestation. Wrapping the lowest twelve inches of vine stem in aluminum foil before the moth’s laying season can deter egg-laying, and growing resistant varieties such as Butternut squash, which is far less attractive to vine borers than other types, is the most reliable long-term prevention strategy available to home gardeners.








What do you think?
It is nice to know your opinion. Leave a comment.