










Stick-Star Garden Mobile: A Fun & Easy Nature Craft for Kids
Introduction: Why Nature Crafts Matter for Children
There’s something genuinely magical about taking kids outside and letting them collect materials straight from the ground around them. Nature crafts like the stick-star garden mobile do so much more than make a pretty decoration — they give children a real, hands-on connection to the living world that no amount of screen time can replicate. When a child picks up a fallen twig, turns it over in their hands, and starts wondering what it could become, something clicks. Creativity and curiosity just… happen.
The stick-star garden mobile looks deceptively simple — and in a way, it is — but the finished piece has a beauty that genuinely surprises people. You lash a handful of straight sticks into a star shape, hang it from a branch or garden hook, and what you get is this lovely, swaying ornament that moves with the breeze and feels like it belongs exactly where it is. It’s the kind of craft grandparents recognise from their own childhoods while kids discover it like it’s brand new — a nice little thread connecting generations through the simple act of making something together.
There’s real developmental value here too, beyond how nice it looks. Tying knots, measuring twine, and figuring out how to balance everything takes focused attention and careful hands. Early childhood research consistently points to unstructured, material-based creative play as genuinely important for healthy cognitive development — and this project delivers exactly that, wrapped up in a fun afternoon activity.
Gathering Your Materials: A Foraging Adventure
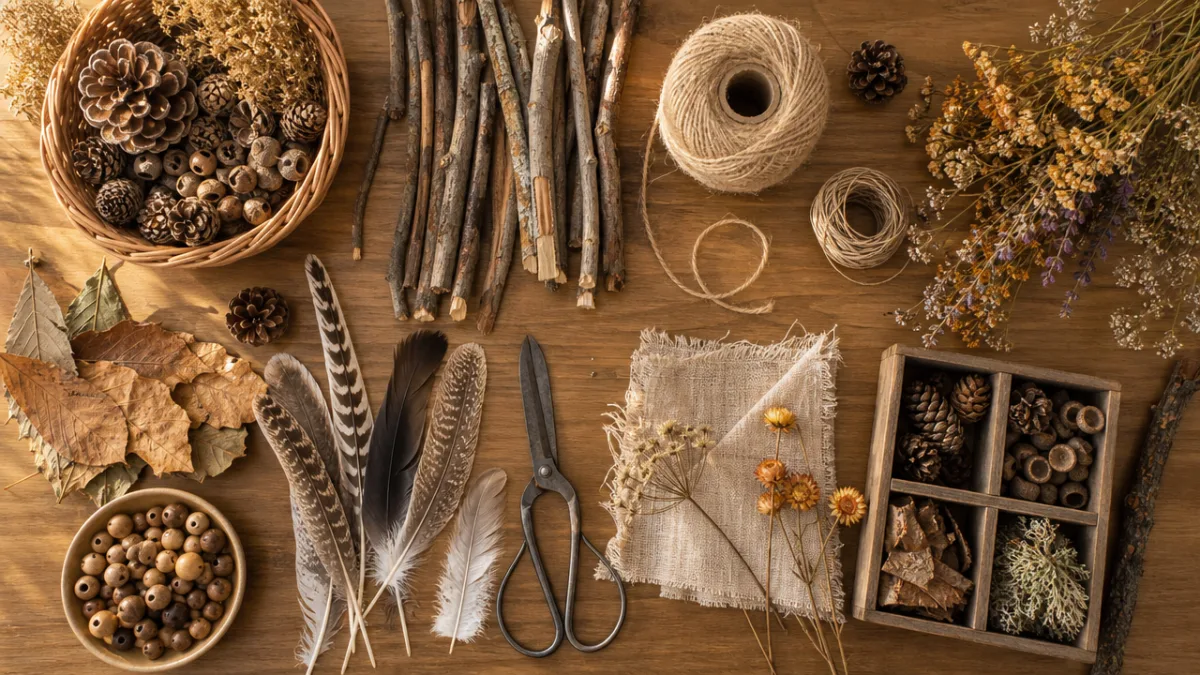
Half the fun of this project happens before you’ve tied a single knot. Head outside with your kids — your backyard, a local park, a woodland path, even a roadside verge works perfectly — and turn the supply run into a little foraging adventure. You’re after straight sticks of roughly equal length, somewhere between 20 and 30 centimetres is ideal. Fallen twigs after a windy night are perfect, and the hunt itself teaches kids to actually look at their surroundings rather than walking straight through them.
While you’re out there, collect a small stash of natural decorations to hang from the finished star. Seed pods, dried flower heads, small pine cones, smooth pebbles with natural holes, acorns, pressed leaves, and dried citrus slices all look wonderful. Feathers found on the ground add a soft, airy movement to the whole thing. Let your child pick what catches their eye — a striped pebble, a strangely shaped leaf — because those personal choices are what make the finished mobile actually theirs.
Back at home, you’ll need a few simple supplies. Natural jute or garden twine is ideal since the earthy colour works so well with the organic materials. Beyond that, you just need scissors, a ruler, and a small amount of craft glue or a low-temperature glue gun for adult supervision. Some families like to add wooden beads, dried berries on wire, or small bells that catch the breeze — all lovely options. But keep it flexible and work with whatever your outdoor space happens to offer that day.
Step-by-Step Instructions: Building the Stick Star
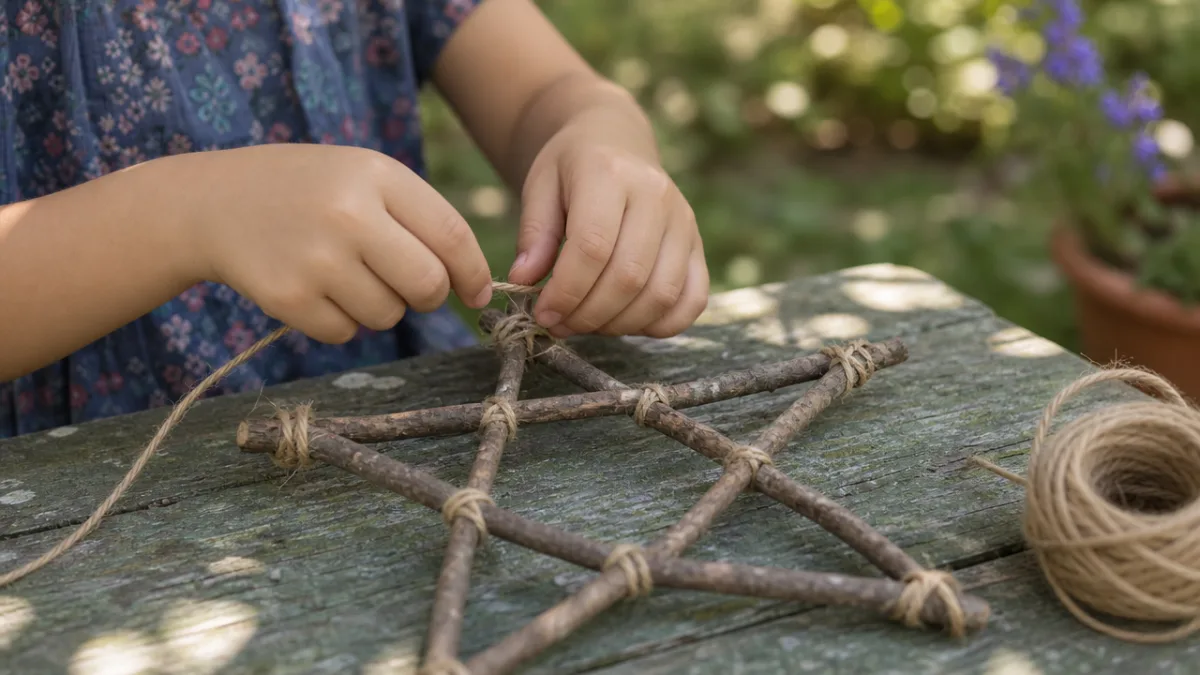
Start by picking five sticks that are as close to the same length as you can manage — that symmetry is what gives the star its satisfying, balanced look. Lay them on a flat surface and arrange them overlapping in a five-pointed star pattern, nudging them around until you’re happy with the shape. If you’re working with younger children, it really helps to lightly sketch a star outline on paper first and lay the sticks over it as a guide. That visual reference makes a noticeable difference.
Now comes the binding. Cut a piece of twine about 40 centimetres long for each of the five crossing points. At each junction, slide the middle of your twine piece underneath, then wrap both ends alternately over and under the two sticks in an X pattern several times. Pull firmly but not so hard you risk snapping a thin twig. Finish with a tight square knot and trim the extra. Take your time here — how secure these joints are determines how well the whole mobile holds together.
Once all five points are bound, pick the star up and have a good look at it. A well-made star will hold its shape without flopping or twisting. If any joint feels a bit wobbly, reinforce it with another wrap of twine or a small drop of craft glue worked into the fibres. Older kids can handle the binding on their own with a little practice. Younger ones do brilliantly when given the specific job of holding two sticks steady while an adult or older sibling does the wrapping — and honestly, that collaboration is a big part of what makes this craft so enjoyable.
Decorating the Star: Hanging Your Natural Treasures
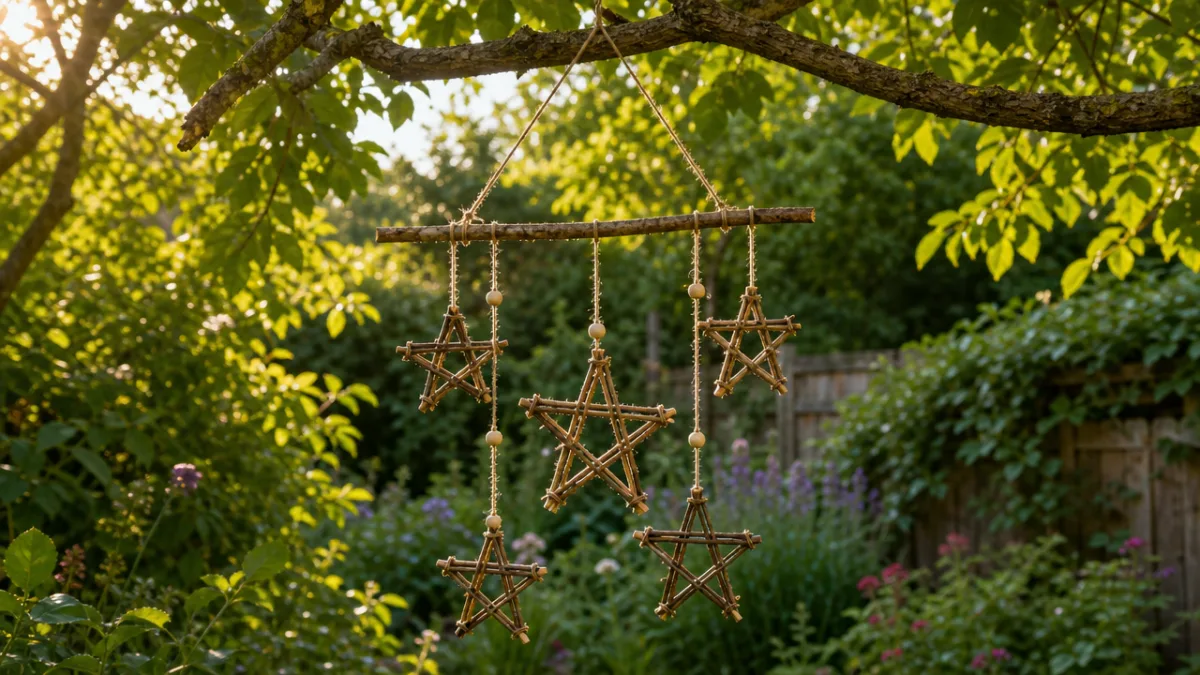
With the frame finished, the decorating begins — and this is usually where kids really come alive. Cut varying lengths of twine, anywhere from about 8 to 25 centimetres, so the decorations hang at different levels and create some visual movement. Tie one end of each length to a point or junction on the star, then attach your natural finds to the free ends. A simple double overhand knot looped through the eye of a feather quill, around the neck of a pine cone, or through a small hole poked into a dried seed pod is all you need.
Think about balance as you go. Heavier things like pebbles and pine cones work better on shorter strings so they don’t drag the star lopsided, while lighter feathers and dried flower heads can trail on longer cords for that graceful, floating look. Encourage your child to step back now and then and look at the whole thing rather than just the bit they’re working on — it’s a genuinely useful creative habit that goes well beyond craft time.
Some families like to add a personal touch at this stage: a painted wooden letter, a hand-stamped air-dry clay disc, or a little bundle of dried lavender tied with ribbon. These extras make the mobile feel like a proper keepsake. That said, it’s just as beautiful in its pure natural form — just wood, fibre, feather, and seed, a small piece of the outside world brought home to dance in the garden.
Creating the Hanging Loop
To hang the star, cut about 30 centimetres of twine and tie each end to two adjacent points of the star, making a loop at the top. Test the balance by dangling the star from one finger through the loop — it should hang level and face outward without tilting too much to one side. If it tips, adjust where on each point the loop ends are tied, shifting them slightly inward or outward until it hangs right. It’s a small engineering puzzle, and kids genuinely enjoy the satisfaction of solving it.
Display Ideas: Where to Hang Your Garden Mobile
One of the best things about a garden mobile is simply watching it move. Find a spot where it’ll catch the breeze — a tree branch, a pergola beam, a garden arch, or a hook on an outdoor wall all work beautifully. It looks especially lovely when it can spin freely, so a swivel clip between the hanging loop and the fixed point will let it turn without the twine twisting up. Even a gentle puff of wind sets the whole thing swaying in a way that’s oddly satisfying to watch.
If your weather is unreliable, this mobile moves indoors really well too. Hang it near an open window where it’ll still catch some air movement, or suspend it from a bedroom ceiling as a nature-inspired decoration and a calming focal point. Kids love having their handmade things on display in their own spaces — it builds a real sense of pride and keeps that connection to nature alive even when they’re inside. A cluster of two or three mobiles in different sizes hung at different heights makes a genuinely striking installation.
The stick-star mobile also makes a wonderfully heartfelt gift. Package it with a small handwritten card describing the materials and where they were gathered, and you’ve turned a simple object into a little story. Teachers love receiving one as an end-of-year gift, grandparents treasure them as something made by small hands, and friends appreciate the thoughtfulness of something genuinely handcrafted. Since the materials cost next to nothing, all the generosity is in the making — which is exactly as it should be.
Variations and Extensions: Keeping the Creativity Flowing
Once your child has the five-pointed star down, a whole world of variations opens up. A four-stick square frame becomes a window-shaped mobile that’s perfect for showing off pressed flowers. A three-stick triangle, bound at each corner, gives younger children an easier starting shape that still looks really striking. Try mixing sticks of different thicknesses — fine willow withies alongside chunky oak twigs, say — for a textural contrast that makes the finished piece even more interesting to look at.
Seasonal swaps are a great way to keep coming back to this craft all year round. In autumn, load it up with small bundles of colourful dried leaves, acorn caps threaded on wire, and miniature gourds. Winter versions look beautiful with pine cones dusted in white paint to suggest frost, bundles of cinnamon sticks, and dried orange slices. Spring mobiles can overflow with dried flower petals, seedheads, and speckled eggshell fragments from the garden. Summer editions call for dried lavender, sea glass, and shells from a beach walk. Each season becomes an excuse to go outside and look closely at what’s available.
For older children or those who want more of a challenge, introduce dreamcatcher-style webbing by weaving twine back and forth across the inside of the star frame before adding the hanging decorations. This interior web adds structural strength and a beautiful layered quality. Older kids can also try their hand at natural dyeing — simmering onion skins, beetroot, or turmeric in water to create colour baths for the twine, producing warm golden, deep pink, and sunny yellow cords that give the whole thing a lovely subtle glow.
Seasonal Decoration Checklist
- Spring: Dried flower petals, pussy willow stems, small birds’ feathers, fresh moss clumps, speckled eggshell fragments
- Summer: Dried lavender bunches, sea glass pieces, collected shells, dried citrus slices, sun-bleached seed pods
- Autumn: Pressed colourful leaves, acorns and acorn caps, small pine cones, dried berries, cinnamon sticks
- Winter: Frosted-looking pine cones, dried orange wheels, star anise pods, sprigs of dried rosemary, small silver bells
The Bigger Picture: Nature Crafts and Child Development
Projects like the stick-star mobile are more than a nice way to spend an afternoon — they’re quietly powerful developmental tools. Gathering, selecting, and transforming natural materials draws on executive function skills like planning, sequencing, and flexible thinking. When a child realises the stick they chose is too short and goes to find a better one, they’re practising adaptive problem-solving in a low-stakes, supportive setting. When they push through a frustrating knot, they’re building resilience. These aren’t skills that stay in the craft box — they show up in classrooms and friendships too.
Time in nature is increasingly recognised by researchers, educators, and mental health professionals as genuinely good for children’s wellbeing. Even modest time in urban green spaces has been shown to lower cortisol levels, improve focus, and nurture a sense of belonging to something bigger than yourself. When children make things from natural materials, that connection deepens — they’re not just looking at nature, they’re working with it. The stick-star mobile is a small but meaningful expression of that relationship.
There’s also something valuable in the imperfection of natural materials. Unlike a manufactured craft kit where every piece is pre-cut and identical, working with sticks means accepting asymmetry, unexpected curves, and the occasional snap. Learning to work with the natural character of your materials rather than fighting it builds a creative flexibility that’s hard to teach any other way — along with a genuine appreciation for organic beauty that doesn’t require everything to be perfect and polished. A slightly lopsided star, bound with uneven knots and hung with a personal collection of found things, isn’t a failed star. It’s an honest one.
Skills Developed Through This Project
- Fine motor coordination — tying knots, threading cord, and handling small natural objects all strengthen the hand muscles and dexterity children need for writing and detailed work.
- Spatial reasoning — arranging sticks into a symmetrical star and distributing decorative weight evenly across the frame builds foundational geometric thinking.
- Creative decision-making — choosing which materials to use, where to place them, and how to compose the mobile as a whole develops aesthetic judgment and a personal creative voice.
- Patience and persistence — the multi-step process, especially the repetitive binding work, builds the capacity to stick with something toward a longer-term goal.
- Environmental awareness — foraging for materials teaches children to notice seasonal change, identify natural objects, and develop a respectful curiosity about the living world around them.
In the end, the stick-star garden mobile earns its place as a perennial favourite not just because it produces something beautiful — though it really does — but because everything about making it is good for children in layered, lasting ways. It asks them to go outside, look carefully, use their hands, persist through difficulty, make choices, and create something from almost nothing. In a world that often defaults to passive consumption, that kind of active, embodied, nature-rooted making feels like a quiet act of resistance, and a genuinely worthwhile gift to give any child.








What do you think?
It is nice to know your opinion. Leave a comment.