










Colorful Free Crochet Chonky Dino Pattern: A Complete Step-by-Step Guide
Introduction to the Chonky Dino Crochet Project
If you’ve ever wanted to bring a chunky, colorful dinosaur to life with just a hook and some yarn, this free crochet chonky dino pattern is exactly what you’ve been searching for. The “chonky” style of amigurumi has taken the crafting world by storm, characterized by its delightfully round, oversized proportions and irresistible squishy appearance. These lovable dinos make perfect gifts for children, adorable shelf decorations, or simply a rewarding weekend project for crocheters of all skill levels who want something both fun and functional.
What makes this particular pattern so appealing is its accessibility. Unlike many amigurumi patterns that require advanced techniques or expensive specialty yarn, the chonky dino can be made with basic worsted weight yarn in virtually any color combination you desire. Whether you want a classic green T-Rex, a pastel purple Brachiosaurus, or a rainbow-striped creation that defies paleontological accuracy entirely, this pattern gives you the creative freedom to experiment. The construction method is intuitive enough for confident beginners while still offering enough detail to keep experienced crafters engaged throughout the process.
The finished dino typically measures around 8 to 10 inches tall depending on your yarn weight and hook size, making it a perfectly huggable companion. Because the body is worked in a continuous spiral using the magic ring technique, the joins are nearly invisible and the overall structure is smooth and professional-looking. Throughout this guide, we’ll walk through every section of the pattern from materials to finishing touches, so you’ll have all the knowledge you need to complete your very own chonky dino from start to finish.
Materials and Tools You’ll Need
Before you cast on your magic ring, it’s important to gather all the materials you’ll need for this project. Having everything within reach before you begin will keep the creative momentum going and prevent the frustrating mid-project scramble for a missing stitch marker or the right color yarn. The beauty of this chonky dino pattern is that it doesn’t require a large supply investment, making it an excellent budget-friendly craft project that delivers enormous charm and personality for relatively little cost.
For yarn, you’ll want a primary color for the body, a secondary or contrasting color for the belly scales and any detail work, and a small amount of black or white for the eyes. Worsted weight yarn (size 4) works beautifully for this pattern because it creates that trademark chubby density that gives the dino its signature look. Brands like Lion Brand Pound of Love, Red Heart Super Saver, or Paintbox Simply DK are all wonderful choices. If you want a softer finished toy, consider a cotton-acrylic blend that’s both durable and gentle against a child’s skin.
Here is a complete list of everything you’ll need to get started:
- Worsted weight yarn in your chosen body color (approximately 150–200 yards)
- Contrasting yarn for belly and accent details (approximately 50–75 yards)
- Small amount of black safety eyes or embroidery floss for eyes
- Size 5mm (H/8) crochet hook
- Polyester fiberfill stuffing
- Stitch markers (at least 2)
- Yarn needle for seaming and weaving in ends
- Scissors
- Optional: wire armature if you want poseable limbs
One important safety note if you’re making this dino for a child under three years old: opt for embroidered eyes using black yarn rather than plastic safety eyes. While safety eyes are indeed designed to lock securely into place, embroidered features eliminate any choking hazard entirely, making the finished toy completely child-safe. You can create surprisingly expressive and charming eyes with just a few carefully placed stitches using a yarn needle and black embroidery floss, and the handmade look adds a beautiful artisan quality to the finished piece.

Understanding the Basic Stitches and Techniques
The chonky dino pattern primarily uses a handful of fundamental crochet stitches that most beginners will either already know or can quickly master with a bit of practice. The backbone of the entire project is the single crochet stitch, worked in continuous spirals rather than joined rounds, which produces that smooth, seamless surface characteristic of amigurumi. If you’ve made a granny square or followed any basic pattern, you’re already well on your way to having the skill set needed to complete this project with confidence and success.
The magic ring (also called the magic circle or adjustable ring) is how you’ll begin each piece of the dino, including the body, head, legs, arms, and tail. This technique allows you to close the center of your circle completely tightly, preventing the annoying hole that often appears when starting with a chain-based ring. To make a magic ring, wrap your yarn around your fingers to create a loop, insert your hook through the loop, pull up a new loop, chain one to secure, and then work your beginning stitches directly into the ring before pulling the tail to close it. It feels awkward the first time but becomes second nature very quickly.
Here are the key stitches and abbreviations you’ll encounter throughout this pattern:
- MR – Magic Ring
- SC – Single Crochet
- INC – Increase (2 single crochets in the same stitch)
- DEC – Invisible Decrease (insert hook through front loops of next 2 stitches, draw up a loop, yarn over and pull through both loops)
- BLO – Back Loop Only
- FLO – Front Loop Only
- SL ST – Slip Stitch
- CH – Chain
The invisible decrease is arguably the most important technique to practice before beginning. Regular decreases leave a visible “bump” on the surface of the fabric, which can interrupt the smooth finish you’re aiming for with this style of toy. The invisible decrease, by contrast, pulls the front loops together first before completing the stitch, creating a much tidier reduction that blends seamlessly into the surrounding stitches. Watch a video tutorial for this technique if you’re a visual learner — even experienced crocheters sometimes benefit from a refresher before starting a new amigurumi project.
Crocheting the Body, Head, and Main Structure
The body and head of your chonky dino are worked separately and then seamed together at the end, giving you better control over the stuffing density and shaping of each piece. Begin with the body, which is the largest component and sets the scale for everything else. Starting from the bottom, you’ll increase evenly over the first several rounds to create that characteristic round, egg-like base before working even rounds through the middle section and then beginning your decreases toward the neck opening. The widest point of the body should feel satisfyingly plump and round, packed firmly but not so tight that the stuffing distorts the shape.
For the body, follow these rounds as your base pattern guide:
- MR, 6 SC into ring (6 stitches)
- INC in each stitch around (12 stitches)
- [SC 1, INC] repeat around (18 stitches)
- [SC 2, INC] repeat around (24 stitches)
- [SC 3, INC] repeat around (30 stitches)
- [SC 4, INC] repeat around (36 stitches)
- SC in each stitch for 8–10 even rounds (36 stitches)
- [SC 4, DEC] repeat around (30 stitches)
- [SC 3, DEC] repeat around (24 stitches) — pause here to add stuffing
- Continue decreasing until a small opening remains, stuff firmly, and close
The head is worked very similarly to the body but starts with a slightly smaller increase sequence and features a flatter front face area where you’ll later attach the eyes and any snout details. When working the head, pay particular attention to the tension on your decreasing rounds — if your tension is too loose, the stuffing will show through the stitches, creating a lumpy, pebbled appearance rather than the smooth surface you’re aiming for. Work with a hook that is one size smaller than the yarn label recommends to keep your tension tight and your fabric dense throughout the entire project.
Once both the body and head are complete, stuff each piece firmly before closing. The stuffing should be evenly distributed without any large clumps, which you can achieve by pulling apart the fiberfill into smaller, fluffier pieces before inserting it. When seaming the head to the body using your yarn needle and a length of matching yarn, use a whip stitch around the entire perimeter, working through both layers of fabric. Pull the stitches snug but not so tight that they pucker the fabric, and hide your knots and tails safely inside the body cavity by threading them through several stitches before trimming.
Creating the Limbs, Tail, and Decorative Spikes
The four limbs of your chonky dino are each worked as small, stubby tubes that are stuffed lightly and then seamed flat before attaching to the body. The chonky aesthetic relies heavily on legs and arms that are proportionally short and wide relative to the body, which gives the dino its adorably helpless, round-limbed appearance. Don’t be tempted to make the legs longer or more anatomically proportionate — embrace the roundness and chunky charm that defines this style and trust that the exaggerated proportions are exactly what makes these toys so irresistible to both children and adults alike.
For each leg, start with a magic ring of 6 stitches, increase to 12 stitches over the next round, work 4–6 even rounds, then stop increasing and simply work in single crochets until the tube reaches your desired length. Leave the top of each leg open, stuff lightly, and then flatten the opening by aligning the edges before seaming them shut with a few slip stitches. This flat seam is what you’ll attach to the body, and the flattened shape gives the legs a more stable base so your finished dino can sit upright without flopping to one side. The arms follow an identical process but are made slightly smaller and with fewer even rounds.
The tail is one of the most characterful elements of the chonky dino and is worked as a tapered tube that begins wider where it meets the body and narrows toward the tip. To achieve this taper, simply incorporate regular decrease rounds spaced evenly throughout the tail’s length rather than working all your decreases at the end. Work the tail without any stuffing, or with just a very light amount of fiberfill, so that it remains slightly floppy and poseable — this adds to the playful, animated quality of the finished toy and gives it a sense of life and personality that children especially tend to adore.
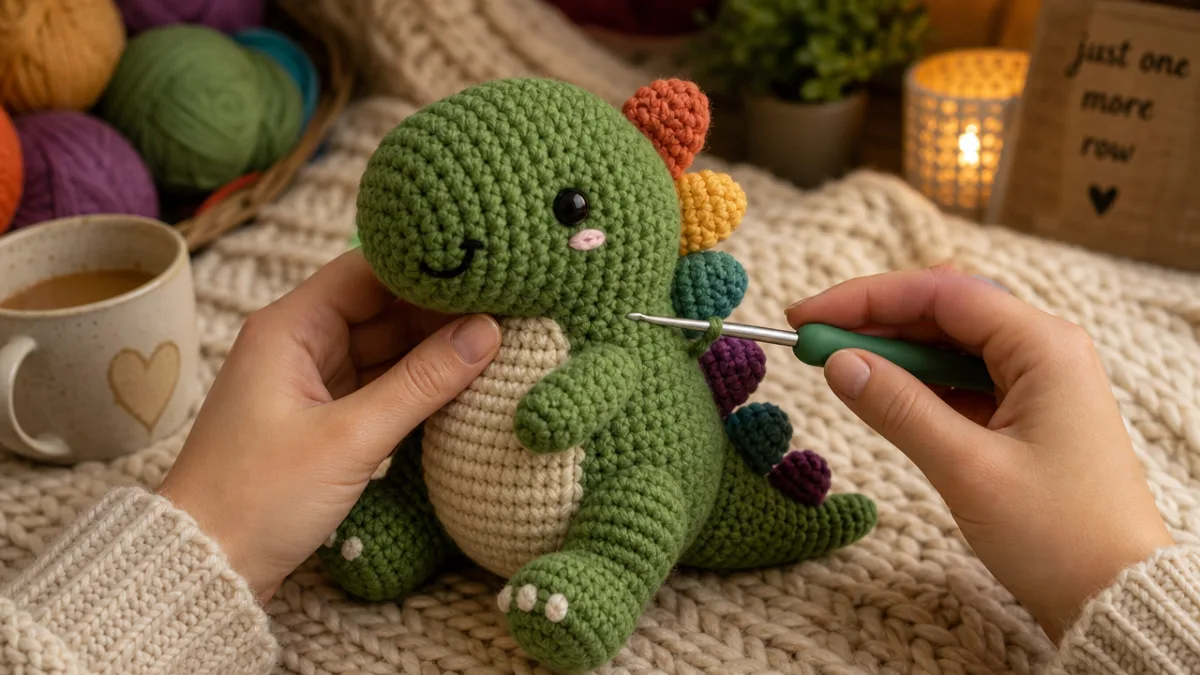
The decorative spikes running down the back of the dino are perhaps the most satisfying elements to create because they can be customized completely to your taste. Work each spike as a small triangle starting with a magic ring, increasing over a few rounds, then rapidly decreasing back to a point. You can make them all the same size for a uniform look, or graduate them from large at the base of the neck to small at the tip of the tail for a more realistic dinosaur silhouette. Use a contrasting color, a gradient yarn, or even alternate two colors between spikes for a vibrant, playful finish that makes each dino completely one-of-a-kind.
Assembly, Eyes, and Final Finishing Details
Assembly is where your chonky dino truly comes to life, and it’s worth taking your time with this stage rather than rushing to the finish line. Lay all your finished pieces out on a flat surface before you begin attaching anything permanently, and play with the placement of the legs, arms, tail, and spikes until you’re happy with the overall composition and balance. A slight variation in limb placement can dramatically change the personality of the finished dino — legs positioned further apart create a more stable, planted stance, while arms angled slightly upward give the toy an eager, reaching expression that many people find particularly endearing and full of character.
Attach the safety eyes before seaming the head closed if you haven’t already done so, inserting them through the fabric at your chosen position and locking the washers firmly onto the posts from inside the head. If you’re using embroidered eyes instead, now is the time to work them using a yarn needle and black embroidery floss, creating small satin stitch circles or simple French knot clusters depending on the look you prefer. You can add a tiny white highlight stitch in the upper corner of each eye to give your dino that classic amigurumi sparkle and bring an immediate sense of life and warmth to the face that transforms it from a stuffed shape into a real character.
For the final seaming of all components to the body, use pins or stitch markers to hold each piece in position before committing to permanent stitches. This allows you to step back, assess the balance and symmetry, and make adjustments before any yarn is cut. Sew through both layers of fabric using a tapestry needle and a length of matching yarn, working small, evenly spaced stitches around the entire attachment area. Pull each stitch snug as you go to ensure a secure join that won’t come loose during enthusiastic play, especially important if the toy is destined for a young child who will inevitably carry it everywhere by a single limb.
Weave in all remaining yarn tails securely by threading each one through your tapestry needle and working it back and forth through several stitches in different directions before trimming it close to the fabric. A properly woven tail should be completely invisible from the outside and secure enough that a gentle tug won’t pull it free. Give your finished dino a gentle squeeze and reshape it with your hands, smoothing any lumps in the stuffing and coaxing the limbs into pleasing angles. Your completed chonky dino is now ready to be gifted, displayed, or kept as a cherished handmade treasure that represents hours of creative skill and loving craftsmanship.

Customization Ideas and Color Inspiration
One of the greatest joys of the chonky dino pattern is that the basic structure serves as a beautifully blank canvas for endless creative customization. Once you’ve completed your first dino following the pattern as written, you’ll quickly start seeing opportunities to put your own signature spin on future versions. The amigurumi community is wonderfully inventive in this regard, and a quick browse through social media craft groups will reveal chonky dinos made in every imaginable color, yarn texture, and stylistic variation from sparkly metallic scales to soft velvet yarn bodies that feel impossibly luxurious to hold.
Color is perhaps the most immediate and impactful customization you can make. Consider these inspiring palette ideas for your next chonky dino project:
- Pastel Rainbow: Use a self-striping pastel yarn for the body and white for the belly to create a dreamy, cotton-candy aesthetic perfect for nursery décor
- Classic Dinosaur Green: Pair forest green with a warm cream belly for a more traditional look that appeals to dinosaur enthusiasts of all ages
- Galaxy Edition: Deep purple or navy yarn with iridescent silver spikes and a pale lavender belly creates a magical cosmic dinosaur unlike anything else
- Autumn Harvest: Burnt orange body with golden yellow belly and deep burgundy spikes channels fall foliage in the most charming possible way
- Ocean Waves: Teal and aqua with white belly scales creates a beautiful sea-inspired palate reminiscent of tropical waters
Beyond color, you can modify the pattern structurally to create different species of chonky dinosaur from the same basic template. Adding a longer neck section between the body and head produces a chonky Brachiosaurus, while giving the head a more pronounced rectangular snout with embroidered nostrils suggests a Stegosaurus or Triceratops. You can add a crest of graduated spikes along the full length of the spine, incorporate tiny horns above the eyes, or add a little felt tongue peeking from the corners of the mouth. Each small addition compounds the personality and uniqueness of your individual creation, making every dino truly one-of-a-kind and reflecting the creativity and care that you brought to the crafting process.
If you want to take your chonky dino to the next level as a gift, consider crocheting a matching miniature version using fingering weight yarn and a 2.5mm hook. A mama or papa dino with a tiny baby dino made from the same color palette is an extraordinarily sweet gift for a new parent or a child who loves imaginative play. You can also crochet a simple little accessory like a tiny bow tie, a flower crown, or a miniature scarf using leftover yarn scraps to give your dino even more personality and charm. The possibilities are genuinely limitless, and that creative flexibility is exactly what keeps so many crocheters coming back to this wonderful pattern again and again with fresh ideas and fresh yarn.








What do you think?
It is nice to know your opinion. Leave a comment.