










Introduction to DIY Chunky Outdoor Chairs: Why Build Your Own Patio Furniture
There is something deeply satisfying about sitting in a chair you built with your own two hands. DIY chunky outdoor chairs have surged in popularity among woodworking enthusiasts and backyard decorators alike, and it is easy to understand why. These bold, substantial pieces of furniture bring an unmistakable rustic charm to any patio, deck, or garden space, and they cost a fraction of what comparable store-bought furniture would set you back. When you build your own outdoor seating, you control everything from the wood species to the finish color to the exact dimensions that suit your body and your space.
Beyond the aesthetic appeal, building your own chunky outdoor chair is a genuinely achievable project for woodworkers at almost any skill level. Unlike intricate cabinetry or fine furniture joinery, these chairs rely on straightforward cuts, simple fasteners, and bold proportions that are forgiving of minor imperfections. The thick lumber that defines the chunky aesthetic actually makes the project easier in many respects, because heavier stock is more stable during cutting and assembly, and small gaps or misalignments disappear visually against the bold lines of the finished piece. First-time builders regularly complete their first chair in a single weekend.
This comprehensive guide will walk you through everything you need to know to plan, cut, assemble, and finish a beautiful chunky outdoor chair that will last for years on your patio. We will cover the materials and tools you need to gather, step-by-step building instructions, finishing and sealing options to protect your investment from the weather, and tips for customizing the design to match your personal style. Whether you are an experienced woodworker looking for a weekend project or a complete beginner ready to try something ambitious, this guide has you covered from first board to final coat of sealant.
Materials and Tools You Will Need Before You Start
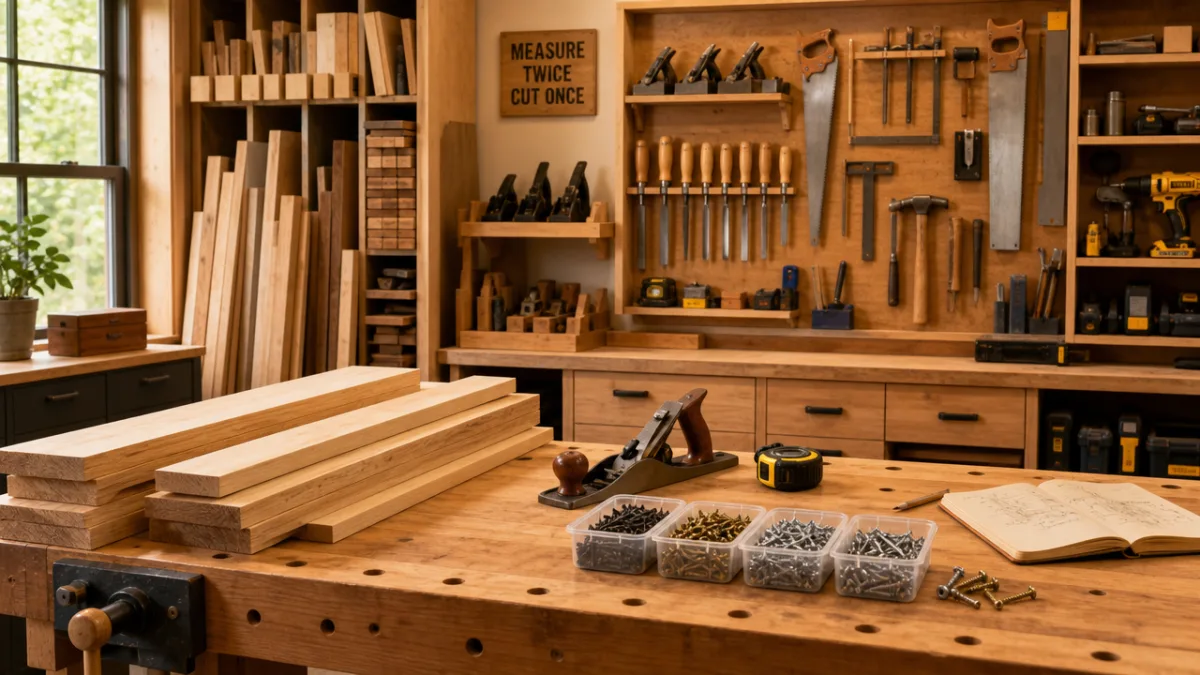
Gathering the right materials before you begin is one of the most important steps in any successful woodworking project, and this chunky outdoor chair is no exception. The most popular lumber choice for this style of chair is construction-grade Douglas fir or Southern yellow pine in 2×4, 2×6, and 4×4 dimensions. These species are widely available at any home improvement store, they hold screws well, they are strong enough to support adult weight comfortably, and they accept paint and stain beautifully. Cedar and redwood are premium alternatives that offer natural rot resistance, making them excellent choices if your chair will be exposed to frequent rain or high humidity.
For a standard chunky outdoor chair, you will typically need approximately eight to ten 8-foot 2×4 boards, two or three 8-foot 2×6 boards for the seat slats and back panels, and one or two 4×4 posts for the front legs, which give the chair its signature bold and chunky appearance. You will also need exterior-grade wood screws in 2.5-inch and 3.5-inch lengths, exterior wood glue, and sandpaper in grits ranging from 80 to 220. If you plan to use pocket hole joinery, which produces an extremely clean and strong connection, you will need a pocket hole jig and the appropriate pocket hole screws as well.
On the tool side, the list is refreshingly manageable. A miter saw or circular saw will handle the majority of your cuts, and a drill driver is essential for driving screws and boring pilot holes to prevent splitting. You will need a tape measure, a speed square for checking right angles, clamps to hold pieces steady during assembly, and a sander or sanding block for smoothing surfaces before finishing. Optional but helpful tools include a pocket hole jig for cleaner joinery, a jigsaw for any curved cuts on the armrests or back supports, and a router for rounding over sharp edges to give the chair a more polished, comfortable feel.
- 2×4 lumber (8-10 boards, 8 feet each) for frame, armrests, and back supports
- 2×6 lumber (2-3 boards, 8 feet each) for seat slats and wide back panels
- 4×4 posts (1-2 boards, 8 feet each) for front legs and structural corners
- Exterior-grade wood screws in 2.5-inch and 3.5-inch lengths
- Exterior wood glue for reinforcing all major joints
- Sandpaper in 80, 120, and 220 grits
- Exterior primer and paint, or penetrating wood stain and sealant
- Miter saw or circular saw, drill driver, tape measure, speed square, and clamps
Step-by-Step Building Instructions: Cutting and Assembling the Frame
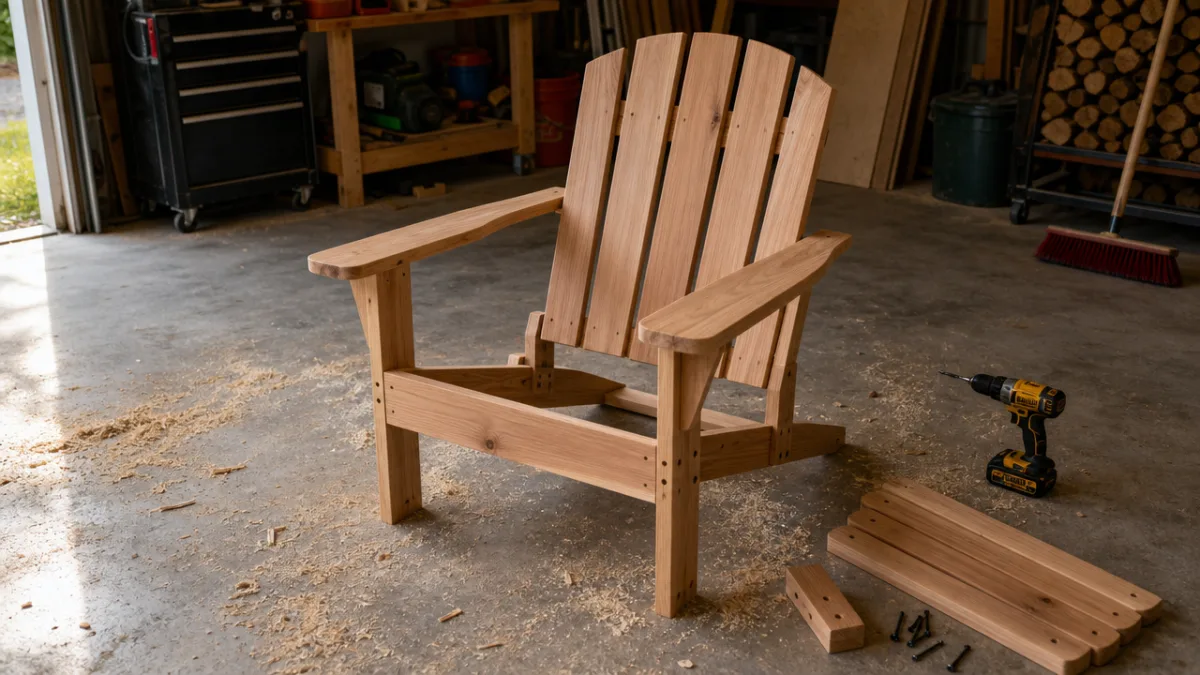
Begin your build by cutting all of your pieces to length before you start assembling anything. This approach, sometimes called the cut-list method, allows you to work efficiently and catch any measurement errors before they become costly mistakes in the middle of assembly. For a chair with a seat height of approximately 17 inches, a seat depth of 20 inches, and a back height of 36 inches from the floor, you will need front legs cut to 17 inches from your 4×4 stock, rear legs cut to 36 inches from 2×4 or 4×4 stock with a slight angled cut at the top to match the recline of the back, and seat supports cut to 20 inches to span the front to back depth of the seat frame.
Once all your pieces are cut and labeled, begin assembly by building the two side frames. Each side frame consists of a front leg, a rear leg, and the horizontal seat support that connects them. Lay these three pieces on a flat surface, apply exterior wood glue to each joint, and fasten them together with 3.5-inch exterior screws, driving two screws per connection for maximum strength. Make sure each side frame is perfectly square before the glue sets by measuring diagonally from corner to corner in both directions — the measurements should be identical if the frame is square. Let the glue cure for at least 30 minutes before moving on.
With both side frames complete, connect them by adding the front and rear cross members that will support your seat slats. The front cross member, cut from 2×4 stock to match the width of your chair (typically 25 to 28 inches), attaches to the front legs flush with the top of the seat supports. The rear cross member attaches similarly at the back. Fasten these with glue and screws, again checking for square before the adhesive sets. At this stage you should have a solid rectangular box frame that represents the seat structure of your chair. This base frame will bear the full weight of the person sitting in the chair, so take extra care to ensure all connections are tight and properly fastened.
Next, add the back frame. The back of a chunky outdoor chair typically reclines at an angle of 10 to 15 degrees from vertical, which gives the chair a relaxed, lounge-like feel. Cut two back support rails that run from the top of the rear legs up to the top of the chair back, and fasten them in place with screws through the rear legs. Add a horizontal top rail connecting the two back supports at the top, which completes the back frame. At this point, your chair skeleton is fully assembled and you can begin adding the seat slats and back panels that will define the finished look of the piece.
Installing Seat Slats, Back Panels, and Armrests
The seat slats and back panels are the most visible parts of your chair, so take your time with this stage to ensure even spacing, consistent overhang, and smooth surfaces. For the seat, cut your 2×6 boards to match the full width of your chair, including any overhang you want on the sides. Most builders leave about half an inch to one inch of overhang on each side for a finished look. Lay your slats across the seat frame and space them evenly, typically leaving a quarter-inch gap between each slat to allow water to drain freely and air to circulate, which dramatically extends the life of the wood.
Fasten each seat slat with two exterior screws per end, driving the screws at a slight downward angle into the seat support frame below. Pre-drilling pilot holes at each screw location is strongly recommended to prevent the wood from splitting, especially near the ends of the boards. After all seat slats are installed, use a sander to smooth any slight height variations between adjacent slats, creating a uniform, comfortable seating surface. If you have a router with a roundover bit, running it along all the top edges of the seat slats will eliminate sharp corners and create a much more comfortable and professional-looking finished chair.
The back panels install in the same manner as the seat slats, running horizontally across the back frame with consistent spacing. Some builders choose to angle the back panels very slightly outward from bottom to top to improve both comfort and visual appearance, which requires slightly beveled cuts on the side edges of each panel. The armrests are typically cut from 2×6 stock and should be wide enough and long enough to rest your forearm comfortably. They attach to the top of the front legs and to the back support rails on each side, creating a solid, supportive surface that also serves to lock the entire chair structure together and significantly increase its rigidity.
- Cut seat slats to width and lay them across the seat frame with quarter-inch spacing gaps
- Pre-drill pilot holes at each fastening point to prevent splitting
- Fasten slats with exterior screws driven at a slight downward angle
- Sand all seat slats smooth and round over top edges with a router or sanding block
- Install back panels horizontally across the back frame with matching spacing
- Cut armrests from 2×6 stock and attach to front legs and back support rails
- Sand all exposed surfaces through progressive grits up to 220
Finishing and Weatherproofing Your Outdoor Chair
A beautiful piece of outdoor furniture that is not properly finished and protected will deteriorate quickly under exposure to sun, rain, humidity, and temperature fluctuations. The finishing stage is every bit as important as the building stage, and it deserves the same level of attention and care. Before you apply any finish at all, sand the entire chair thoroughly through your progression of grits, ending with 220 grit for a smooth, finish-ready surface. Wipe down the entire piece with a tack cloth or a damp rag to remove all sanding dust, and let it dry completely before applying any primer or stain.
The two most popular finishing approaches for DIY chunky outdoor chairs are an exterior paint system and a penetrating stain and sealant system. An exterior paint system begins with one or two coats of exterior primer, followed by two or three coats of exterior latex paint in your chosen color. This approach offers the widest range of color options and excellent protection when the paint film remains intact, but it will eventually peel and require repainting every few years. A penetrating stain and sealant system soaks into the wood fibers rather than forming a film on the surface, which means it cannot peel. It requires more frequent reapplication, typically every year or two, but the touch-up process is far simpler than stripping and repainting.
Regardless of which finish system you choose, pay particular attention to the end grain of all your boards, which absorbs moisture far more readily than face or edge grain and is therefore the most common point of entry for water damage and rot. Apply an extra coat of finish or a dedicated end grain sealer to all cut ends before completing your finishing process. Pay similar attention to any areas where two pieces of wood meet, as these joints can trap moisture if not well sealed. After the final coat of finish has cured according to the manufacturer’s instructions, your chair is ready to place on your patio, deck, or in your garden.
Customization Ideas and Design Variations to Make It Your Own
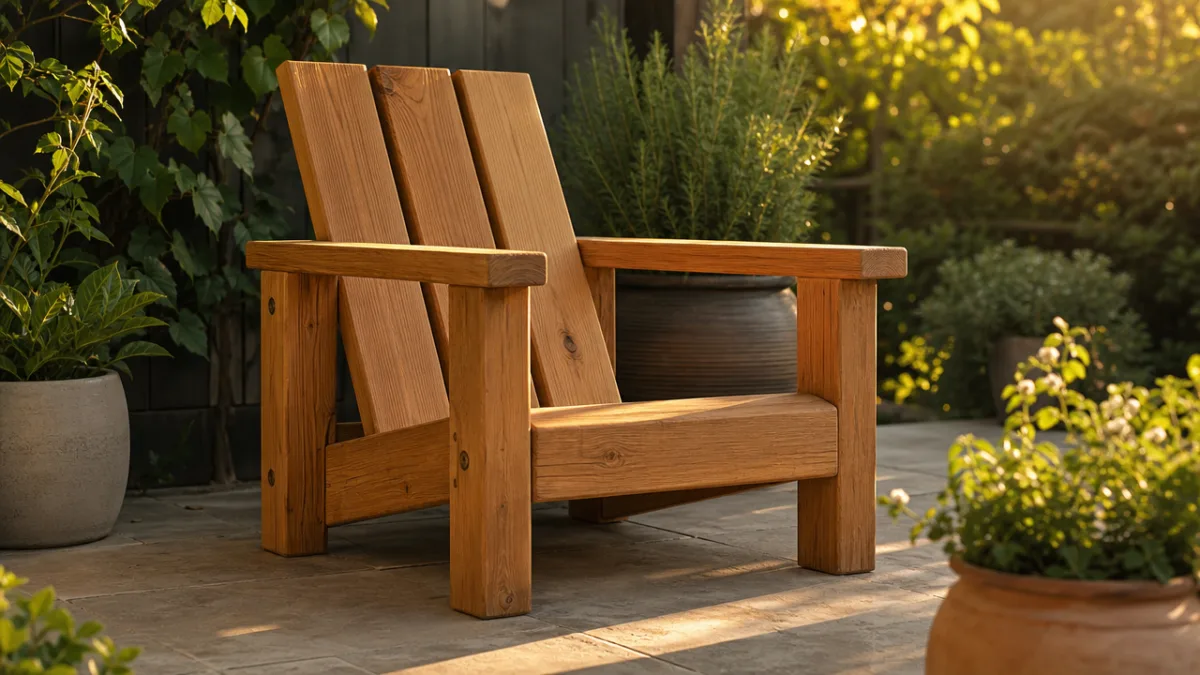
One of the greatest advantages of building your own outdoor furniture is the freedom to customize every aspect of the design to suit your personal taste, your outdoor space, and your practical needs. The basic chunky chair design is really a starting point, a versatile platform that you can modify in dozens of ways to create something that feels entirely original. One of the most popular and impactful customizations is adjusting the seat angle and back recline to create a true lounge chair with a much more relaxed seating position. By lowering the seat height to around 13 to 15 inches and increasing the back recline to 20 or 25 degrees, you transform a standard patio chair into something closer to an Adirondack-style lounge chair.
Color is another powerful customization tool that costs very little but makes an enormous visual difference. Classic choices for chunky outdoor chairs include crisp white, which brightens a shaded porch or garden beautifully, charcoal gray or black for a modern farmhouse aesthetic, and warm wood tones achieved with a penetrating stain for a natural, rustic look. Bold colors like navy blue, forest green, or barn red can make a striking statement in the right outdoor setting and are especially effective when you build a matching set of chairs that surround a coordinating outdoor dining table or fire pit arrangement. Do not be afraid to experiment with color on this project, because re-painting is always an option if you decide to change direction later.
Beyond dimensions and color, consider adding functional enhancements that make your chair even more useful and enjoyable. A built-in side table or wide armrest with a flat, level surface is a popular addition that lets you set down a drink or book without reaching for a separate table. Some builders add a thin cushion ledge or a small lip around the front and sides of the seat to keep a removable cushion in place during windy weather. Others build a matching footstool or ottoman using the same design language and materials, which transforms a simple patio chair into a full outdoor lounging station that rivals anything you could buy at a high-end outdoor furniture retailer.
If you enjoy the building process and want to take your outdoor furniture project further, consider building a full matched set that includes two or four chairs, a coordinating dining or coffee table, and perhaps a two-seat or three-seat bench built on the same chunky aesthetic. A cohesive set of matching outdoor furniture built from the same lumber, finished in the same color, and designed with the same proportions creates an outdoor living space that looks intentional, polished, and inviting. Many builders who complete their first chunky outdoor chair find that the project sparks a genuine passion for woodworking, and the outdoor furniture set becomes just the beginning of a much larger and more ambitious woodworking journey.
Maintenance Tips to Keep Your Chair Looking Great for Years
Even the best-built and most beautifully finished outdoor chair will require some ongoing maintenance to stay in peak condition through seasons of sun, rain, and temperature changes. Establishing a simple annual maintenance routine will protect your investment and keep your chair looking as good as the day you finished it for many years to come. At the start of each outdoor season, take a few minutes to inspect your chair thoroughly, looking for any signs of cracking or checking in the wood, loose screws, separated joints, or areas where the finish has worn through and left bare wood exposed to the elements. Addressing these small issues early prevents them from becoming larger and more expensive problems later.
Tighten any screws that have worked loose over the winter, which is common as wood expands and contracts through freeze-thaw cycles. If you find any joints that have separated slightly, inject a small amount of exterior wood glue and clamp the joint closed until the adhesive cures. Sand any rough or splintery areas with 120-grit sandpaper before touching up the finish. For painted chairs, a small foam roller and an inch or two of leftover paint is usually all you need to touch up worn areas and restore a fresh, clean appearance. For stained and sealed chairs, a light sanding followed by a fresh coat of penetrating sealant renews the protection and brings back the warm glow of the wood grain.
During the off-season, storing your chunky outdoor chairs under a covered patio, in a garage, or under breathable furniture covers will dramatically extend their lifespan and reduce the amount of maintenance they require. If year-round outdoor storage is unavoidable in your climate, elevating the chair legs slightly off the ground using furniture feet or small rubber pads prevents the leg ends from sitting in standing water, which is the single most common cause of premature rot in outdoor wooden furniture. With just a small amount of seasonal attention, a well-built chunky outdoor chair can remain a beautiful and functional piece of your outdoor living space for a decade or more, providing a remarkable return on the time and modest materials cost you invested in building it.








What do you think?
It is nice to know your opinion. Leave a comment.