










How to Make Candles with Essential Oils: An Easy DIY Recipe
Why Make Your Own Essential Oil Candles?
There is something deeply satisfying about lighting a candle that you made yourself, knowing exactly what went into it and why. Store-bought candles often contain synthetic fragrances, paraffin wax derived from petroleum, and additives that can release unwanted chemicals when burned. By making your own candles at home with essential oils, you take complete control over the ingredients, the scent profile, and the overall quality of the finished product. It is a rewarding craft that pays dividends every time you strike a match.
Beyond the health and safety benefits, homemade essential oil candles make extraordinarily thoughtful gifts. A candle blended with lavender and cedarwood for a stressed friend, or one combining citrus and peppermint for someone who loves an energizing workspace, carries a level of intentionality that no mass-produced product can replicate. The ability to customize scent strength, vessel style, and even wax color means every candle can be a truly personal creation tailored to the recipient’s preferences and personality.
Making candles at home is also surprisingly economical once you have the basic supplies on hand. A single candle-making session can yield a dozen or more candles for roughly the same price as two or three premium store-bought options. The learning curve is gentle, the process is meditative, and the results are impressive enough to share with pride. Whether you are a seasoned crafter or a complete beginner, this guide will walk you through everything you need to know to get started confidently.
Understanding Your Ingredients: Wax, Wicks, and Essential Oils
The foundation of any great candle is the wax, and choosing the right type matters more than most beginners realize. Soy wax is the most popular choice for DIY candle makers because it is natural, renewable, burns cleanly, and holds fragrance exceptionally well. It also has a lower melting point than paraffin, which makes it safer and easier to work with at home. Coconut wax is another premium option that offers an even cleaner burn and a beautiful creamy appearance, though it tends to be more expensive. Beeswax, the oldest candle-making material known to humanity, burns the longest and naturally emits a subtle honey scent that blends beautifully with floral essential oils.
Wicks are often an afterthought for new candle makers, but they are arguably the most technically important component of the entire candle. A wick that is too thin will tunnel down through the center of the candle without melting the wax pool to the edges, leading to wasted wax and a shortened burn time. A wick that is too thick will produce an oversized flame, excessive smoke, and potentially unsafe burning conditions. Cotton wicks are the standard choice for most applications and come in a wide range of sizes correlated to the diameter of your chosen vessel. Always consult a wick sizing guide specific to your wax type before making a final selection.
Essential oils are where the magic and the artistry truly come into play. Unlike synthetic fragrance oils, essential oils are derived directly from plants through distillation or cold pressing, which means they carry not only scent but also the therapeutic properties of their source material. However, they do behave differently from synthetic fragrances in wax — they tend to be more volatile, meaning some of the scent can evaporate during the pouring process if temperatures are not carefully managed. Understanding which essential oils perform best in candles, and how to blend them for complexity and balance, is a skill that develops wonderfully with practice and experimentation.
Essential Tools and Equipment You Will Need
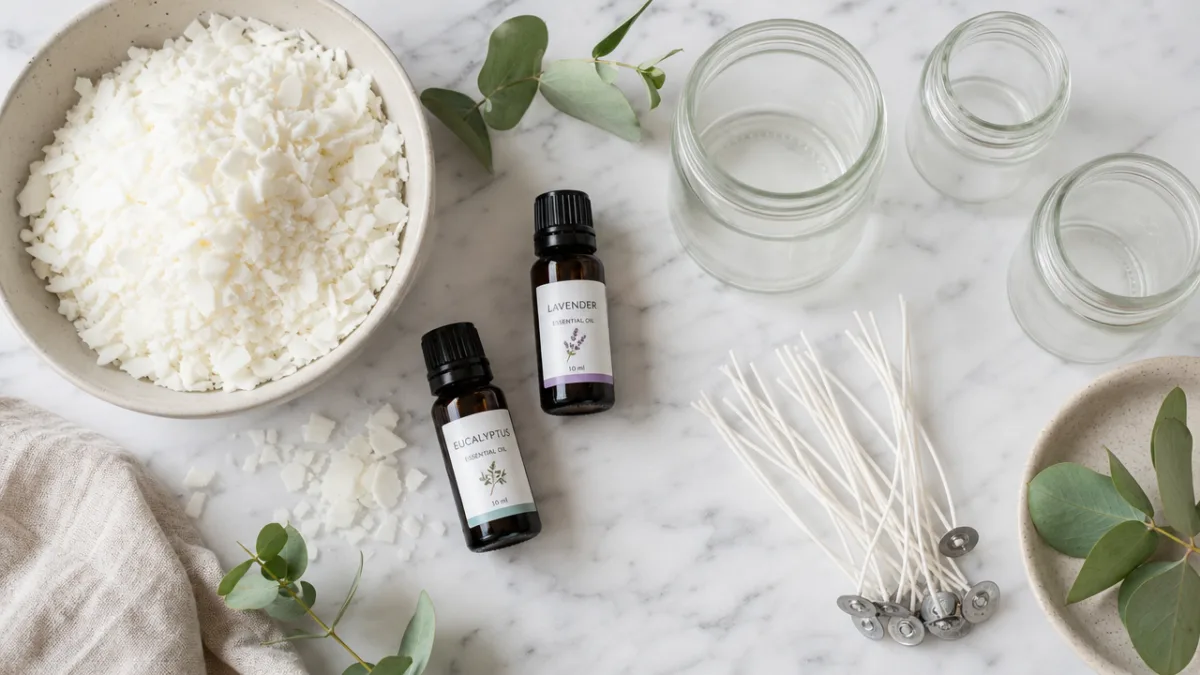
Before you begin your first candle-making session, gathering the right tools will make the process far smoother and more enjoyable. The good news is that most of what you need is either already in your kitchen or available inexpensively at craft supply stores. Having everything organized and within reach before you start melting wax is a habit that experienced candle makers swear by, since the process moves quickly once things get underway and you do not want to be scrambling for equipment while hot wax cools in the pot.
A double boiler setup is essential for melting wax safely and evenly. You can purchase a dedicated wax melting pitcher, which is the most convenient option, or simply place a heat-safe pouring container inside a pot of simmering water. Never melt wax directly on a burner without a water bath, as wax is flammable and direct heat creates an uneven temperature that can scorch or discolor your finished candles. A digital kitchen thermometer is equally important — different waxes require pouring at specific temperature ranges, and essential oils should be added at precise temperatures to preserve their aromatic integrity.
Here is a consolidated list of the core equipment you will want to have ready before starting:
- Double boiler or dedicated wax melting pitcher
- Digital kitchen thermometer
- Kitchen scale for measuring wax and oils by weight
- Silicone spatula or wooden stirring stick
- Candle vessels such as glass jars, tins, or ceramic containers
- Pre-tabbed cotton wicks sized to your vessel diameter
- Wick centering tools or simple clothespins to hold wicks in place
- Heat-resistant pouring pitcher with a spout
- Rubbing alcohol in a spray bottle for cleaning spills
- Protective paper or silicone mat to cover your work surface
In addition to these core tools, you may also want to invest in a small selection of candle dye chips or natural colorants if you wish to add visual interest to your creations. Labels, twine, and decorative lids can transform a simple homemade candle into something that looks entirely professional and gift-ready. Over time, you will develop a personal toolkit that reflects your specific preferences and the types of candles you most enjoy making.
Choosing and Blending Essential Oils for Your Candles
Not all essential oils perform equally in candles, and understanding which ones deliver the best scent throw — the strength and reach of the fragrance when the candle is burning — is one of the most valuable pieces of knowledge a candle maker can acquire. Some essential oils, particularly the citruses like lemon, orange, and grapefruit, are highly volatile and tend to fade quickly both during the curing process and when the candle is lit. Others, such as patchouli, cedarwood, vetiver, and frankincense, have a much heavier molecular weight and anchor a blend beautifully, providing lasting base notes that carry the scent throughout the entire burn.
The classic perfumer’s approach to fragrance blending uses a three-tier framework of top, middle, and base notes, and this system translates wonderfully to candle making. Top notes are the first scents you perceive — bright, fresh, and immediate, but the quickest to dissipate. Popular top notes for candles include bergamot, eucalyptus, lemon, and peppermint. Middle notes form the heart of the fragrance and provide character and body; lavender, rosemary, geranium, and clary sage all perform beautifully in this role. Base notes are the rich, slow-releasing foundation of the blend — sandalwood, vanilla absolute, benzoin, and ylang ylang are all excellent choices that help the fragrance linger and evolve as the candle burns down.
A reliable starting formula for a well-rounded essential oil blend is roughly 30 percent top notes, 50 percent middle notes, and 20 percent base notes by volume. For a standard 8-ounce soy wax candle, a total fragrance load of around 1 ounce — or 6 percent of the total wax weight — is a solid starting point. Some soy waxes can hold up to 10 percent fragrance load, but exceeding the recommended amount for your specific wax can lead to fragrance pooling on the surface or the essential oils failing to bind properly with the wax. Always test a small batch before committing to a large pour, especially when working with a new combination of oils or a different wax formulation.
Some especially popular and well-performing essential oil combinations for candles include the following pairings, each of which creates a distinct mood and atmosphere in the home:
- Lavender and Cedarwood — a calming, grounding blend perfect for bedrooms and relaxation spaces
- Sweet Orange and Clove — a warm, spiced combination that evokes cozy autumn evenings
- Eucalyptus and Peppermint — a crisp, invigorating scent ideal for home offices and bathrooms
- Frankincense and Sandalwood — a deep, meditative blend suited for yoga or meditation spaces
- Lemon and Rosemary — a clean, herbal fragrance that feels fresh and uplifting in any room
- Bergamot and Ylang Ylang — a floral-citrus pairing that is romantic without being overwhelming
Step-by-Step Instructions for Making Your Candles
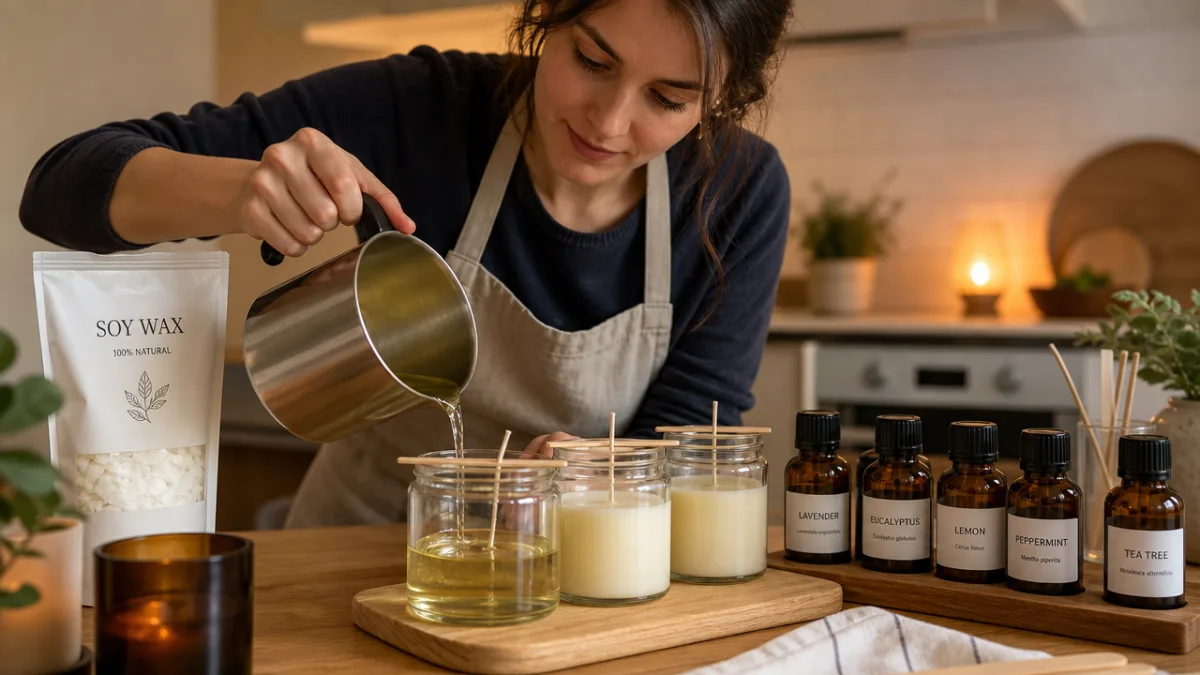
Begin by preparing your workspace and vessels before any wax goes near the heat source. Clean your glass jars or tins thoroughly with warm soapy water and allow them to dry completely — any residual moisture can interfere with the wax adhering properly to the sides of the container. Pre-warm your vessels slightly by placing them in a low oven at around 150 degrees Fahrenheit for a few minutes; this helps prevent the sinkholes and frosting that can appear on the surface of soy candles as they cool. While the vessels are warming, thread your pre-tabbed wicks through a wick centering tool or secure them across the top of the vessel using two clothespins positioned at right angles to hold the wick centered and taut.
Measure your soy wax flakes using a kitchen scale — a general rule is that soy wax reduces by approximately half in volume once melted, so you will need roughly twice the volume of wax flakes as the volume of the finished candle you wish to make. Place the measured wax into your double boiler and apply medium heat, stirring occasionally with your silicone spatula as the flakes melt. Monitor the temperature carefully with your digital thermometer, aiming to bring the wax up to a melting temperature of around 170 to 180 degrees Fahrenheit. Once fully melted and clear, remove the wax from the heat and allow it to cool while continuing to stir gently.
Adding your essential oils at the correct temperature is critical for achieving a strong and lasting scent. For soy wax, the ideal temperature for adding fragrance is between 135 and 145 degrees Fahrenheit. Adding oils when the wax is too hot will cause many of the volatile aromatic compounds to evaporate before the candle even cures, resulting in a weak scent throw. Stir the essential oil blend into the wax slowly and continuously for a full two minutes to ensure complete and even incorporation — rushing this step is one of the most common reasons for uneven scent distribution in finished candles. If you are adding any colorant, do so at the same stage and stir until fully blended.
Pour the scented wax into your prepared vessels slowly and steadily, aiming for a temperature of around 125 to 135 degrees Fahrenheit at the moment of pouring. This lower temperature helps minimize the appearance of air bubbles and surface cracking as the candle cools. Fill each vessel to about half an inch below the rim, leaving enough space for the melt pool to develop cleanly during burning. Set your poured candles in a draft-free location at room temperature and resist any temptation to move or disturb them while they cool — soy wax takes time to set properly, and vibration during cooling can affect the final texture and appearance.
Curing, Testing, and Troubleshooting Your Candles
Patience is perhaps the most undervalued virtue in candle making, and nowhere is this truer than in the curing stage. Soy wax candles benefit enormously from a cure time of at least 48 hours before burning, and many experienced makers recommend a full week of curing for the best possible scent throw. During this time, the essential oils continue to bind with the wax molecules at a molecular level, creating a more cohesive fragrance experience when the candle is eventually lit. Covering cured candles loosely with a cloth or placing lids on jarred candles helps protect them from dust while still allowing any residual moisture or air to escape naturally.
When it comes time to test your candles, the first burn is the most important one you will ever give them. Trim the wick to a quarter of an inch before lighting, and then allow the candle to burn long enough for the entire top surface of wax to melt into a complete, even pool reaching all the way to the edges of the vessel. This process can take anywhere from one to three hours depending on the diameter of the container, and it is essential for preventing tunneling on all subsequent burns. Never extinguish a candle before a full melt pool has formed on the first burn — this single step determines the burn behavior of the candle for its entire lifetime.
Troubleshooting common candle issues becomes easier with experience, but knowing what to look for early saves considerable frustration. If your candle has a weak scent throw when burning, the most likely culprits are either insufficient fragrance load, adding essential oils at too high a temperature, or insufficient curing time — try adjusting each variable systematically in separate test batches rather than changing everything at once. If you notice frosting, which appears as a white, powdery coating on the surface of soy candles, this is a completely natural characteristic of pure soy wax and does not affect burn quality or scent in any way, though you can minimize it by pouring at slightly higher temperatures. Sinkholes or surface cracking usually indicate rapid or uneven cooling, which a second top-up pour can easily remedy.
Here are a few additional tips that will help elevate the quality and consistency of your candles as you continue developing your craft:
- Always keep detailed notes on every batch, including wax type, wick size, essential oil ratios, pour temperature, and cure time, so you can reliably replicate successful candles
- Store unused essential oils in dark glass bottles away from heat and light to preserve their potency and extend their shelf life
- Use a heat gun or hair dryer on a low setting to gently smooth out any surface imperfections before gifting candles
- Never leave a burning candle unattended, and always burn candles on a heat-resistant surface away from drafts and flammable materials
- Discontinue burning when approximately half an inch of wax remains in the bottom of the vessel to prevent the container from overheating
Scaling Up and Making Candle Making a Creative Practice
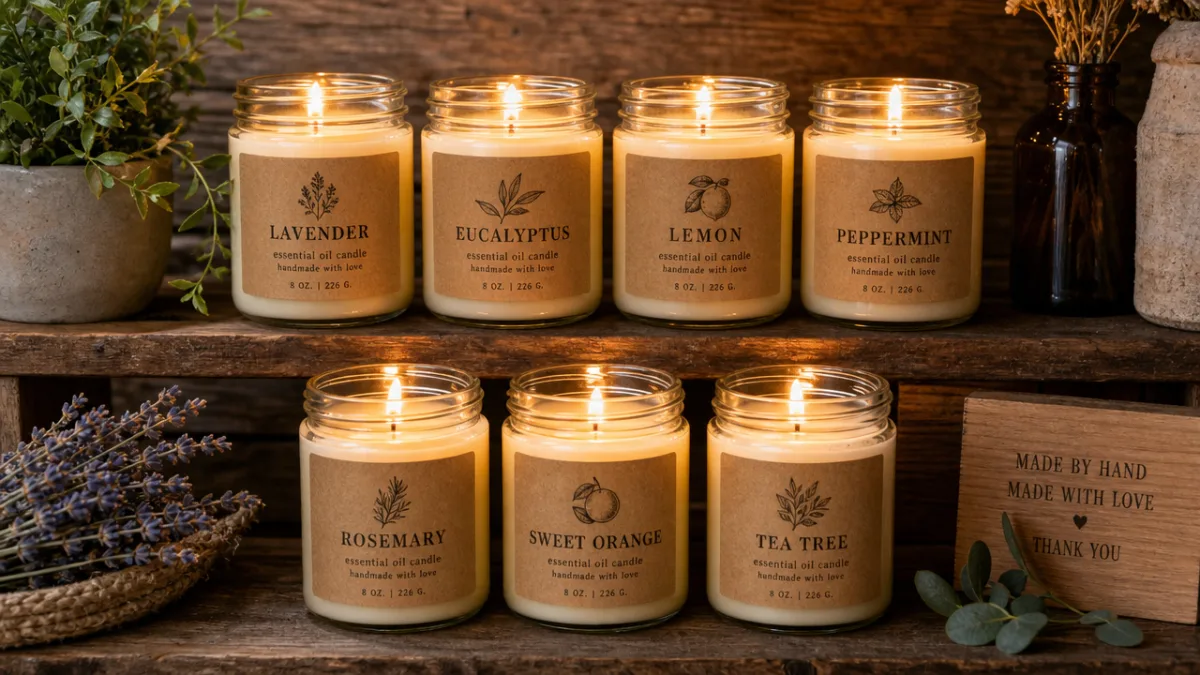
Once you have mastered a few reliable recipes and have a feel for how your chosen wax and wicks behave together, the natural next step is to begin expanding your range. Experimenting with seasonal scent collections is one of the most enjoyable aspects of candle making as a creative practice — imagine a winter lineup featuring fir needle, clove, and orange, or a spring collection built around neroli, jasmine absolute, and fresh green herb notes. Developing a personal signature scent that becomes recognizable to friends and family is a deeply satisfying creative milestone that many hobby candle makers eventually reach through months of thoughtful experimentation.
Candle making also pairs beautifully with other natural crafts and can become part of a broader commitment to a more intentional, handmade home. The same essential oils you use in your candles can be incorporated into homemade room sprays, linen mists, wax melts, and diffuser blends, allowing you to create a cohesive aromatic environment throughout your living spaces using ingredients you have already invested in. Many candle makers eventually branch into related products like soy wax melts and fire starters, which require no wicks and can be made in large batches very efficiently using leftover wax and fragrance combinations.
If you find yourself genuinely passionate about the craft, it is worth exploring the possibility of turning your hobby into a small creative business. The market for artisanal, natural, and handmade candles continues to grow as consumers become more conscious of the ingredients in products they bring into their homes. A small Etsy shop, a presence at local farmers markets, or candles created specifically for corporate gifting are all pathways that many home candle makers have successfully pursued. The foundational skills you develop making candles for yourself translate directly into the consistency and quality that small-batch customers seek out and are willing to pay a premium to find.
Ultimately, candle making with essential oils is a craft that rewards curiosity, patience, and a genuine love of beautiful scent. Every batch teaches you something new — about the behavior of wax, the complexity of aromatic blending, the physics of a flame, and the quiet pleasure of making something with your hands that brings warmth and beauty into the world. Start with the basics outlined in this guide, invest in quality ingredients, take careful notes, and above all, enjoy the process. The candle you make today might well become someone’s most treasured gift, or the scent that defines the atmosphere of your home for years to come.








What do you think?
It is nice to know your opinion. Leave a comment.