










10 Small Craft Room Ideas to DIY Even When You’re Short on Space
Making the Most of Your Crafting Space
Having a dedicated craft room is a dream for many creative people, but the reality of modern living often means working with limited square footage. Whether you have a spare closet, a corner of your bedroom, or a small nook under the stairs, it is entirely possible to create a functional and inspiring craft space that meets your needs. The key lies in smart planning, creative storage solutions, and a willingness to think vertically rather than horizontally when floor space is scarce.
Many crafters have discovered that small spaces, when properly organized, can actually be more efficient than sprawling rooms. When everything has a place and nothing is more than an arm’s reach away, you spend less time hunting for supplies and more time doing what you love. A well-designed compact craft room forces you to curate your supplies, keeping only what you genuinely use and letting go of items that simply accumulate dust.
The ideas in this article draw from real DIY solutions that crafters around the world have implemented in their own homes. From transforming a closet into a fully equipped craft station to using pegboards and floating shelves to maximize wall space, each concept is designed to be achievable on a modest budget and without professional construction skills. With a weekend, some basic tools, and a clear vision, you can create the craft space you have always wanted.
Understanding Your Crafting Needs Before You Begin
Before picking up a drill or buying a single shelf, it is worth spending time assessing what type of crafting you do most often. A quilter has very different storage requirements than someone who primarily makes jewelry or scrapbooks. Think about the tools you reach for daily, the materials that need special storage conditions, and the kind of work surface that best supports your projects. This honest inventory will guide every decision you make going forward.
Consider also how your space will need to function beyond crafting. In many small homes, the craft area doubles as a home office, a wrapping station, or a reading nook. Designing for flexibility from the start means you will not have to redo everything the moment your needs shift. Choose furniture and storage systems that can adapt, such as modular shelving units or rolling carts that can be repositioned or repurposed over time.
The Craft Closet Conversion
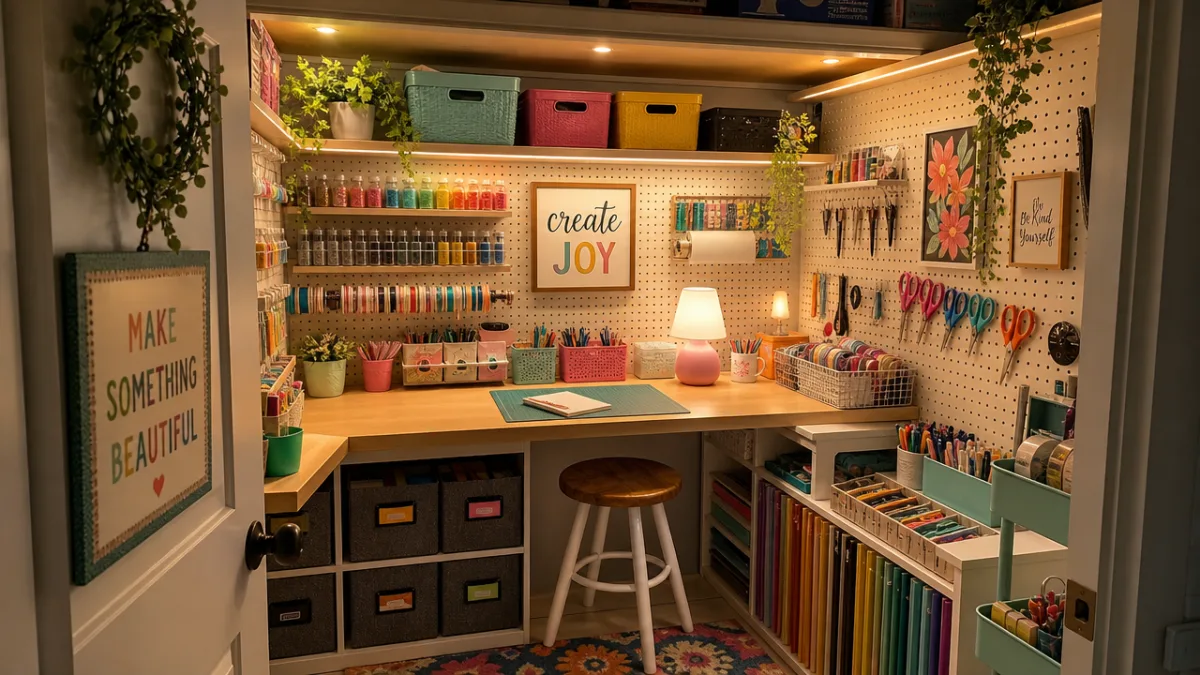
One of the most popular and transformative small craft room ideas is the closet conversion. A standard bedroom closet, when its doors are removed and its interior is thoughtfully outfitted, can become an incredibly capable craft station. Install a solid work surface at a comfortable standing or seated height, and you immediately gain dedicated space without sacrificing any square footage in the room itself. When you are done crafting for the day, simply slide the doors closed or hang a curtain to conceal the workspace entirely.
The walls inside a closet are prime real estate for storage. Line them from top to bottom with a combination of shelving, pegboards, and small bins. Deep shelves can hold fabric bolts or paper pads, while shallower ones keep frequently used items visible and accessible. Add a strip of LED lighting along the top of the closet interior to ensure you always have adequate illumination, since natural light rarely reaches inside a closed alcove. Battery-powered or plug-in options make installation simple without requiring an electrician.
Adding a fold-down work surface is a game-changer for closet craft rooms. A hinged panel mounted to the back wall of the closet can fold flat when not in use and drop down to create a proper work table when you need it. Pair this with a slim stool that slides underneath when not in use, and you have a fully equipped station that takes up almost no permanent space. This approach is particularly effective in studio apartments or homes where every room serves multiple purposes.
Pegboard Walls Inside the Closet
Pegboards are among the most versatile and cost-effective tools in the small craft room designer’s toolkit. Installed on the back or side walls of a converted closet, a pegboard turns an otherwise dead surface into dynamic, customizable storage. Hooks, bins, shelves, and holders can be rearranged at any time without tools, allowing your organization system to grow and evolve as your crafting practice changes. Paint the pegboard a bold accent color to make your craft space feel intentional and designed rather than improvised.
For a DIY pegboard installation, you will need to mount the board slightly away from the wall so that hooks can slide in from the back. Use wooden spacers or furring strips behind the pegboard before screwing it into wall studs for a clean, sturdy result. The pegboard can hold scissors, spools of ribbon, rolls of tape, markers, rulers, and small tools in plain sight, eliminating the need to rummage through drawers every time you start a new project.
Vertical Storage Solutions That Transform Walls into Workhorses
In a small craft room, the walls are arguably your most valuable asset. Floor space may be limited, but a wall that extends eight or more feet to the ceiling offers tremendous storage potential if you are willing to go high. Installing floating shelves from near the floor all the way up to the ceiling dramatically increases your usable storage without consuming any floor area at all. Reserve the lower, most accessible shelves for daily-use supplies and move seasonal or rarely used materials to higher levels.
Consider combining open and closed storage on your walls for both practicality and aesthetics. Open shelves display colorful supplies and make everything easy to find, while cabinets with doors keep more visually cluttered items like loose paper scraps or tangled cord collections out of sight. This balance keeps the room feeling organized and calm rather than chaotic, which matters enormously in small spaces where visual noise can quickly become overwhelming.
Wall-mounted rail systems, originally designed for kitchens and bathrooms, translate beautifully into craft room storage. These systems consist of horizontal rails to which you can attach a variety of hooks, jars, shelves, and containers. Because everything is visible and easily repositioned, they encourage good organizational habits. Many crafters install a rail system above their main work surface to keep scissors, tape runners, and adhesives within reach at all times, reducing interruptions to their creative flow.
Using the Space Above Furniture
The space above a desk, cabinet, or shelving unit is often entirely unused in a small room, representing a significant missed opportunity. Installing shelves that bridge the gap between the top of your furniture and the ceiling turns this dead zone into valuable storage. Use attractive baskets or labeled bins on these upper shelves to store items you need periodically but not daily, such as seasonal craft supplies, large paper pads, or ongoing project materials.
Tall, narrow bookcases are another excellent option for small craft rooms. A unit that is just twelve inches deep but stretches all the way to the ceiling can hold an astonishing amount of material while occupying a minimal footprint. Look for adjustable-shelf models so you can customize the spacing to suit your specific supplies. Place the tallest units against the longest uninterrupted wall and arrange them symmetrically for a built-in look that elevates the entire room’s aesthetic.
DIY Work Surfaces Built for Small Spaces
The work surface is the heart of any craft room, and in a small space it needs to be both functional and proportional to the room’s dimensions. A desk that is too large will dominate the space and make the room feel claustrophobic, while one that is too small will leave you frustrated and cramped. Many crafters find that a wall-mounted drop-leaf table is the ideal solution, as it provides a generous working area when needed and folds completely flat against the wall when not in use, reclaiming the floor space entirely.
Building a custom work surface from a solid door blank and a pair of file cabinets is a beloved DIY trick that delivers a spacious, sturdy table at a fraction of the cost of a commercial desk. The file cabinets provide both support and storage, and the door blank gives you a wide, smooth surface ideal for cutting fabric, laying out paper projects, or assembling large-scale crafts. Seal the door blank with a coat of paint or polyurethane to make it durable and easy to wipe clean.
If your craft room doubles as another living area, consider investing in a table with built-in storage underneath. A craft table with cubbies, drawers, or open shelves beneath the work surface keeps your most-used supplies close at hand without requiring additional furniture. Look for tables with a side extension leaf that folds out when you need more space and folds back in when the room needs to return to its other function. This kind of thoughtful, dual-purpose design is the cornerstone of any well-planned small craft space.
Rolling Carts as Flexible Work and Storage Units
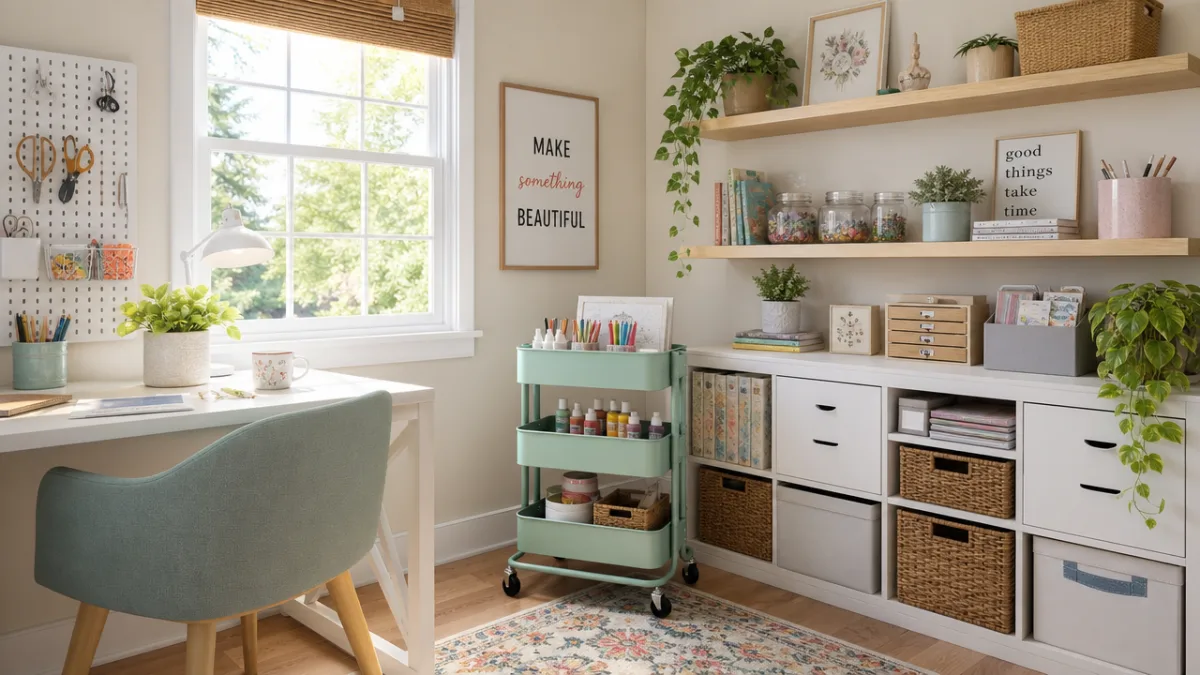
Rolling carts have become a staple in small craft rooms for very good reason. They can serve as an extension of your work surface, a mobile storage unit, or an organizational system for a specific craft type. Fill a cart with all your watercolor supplies, for example, and wheel it to wherever you are working that day, whether it is your craft desk, the kitchen table, or the back porch. When the session is over, the cart rolls neatly back into its corner or under the desk, out of the way.
Many crafters dedicate one cart to each major project or craft type, creating self-contained, grab-and-go creative kits. This approach works especially well for those who craft in multiple locations throughout the home or need to pack up quickly when the space is needed for other activities. Choose carts with lockable wheels for stability when you are working, and look for models with deep drawers or adjustable shelving to accommodate supplies of varying sizes.
Smart Organization Systems That Keep Small Spaces Functional
The difference between a small craft room that feels chaotic and one that feels serene and workable often comes down entirely to organization. Even the most beautifully designed space will quickly descend into disorder if there is no system for returning items to their designated places. Investing time in developing a logical, intuitive organization scheme at the outset pays enormous dividends in daily usability. Every tool, material, and supply should have a home, and that home should make sense given how often the item is used and how it relates to the items stored nearby.
Transparent containers are among the most useful organizational tools in a compact craft room. When you can see exactly what is inside a jar or bin without picking it up and opening it, you save time and reduce frustration. Use clear acrylic organizers for small items like buttons, beads, and paper clips, and label everything clearly so that returning items to their proper place becomes automatic. Color-coding your labels by craft type or frequency of use adds another layer of intuitive organization that helps you stay tidy even during busy creative sessions.
Drawer organizers and small trays inside cabinets prevent the common problem of supplies migrating and mixing over time. Without dividers, a drawer that starts out neatly arranged will quickly become a jumble of overlapping, tangled items. Take the time to measure your drawers before purchasing organizers, and look for modular systems that can be configured to fit your exact storage needs. A little upfront investment in proper containment systems saves countless hours of searching and reorganizing in the months and years to come.
Creating Zones Within a Small Space
Even in a very small craft room, designating specific zones for different activities makes the space feel larger and more intentional. Identify the primary activities you perform in the room and assign each one a zone, however small. Your cutting zone might be just a two-foot section of work surface equipped with a self-healing mat, rotary cutter, and ruler. Your paper crafting zone might be a shelf unit stocked with card stock, stamps, and ink pads. Creating these mental and physical boundaries makes it easier to stay organized and to transition efficiently between different projects.
Zone creation also helps when multiple people need to use the craft space. If you share your room with a partner, a child, or a roommate who also crafts, clearly defined zones ensure that each person’s supplies stay separate and that the room remains functional for everyone. Use color-coded bins, labeled shelving sections, or even a simple strip of washi tape on the work surface to delineate boundaries in a friendly, visually appealing way.
Inspiring DIY Projects to Personalize Your Craft Space
A craft room should not only be functional but should also feel like a place you genuinely want to spend time in. Adding personal touches through DIY décor projects makes the space feel uniquely yours and reinforces your creative identity every time you walk through the door. Consider painting an accent wall in your favorite color, hanging inspiration boards covered in images that fuel your creativity, or installing a chalkboard wall where you can sketch ideas, write project lists, or leave yourself encouraging notes.
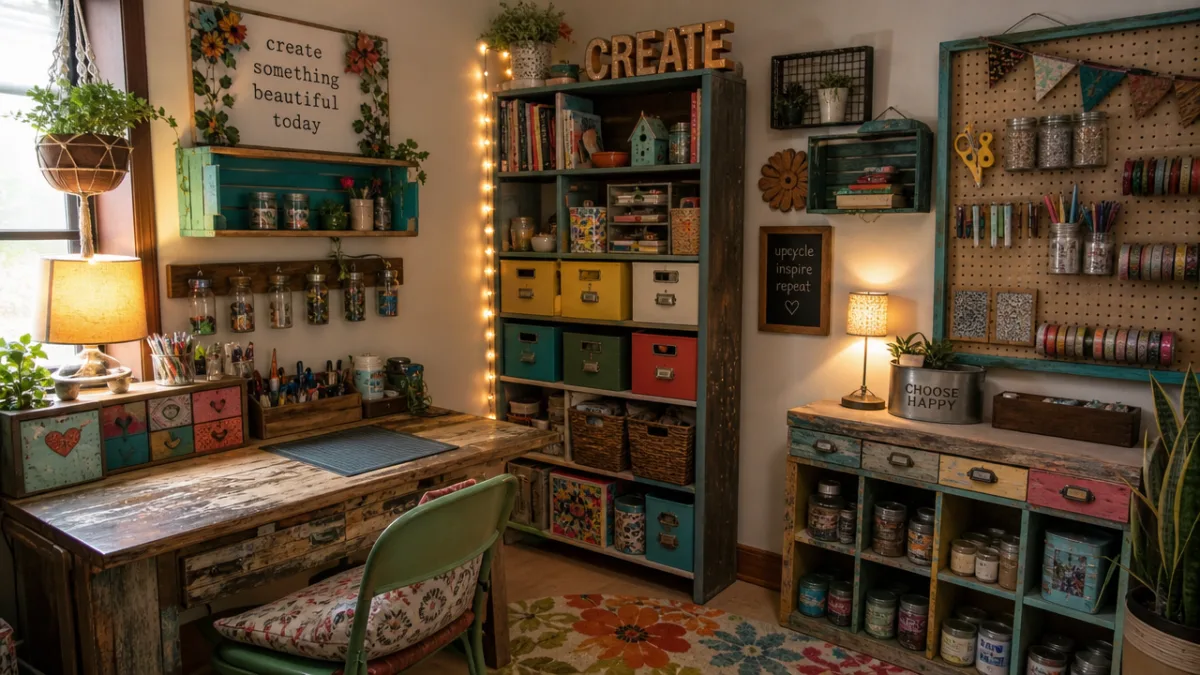
Upcycling household items into craft storage is both economical and wonderfully satisfying. Old tin cans make excellent holders for brushes and scissors when cleaned and painted in coordinating colors. Wooden crates stacked on their sides become instant open shelving units. Vintage teacups or muffin tins hold small embellishments with charm and character. These repurposed storage solutions add warmth and personality to the room while keeping costs low, which leaves more budget for actual crafting supplies.
Lighting is often an afterthought in room design, but in a craft room it is absolutely critical. Poor lighting leads to eye strain, color-matching errors, and reduced enjoyment of the creative process. Layer your lighting by combining ambient overhead fixtures with task lighting directly above your work surface. An adjustable arm lamp positioned at your main workspace ensures you always have bright, directed light exactly where you need it. Choose bulbs with a color rendering index of 90 or above to see colors accurately, which is essential for any project where color matching matters.
Final Tips for Maintaining Your Small Craft Room
Creating a beautiful, organized craft room is one achievement, but maintaining it over time is another challenge entirely. Build a simple end-of-session routine that involves returning every item to its designated spot before you leave the room. This five-minute habit prevents the gradual accumulation of clutter that can make a small space feel oppressive and unusable. Think of it as part of the crafting ritual, the final step that honors both your space and your future self who will return to it ready to create.
Schedule a seasonal review of your supplies and equipment to assess what you have actually used and what has been sitting untouched. Craft supplies have a way of multiplying, and a small room requires a disciplined approach to acquisition. Consider adopting a one-in, one-out policy: for every new supply or tool that enters the room, something else must be donated, sold, or discarded. This practice keeps the room from becoming overwhelmed and ensures that everything in the space is genuinely useful to you.
- Reassess your organization system every few months and adjust it as your crafting practice evolves.
- Invest in quality storage containers that stack efficiently and will last for years.
- Keep a donation box in or near the craft room for supplies you no longer need.
- Take photos of your organized space so you have a reference when things get messy.
- Celebrate small improvements rather than waiting until the space is perfectly finished to enjoy it.
Ultimately, the best small craft room is the one that works for you specifically. Do not feel pressured to replicate a design you admired online if it does not match your actual workflow or storage needs. Use the ideas in this article as a starting point and then adapt them to your unique situation, your budget, and your personal style. A craft room does not need to be large to be wonderful. It simply needs to be thoughtfully designed, lovingly organized, and filled with the supplies and tools that bring your creative vision to life.








What do you think?
It is nice to know your opinion. Leave a comment.