










Crackling Paint Technique: A Complete Guide to Achieving Beautiful Distressed Finishes
What Is the Crackling Paint Technique?
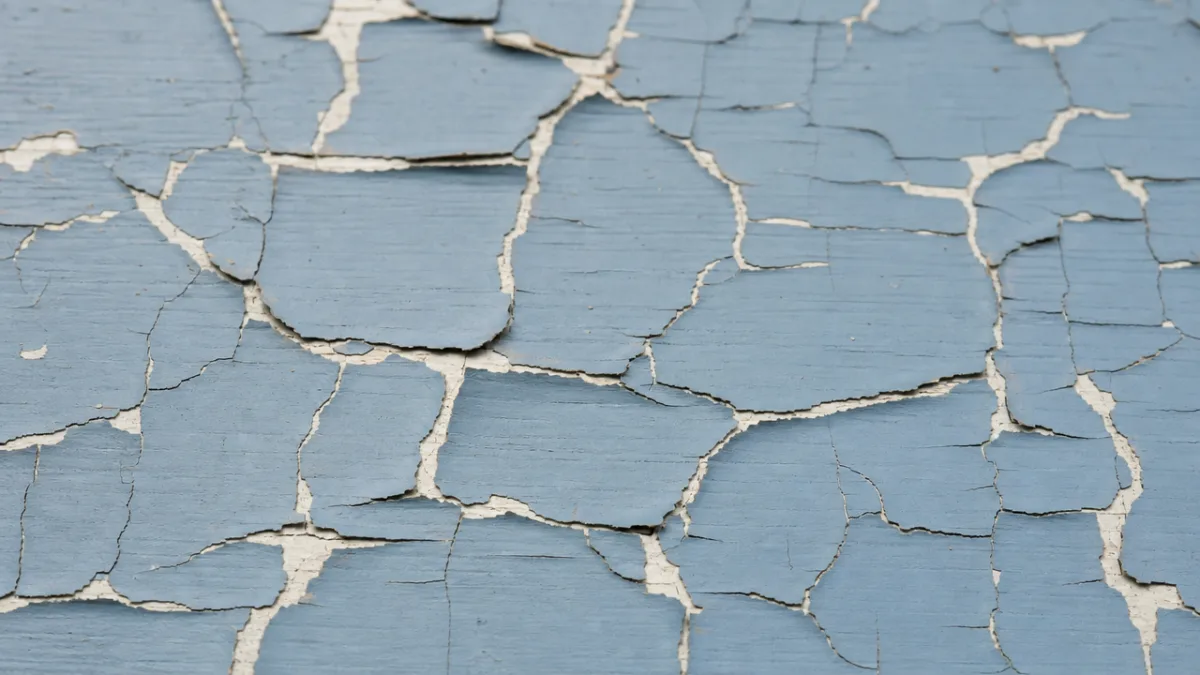
The crackling paint technique is a decorative finishing method that creates an aged, distressed appearance on surfaces by causing the topcoat of paint to crack and split, revealing a contrasting color underneath. This effect mimics the natural weathering and aging that occurs on antique furniture, vintage signs, and old wooden structures over decades of exposure to the elements. Artisans and DIY enthusiasts alike have embraced this technique as a way to add character, depth, and a sense of history to otherwise ordinary objects and surfaces.
At its core, the crackle effect is achieved through a tension between two layers of paint that have incompatible drying properties. A crackle medium, also known as crackle glaze or crackling varnish, is applied between a base coat and a topcoat of paint. As the topcoat dries, it adheres to the sticky crackle medium unevenly, causing it to pull apart and form irregular fissures that expose the base coat beneath. The size and pattern of the cracks can be controlled by adjusting the thickness of the crackle medium and topcoat layers.
This technique has roots in ancient decorative arts and was historically used in Asian lacquerware and European furniture painting. Today, it remains a popular choice for home decorators, furniture restorers, and craft artists who want to add a rustic, farmhouse, or vintage aesthetic to their projects. The beauty of the crackling technique lies in its unpredictability — no two crackled surfaces will ever look exactly alike, making each finished piece a truly one-of-a-kind creation.
The History and Cultural Significance of Crackle Finishes
Crackle finishes have a remarkably rich history that spans multiple continents and centuries. In ancient China, potters and lacquer artists discovered that certain glazes would crack beautifully during the firing process, creating a decorative pattern known as “crazing.” These crackled ceramics became highly prized collector’s items and were even intentionally replicated by later artisans who recognized the aesthetic value of controlled imperfection. This Eastern influence eventually traveled to Europe through trade routes, inspiring Western craftspeople to incorporate similar effects into their own decorative traditions.
During the Renaissance and Baroque periods in Europe, painted furniture and decorative objects became status symbols among the wealthy, and craftsmen developed increasingly sophisticated techniques for creating aged or antique-looking finishes. The practice of artificially aging furniture and decor, known broadly as distressing, became a respected trade skill. Crackle finishes were a particularly valued tool in this arsenal, as they could transform a newly made piece into something that appeared to have centuries of history behind it, satisfying the aristocratic appetite for objects with a sense of heritage and provenance.
In the modern era, the crackling technique experienced a significant revival during the late twentieth century farmhouse and shabby chic design movements. Designers and home decorators rediscovered the timeless appeal of distressed surfaces, and craft supply manufacturers responded by developing easy-to-use crackle mediums that made the technique accessible to hobbyists without specialized training. Today, the crackle finish appears across a wide range of applications, from furniture and home accessories to fine art canvases and mixed-media projects, proving that its appeal is as enduring as the aged aesthetic it creates.
Materials and Tools You Will Need
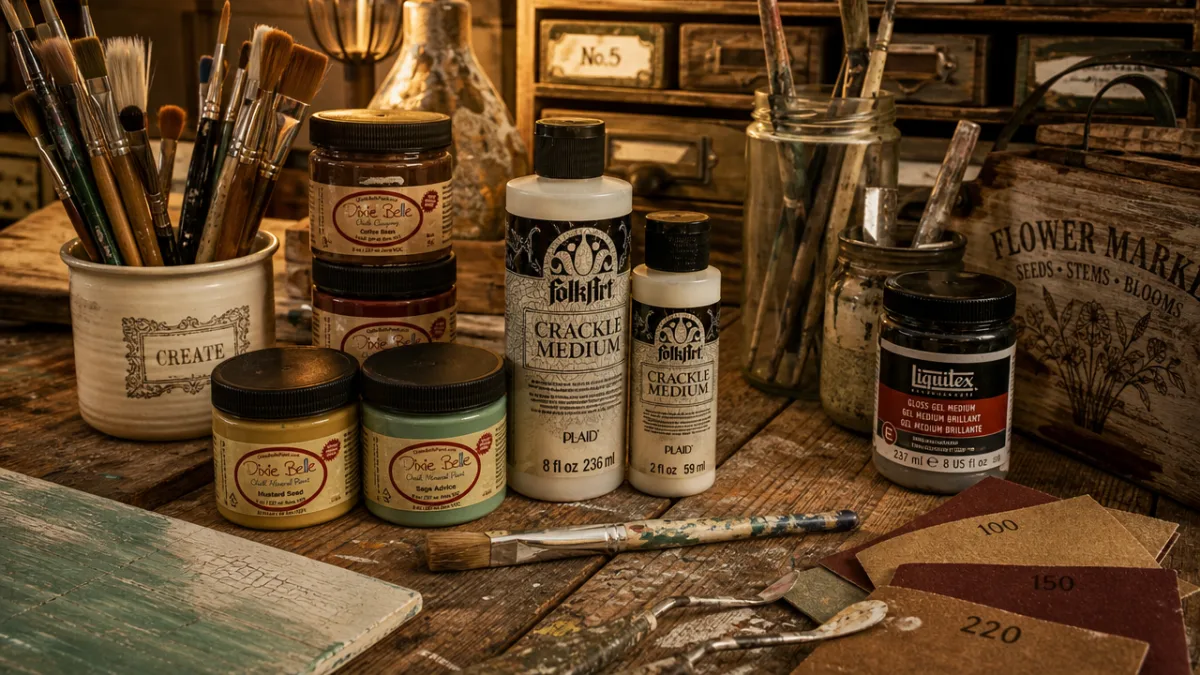
Before beginning any crackling project, it is essential to gather all the necessary materials to ensure a smooth and successful process. The most critical supply is a high-quality crackle medium, which is available at most craft and hardware stores in both water-based and oil-based formulas. Water-based crackle mediums are generally easier to work with, dry faster, and clean up with soap and water, making them the preferred choice for beginners. Oil-based versions tend to produce more dramatic, larger cracks and are better suited for experienced painters who need a more pronounced effect.
In addition to the crackle medium, you will need two paint colors — one for the base coat and one for the topcoat. The contrast between these two colors is what makes the finished crackle effect visually striking, so it is important to choose shades that complement each other while still offering enough differentiation to make the cracks visible. Classic combinations include white over black, cream over navy, gray over terracotta, and turquoise over brown. Latex or acrylic paints work best with water-based crackle mediums and offer a wide range of color options at an accessible price point.
Beyond paint and crackle medium, you will need a selection of brushes, rollers, or sponges for application, as well as sandpaper in various grits for surface preparation. A clean, lint-free cloth is helpful for blending and softening effects, and painter’s tape is useful for protecting areas you do not want to crackle. Optional materials include a clear sealer or varnish for protecting the finished surface, fine-grit steel wool for subtle distressing effects, and a palette or container for mixing and loading your brush with the correct amount of product.
Choosing the Right Surface for Crackling
The crackling technique can be applied to a wide variety of surfaces, but some substrates work better than others, and proper preparation is key to achieving professional-looking results. Wood is perhaps the most popular and forgiving surface for crackle finishes, as it readily accepts both primer and paint and provides a stable base for the crackle medium to adhere to. Raw wood should always be sanded smooth and primed before applying any paint layers, while previously painted or finished wood pieces may need to be lightly sanded to create enough tooth for the new layers to bond properly.
Other suitable surfaces include MDF, canvas, terracotta, ceramic, and certain types of metal or plastic that have been properly primed. Smooth, non-porous surfaces like glass or glossy ceramics require special adhesion primers before the crackling process can begin. It is worth noting that highly flexible surfaces such as fabric or thin plastic are generally not suitable for this technique, as the rigid crackle medium and paint layers are likely to flake or peel as the material bends. Always consider the intended use and durability requirements of your project when selecting a surface.
Surface preparation is often the most overlooked step in the crackling process, yet it has a profound impact on the final result. A clean, smooth, properly primed surface allows each subsequent layer to adhere evenly and dry consistently, which leads to a more uniform and controlled crackle pattern. Conversely, a dusty, greasy, or poorly primed surface can cause the crackle medium or paint to bead up, peel, or fail to crack in a pleasing pattern. Taking the time to properly clean, sand, and prime your chosen surface before you begin is an investment that will pay off significantly in the quality of your finished piece.
Step-by-Step Application Process
The crackling technique follows a straightforward sequence of steps, but success depends on careful attention to timing, layering, and application method at each stage. Begin by applying your base coat — the color that will show through the cracks — in a thin, even layer over your prepared surface. Allow this base coat to dry completely and thoroughly before moving on to the next step. Rushing this stage is one of the most common mistakes beginners make, as an insufficiently dry base coat can interfere with the chemical reaction that causes the topcoat to crackle properly.
Once the base coat is fully dry, apply the crackle medium in a smooth, even layer using a brush or roller. The thickness of this layer is crucial: a thin coat of crackle medium will produce small, fine cracks, while a thick coat will create larger, more dramatic fissures. For most decorative projects, a medium thickness of approximately two to three millimeters works well, but you can experiment with varying thicknesses in different areas to create a more organic, naturalistic crackle pattern. Apply the crackle medium in a single direction without going back over areas you have already covered, as brushing over wet crackle medium can disturb its surface and create uneven results.
After the crackle medium has dried to a tacky consistency — typically between fifteen minutes and one hour depending on the product and ambient conditions — apply the topcoat in a single, confident stroke per area. This is the most critical step in the entire process: the topcoat must be applied quickly and without going back over areas that have already been painted, because the crackle medium begins reacting the moment it contacts the wet topcoat. Brushing over the same area multiple times will tear the topcoat and disrupt the crack formation. Work in sections if necessary, maintaining a wet edge to avoid visible seams between areas.
Common Variations and Advanced Techniques
Once you have mastered the basic crackling technique, there are numerous variations and advanced approaches that can expand your creative possibilities. One popular variation involves applying multiple layers of crackle medium and paint to create a more complex, multi-dimensional effect with cracks revealing several different colors in succession. This layered approach requires careful planning of your color palette and thorough drying time between each stage, but the results can be stunning, resembling layers of old paint that have accumulated over many decades of repainting.
Another advanced technique involves using different tools to apply the crackle medium, such as a palette knife, a sponge, or even crumpled plastic wrap, to create more textural and irregular crack patterns. A palette knife applied in rough, expressive strokes will create deeply textured ridges and valleys that crackle in an organic, almost geological pattern, while a sponge application produces a more random, allover texture with smaller, more evenly distributed cracks. These tool-based variations can add an extra dimension of visual interest and help you tailor the crackle effect to the specific aesthetic goals of your project.
Heat guns and hair dryers can also be used to accelerate and influence the crackling process, causing the topcoat to dry more rapidly and producing more dramatic, pronounced cracks. Directing concentrated heat at a specific area while the topcoat is still wet will cause the paint to crack more quickly and intensely in that zone, which can be used to create focal points or areas of emphasis within the overall design. However, this technique requires a practiced hand, as too much heat applied too quickly can cause the paint to blister or peel rather than crack in a controlled, decorative manner.
Creative Project Ideas Using the Crackling Technique
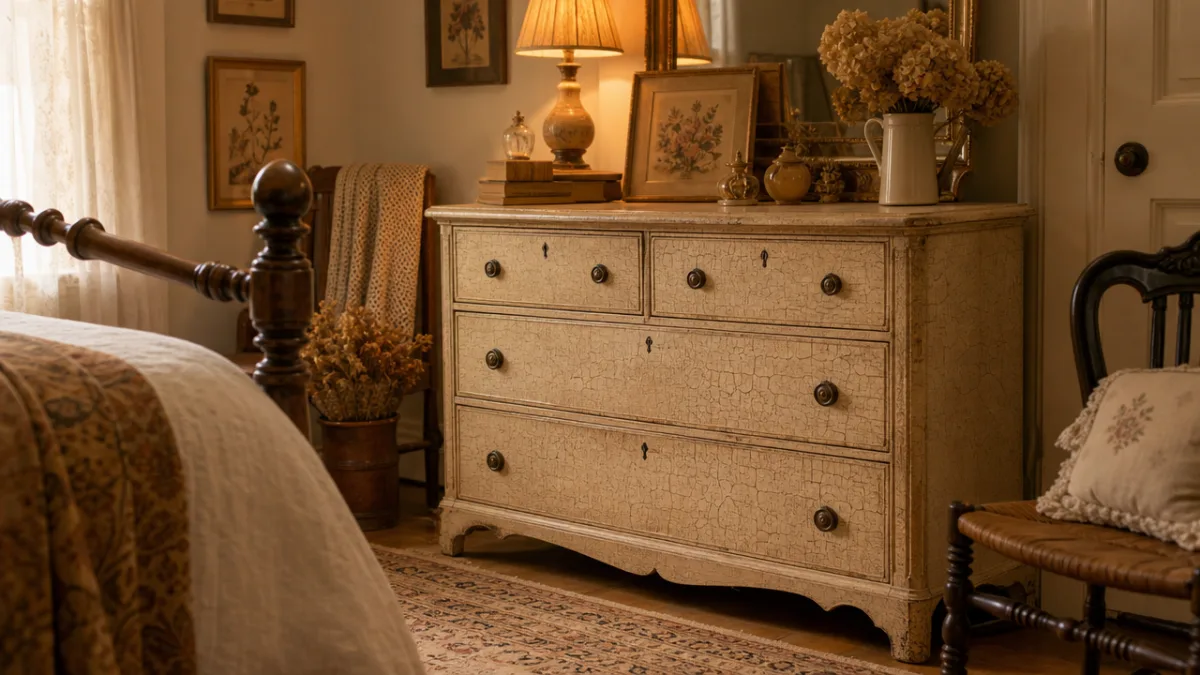
The crackling technique lends itself to an enormous range of creative projects, from small decorative accents to large statement furniture pieces. One of the most popular applications is transforming outdated or thrift-store furniture into charming farmhouse or shabby chic statement pieces. Dressers, side tables, chairs, and picture frames all respond beautifully to the crackling technique and can be completely reinvented for a fraction of the cost of purchasing new vintage-style furniture. The combination of a thoughtfully chosen color palette and a carefully applied crackle finish can elevate even the most unremarkable piece of flat-pack furniture into something with genuine character and appeal.
Home accessories and decorative objects are another wonderful category for crackling projects. Terracotta pots and planters take on a beautiful Mediterranean or Tuscan quality when finished with an earthy crackle effect, while wooden trays, serving boards, and decorative boxes can be given an elegant aged look that makes them feel like treasured heirlooms. Mirrors with wooden or MDF frames are particularly striking candidates for the crackling technique, as the contrast between the aged, textured frame and the clear reflective surface creates a compelling visual interplay that adds sophistication to any room.
For those interested in fine art and mixed media, the crackling technique opens up exciting possibilities on canvas. Abstract paintings can be given an additional dimension of texture and visual complexity through strategic application of crackle medium, and the unpredictable patterns of the cracks can inspire entirely new compositional directions. Some artists intentionally incorporate crackle effects into representational works to suggest the passage of time or the weathering of surfaces within the subject matter itself, using the physical texture of the artwork to reinforce its thematic content in a deeply integrated way.
Inspiring Project Ideas at a Glance
- Furniture makeovers: Dressers, nightstands, dining chairs, wooden bed frames, and coffee tables are all excellent candidates for full or partial crackle finishes that add vintage character and visual warmth.
- Wall art and canvases: Abstract or mixed-media artworks on canvas or wooden panels can be enhanced with crackle textures that add depth, history, and tactile interest to the finished piece.
- Home accessories: Decorative trays, wooden boxes, photo frames, vases, and lamp bases can all be personalized and elevated with the crackling technique.
- Garden and outdoor decor: Terracotta pots, wooden planters, birdhouses, and garden signs take on a charming rustic quality when finished with weather-resistant crackle paint products designed for outdoor use.
- Holiday and seasonal decorations: Wooden ornaments, festive signs, wreaths with wooden elements, and seasonal centerpiece accessories can all be given an heirloom quality through crackle finishing.
Sealing, Protecting, and Troubleshooting Your Crackle Finish
Once you have achieved the crackle effect you are looking for, it is essential to protect it with a clear sealer or varnish to ensure the longevity of your work. Unprotected crackle finishes, particularly on surfaces that will receive regular handling or exposure to moisture, are vulnerable to chipping, peeling, and further unintended deterioration. A water-based polyurethane varnish or a dedicated furniture wax applied in thin, even coats will seal the surface while preserving the delicate texture and visual character of the crackle effect. For outdoor projects, look for exterior-grade sealers that offer UV protection and resistance to moisture and temperature fluctuations.
Troubleshooting is an important skill for anyone practicing the crackling technique, as several common issues can arise during the process. If the topcoat fails to crack at all, the most likely cause is that the crackle medium was either fully dry rather than tacky when the topcoat was applied, or that the topcoat was applied too thinly. If the cracks are too small or uniform, try applying the crackle medium more thickly on your next attempt, or experiment with a different brand of crackle medium that is formulated to produce larger, more dramatic cracks. If the topcoat is peeling rather than cracking, reduce the thickness of the topcoat layer and allow the crackle medium a bit more time to reach the ideal tacky consistency before painting over it.
Another common issue is visible brush strokes in the finished topcoat, which can compete visually with the crackle pattern and give the piece an uneven, unfinished appearance. To minimize brush stroke visibility, use a wide, flat brush or a foam roller for topcoat application and load it generously with paint so that you can cover each section in a single, fluid stroke. If brush strokes are still visible after the piece has dried, a very light sanding with fine-grit sandpaper followed by a fresh coat of a clear sealer can help smooth the surface and integrate the texture into a more cohesive overall finish.
Tips for Consistent and Repeatable Results
Achieving consistent results with the crackling technique requires developing a reliable system and keeping detailed notes about the products, thicknesses, and timing that work best for your specific combination of materials and environmental conditions. Humidity, temperature, and air circulation all affect the drying rate of both the crackle medium and the topcoat, which in turn influences the size, distribution, and character of the cracks. Experienced crackling artists often keep a practice journal or sample boards where they test different product combinations and environmental conditions before committing to a final piece.
Working in a controlled environment whenever possible will help you achieve more predictable results. Avoid working on crackling projects on very humid days, as excess moisture in the air slows the drying process and can prevent the topcoat from cracking properly. Similarly, extremely dry or hot conditions can cause the crackle medium to dry too quickly, leaving insufficient time for you to apply the topcoat before the window of ideal tackiness has passed. An indoor workspace with moderate temperature and humidity, good ventilation, and consistent lighting conditions is ideal for mastering this technique and building the intuitive understanding needed to adapt to variations in products and conditions.
Practice is ultimately the most valuable tool in the crackling artist’s toolkit. Each project teaches you something new about how different products interact, how varying application pressures and speeds affect the final result, and how to read the surface during the process to know when to proceed to the next step. Embrace the experimental nature of the technique and approach each project as an opportunity to deepen your understanding and refine your skills. The crackling technique rewards patience, observation, and a willingness to learn from both successes and imperfect results equally, making the journey of mastering it as rewarding as the beautiful, characterful finishes it produces.








What do you think?
It is nice to know your opinion. Leave a comment.