










Alcohol Ink Pillar Candles: A Complete Guide to Creating Stunning Marbled Masterpieces
Introduction to Alcohol Ink Candle Art
Alcohol ink pillar candles have taken the crafting world by storm, transforming ordinary wax cylinders into breathtaking works of art that double as functional home décor. Unlike traditional candle-making techniques that focus solely on color uniformity, alcohol ink methods embrace the unpredictable, fluid nature of the medium, resulting in swirling, marbled patterns that are entirely unique to each candle you create. The organic flow of alcohol inks produces effects that no two artists can replicate exactly, making every finished piece a one-of-a-kind treasure worthy of display or gifting.
The beauty of this craft lies in its accessibility. Whether you are a seasoned candle maker or a complete beginner picking up a crafting hobby for the first time, alcohol ink candle art welcomes you with relatively few barriers to entry. The supplies required are straightforward, the technique can be learned quickly, and the results are dramatic enough to impress even the most discerning eye. Within a single afternoon, you can produce candles that look as though they were purchased from a high-end boutique, complete with vibrant hues and luxurious marbled finishes that catch the light beautifully.
Beyond their aesthetic appeal, alcohol ink pillar candles make exceptional gifts for birthdays, housewarmings, weddings, and the holiday season. Because you control every aspect of the design — from color palette to pattern intensity — you can customize each candle to suit the recipient’s taste or the décor scheme of a specific room. This personal touch, combined with the visual drama of the alcohol ink finish, elevates a simple handmade candle into something genuinely special that the recipient will display with pride long after the wick has burned down.
Understanding Your Materials and Supplies
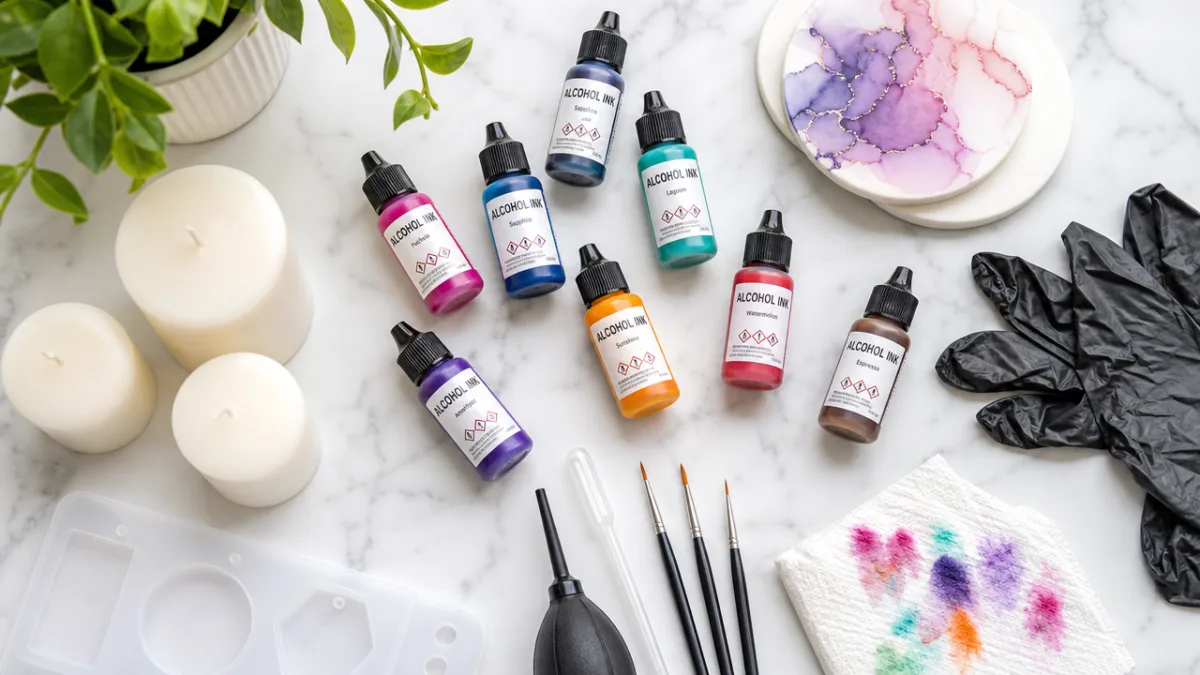
Before you begin your first alcohol ink candle project, gathering the right materials is essential. At the core of your supply list are plain white or ivory pillar candles, which serve as your canvas. White candles are generally preferred because they allow the alcohol ink colors to appear true and vibrant without interference from an underlying tint. Pillar candles work best for this technique because their flat, vertical surfaces provide ample space for the inks to flow, pool, and blend, creating the wide sweeping patterns that make this art form so visually captivating.
Alcohol inks themselves are the stars of the show. Brands such as Ranger Adirondack, Jacquard Piñata, and Tim Holtz are widely celebrated among crafters for their rich pigmentation, fast-drying formula, and wide color ranges. These inks are transparent, alcohol-based dyes that move fluidly when applied to a surface, blending with one another in ways that mimic watercolor while maintaining a more intense, jewel-like saturation. You will also need isopropyl alcohol at 91% concentration or higher, which acts as a blending agent to push the inks across the candle surface and create those signature feathered, flowing effects.
Additional supplies include disposable gloves to protect your hands from staining, a protected work surface such as a silicone mat or parchment-covered table, a heat gun or straw for manipulating ink flow, and paper towels for quick cleanups. Some crafters also keep a small palette of cotton swabs, pipettes, and fine-tipped applicator bottles on hand to give them greater control over where and how ink is deposited. Having all of these tools organized and within reach before you begin will make the creative process more fluid, allowing you to respond quickly to the ink as it moves and adapt your technique in real time.
- Plain white or ivory pillar candles in your preferred size
- Alcohol inks in two to five coordinating colors
- 91% or higher isopropyl alcohol in a small spray bottle
- Disposable gloves and a protected work surface
- Heat gun or drinking straw for directing ink flow
- Cotton swabs, pipettes, or fine-tipped applicator bottles
- Paper towels and a sealed waste bag for cleanup
Preparing Your Workspace and Candles
Proper preparation is the unsung hero of successful alcohol ink candle projects. Begin by setting up your workspace in a well-ventilated area, as alcohol inks contain solvents that release fumes during application and drying. Open windows, run a fan directed away from your work surface, or work outdoors on a calm day if possible. Lay down several layers of protective covering on your table — old newspapers, a plastic drop cloth, or a dedicated craft mat — because alcohol ink is notorious for seeping through light barriers and staining surfaces permanently. Trust the experienced crafters who learned this lesson the hard way and protect generously.
Before touching a single drop of ink to your candle, wipe each candle’s exterior surface with a cotton ball dampened in a small amount of isopropyl alcohol. This step removes any dust, fingerprints, or manufacturing residue that could interfere with ink adhesion and create unwanted bare spots in your final design. Allow the candles to dry completely after this cleaning step, which typically takes only a minute or two given alcohol’s fast evaporation rate. Some artists also lightly warm the candle surface with a heat gun at this stage, believing that a very slightly warm wax surface accepts ink more readily and allows for smoother blending.
Consider the orientation and positioning of your candle during the inking process as well. Many crafters prefer to lay the candle horizontally on a cradle made from two parallel rolls of tape or dowels, which allows them to rotate the candle slowly as they apply ink, ensuring even coverage around the entire circumference. Others prefer to stand the candle upright and work in vertical sections, allowing gravity to pull the ink downward in dramatic drips and streaks. Both approaches yield beautiful results — the key is to decide on your method before you begin so that your movements during the application process are deliberate and controlled rather than reactive and rushed.
Techniques for Applying Alcohol Ink
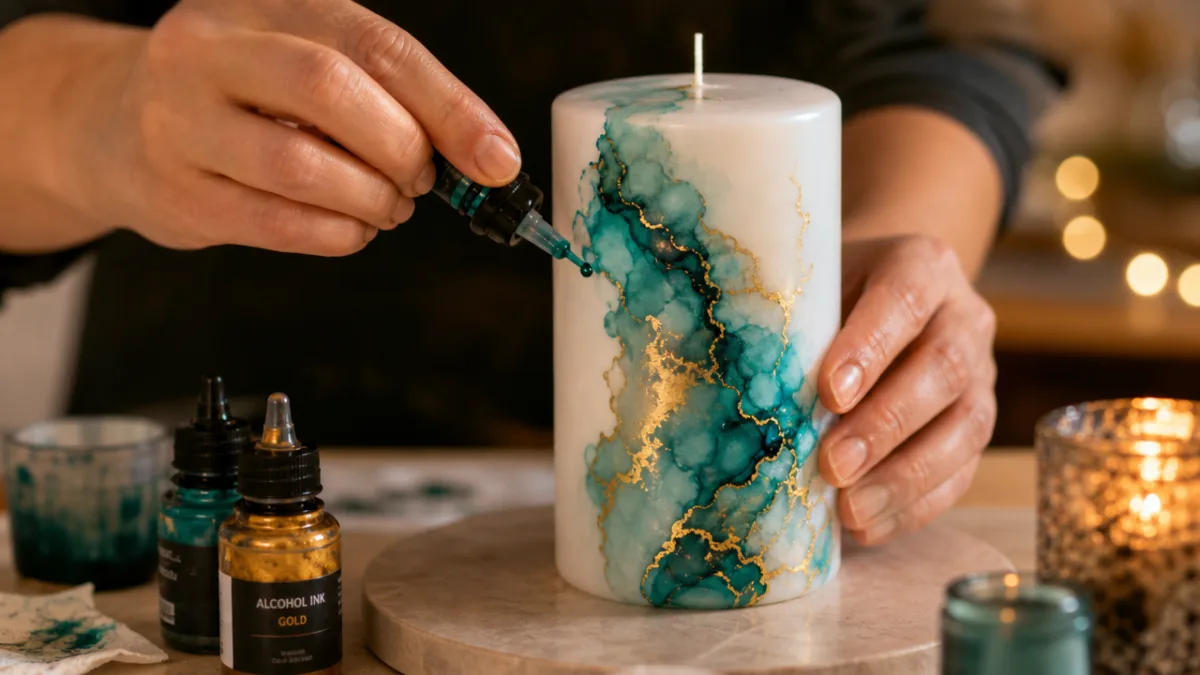
The application stage is where the real magic happens, and there are several distinct techniques you can employ depending on the aesthetic you are after. The most popular method among beginners is the drip and swipe technique: simply drop small amounts of alcohol ink directly from the bottle or a pipette onto the candle surface, then use a straw to blow the ink gently in the direction you want it to flow. This creates long, feathery streaks and organic spreading patterns that mimic geological formations like agate or malachite. Layering multiple colors using this approach results in depth and complexity that looks far more advanced than the technique actually requires.
For a more controlled marbled effect, try the wrap technique. Begin by applying several drops of two to three colors onto a piece of plastic wrap, then quickly and loosely crumple the wrap and press it against the candle surface, rolling it gently as you go. When you peel the plastic away, it leaves behind an intricate, textured pattern with blended color transitions and subtle texture variations. This method produces a more uniform coverage than the drip technique and is particularly effective when you want a consistent all-over pattern rather than a design concentrated in one area of the candle.
Isopropyl alcohol sprayed lightly over freshly applied ink can dramatically alter the outcome of your design. A fine mist of alcohol pushed through a small spray bottle causes the ink to spread rapidly outward from the point of contact, creating starbursts and halos of lighter color amid the denser pigment. The more alcohol you apply, the more the ink dilutes and spreads, so practice this on a scrap surface first to understand how much pressure and distance from the candle produces the effect you want. Combining the spray technique with the drip-and-blow method in successive layers builds astonishing complexity into the final pattern.
- Drip and Blow: Drop ink onto the surface and use a straw or heat gun to direct its flow in sweeping streaks.
- Plastic Wrap Transfer: Pool inks on plastic wrap, crumple it, and press it to the candle for organic texture.
- Alcohol Spray: Mist isopropyl alcohol over wet ink to create starburst dilution patterns.
- Cotton Swab Detailing: Use a swab dipped in ink to add fine lines, dots, or precise color accents.
- Layered Dripping: Allow one layer to dry before adding another to build up dimensional depth.
Color Theory and Palette Selection
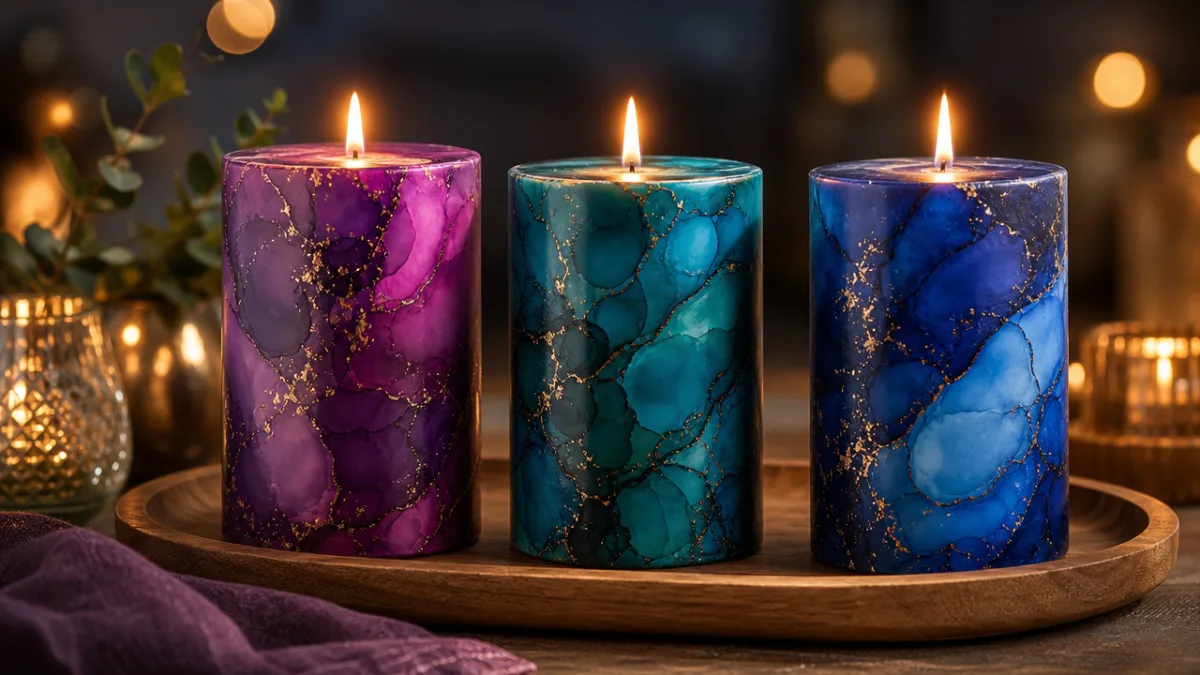
Choosing a harmonious color palette is one of the most impactful decisions you will make in the candle-making process, and a basic understanding of color theory can dramatically elevate your results. Analogous color schemes — those that group colors adjacent to one another on the color wheel, such as teal, blue, and violet — create a serene, cohesive effect that reads as sophisticated and calming. These palettes are particularly well-suited to candles intended for bathrooms, bedrooms, or meditation spaces where tranquility is the desired mood. Because alcohol inks blend naturally where they meet, analogous colors merge gracefully without creating muddy transitions.
Complementary color schemes, which pair colors from opposite sides of the color wheel such as cobalt blue with burnt orange or magenta with lime green, produce high-contrast, vibrant results that are visually arresting and modern. These combinations work beautifully for statement pieces meant to draw the eye in a living room or entryway. However, because complementary colors can quickly turn brown or grey where they overlap heavily, the key is to allow them to meet at their edges without over-blending, preserving the integrity of each hue while still creating dynamic interaction between them on the candle surface.
Metallic alcohol inks deserve special mention in any discussion of palette selection for candle art. Gold, silver, copper, and rose gold inks add an entirely different dimension to the finished piece, catching the ambient light and flickering warmly when the candle is lit. Pairing a jewel-toned palette of sapphire, emerald, and amethyst with gold accents, for example, creates a lush, Byzantine richness that looks extraordinary in the glow of candlelight. Alternatively, silver and white inks against a soft grey or blush base produce a cool, ethereal quality reminiscent of winter frost or moonlit water — endlessly elegant for gift-giving or seasonal décor.
Sealing and Finishing Your Candles
Once your alcohol ink design is complete and fully dry — which typically takes anywhere from fifteen minutes to an hour depending on how heavily the ink was applied — the question of sealing arises. This is a topic that generates genuine debate in the candle-crafting community. On the one hand, applying a clear sealant can protect the ink from scratching and smudging during handling, storage, and shipping, which is particularly important if you plan to sell or gift your candles. On the other hand, many commonly used spray sealants are not rated as candle-safe and could release toxic fumes when burned, which is a non-negotiable safety concern.
The safest approach for candles that will actually be burned is to skip the sealant entirely and focus instead on proper handling and storage to minimize damage to the ink surface. Store finished candles in a cool, dry place away from direct sunlight, which can fade alcohol ink colors over time. Wrap them loosely in tissue paper rather than cling wrap, which can sometimes lift the ink from the wax surface if pressed too tightly. If you do choose to apply a sealant — perhaps because the candles are purely decorative and will never be lit — look specifically for products labeled as non-toxic and fully safe when burned, and always test thoroughly before using on a candle intended for another person.
Finishing touches can also include embellishments that complement the alcohol ink design. Thin ribbons of metallic twine or satin ribbon tied around the base of the candle add a gift-ready elegance without obscuring the artwork. Dried botanicals such as small sprigs of lavender, eucalyptus, or pressed flowers can be carefully pressed into the wax surface before it fully cools for a naturalistic, artisanal quality. Crystal accents, charms, or wax seals stamped onto the base add personality and intention. Each of these finishing details should feel like a natural extension of the color palette and mood established by the ink design rather than an afterthought.
Troubleshooting Common Problems
Even experienced crafters encounter challenges with alcohol ink candle projects, and understanding the most common pitfalls can save you significant frustration. One of the most frequent issues beginners face is ink beading or refusing to adhere smoothly to the candle surface. This is almost always caused by residue on the wax — oils from fingertips, dust, or manufacturing coatings that repel the alcohol-based ink. The solution is simple: always wipe candles with isopropyl alcohol before beginning, and handle them with gloves throughout the process to prevent skin oils from transferring to the surface.
Color muddiness is another common complaint, particularly among crafters who are enthusiastic about layering many colors without allowing sufficient drying time between applications. When wet inks of many colors are pushed together repeatedly, they eventually blend into an indistinct brownish or greyish tone that lacks the vibrancy that makes alcohol ink art so appealing. The remedy is restraint: limit your palette to two to four colors per candle, allow each layer to dry before adding the next, and resist the urge to overwork an area that already looks beautiful. Sometimes stepping away and letting the ink do its own thing produces far more stunning results than constant intervention.
Uneven coverage or blank patches on the candle can be addressed by going back in with a small pipette or cotton swab and carefully depositing additional ink into the bare areas, then blending the edges gently with a straw or the tip of a finger. Drips that run farther than intended can sometimes be redirected with a heat gun on its lowest setting, which slightly softens the wax and allows you to encourage the ink in a new direction — though this requires a very gentle touch to avoid damaging the surrounding design. Above all, embrace the organic, imperfect nature of alcohol ink art; the medium rewards spontaneity and acceptance, and what initially looks like a mistake often becomes the most interesting part of the finished piece.
Displaying and Gifting Your Creations
The final reward of your creative effort is seeing your alcohol ink pillar candles displayed beautifully in a living space or unwrapped with delight by a grateful recipient. When displaying candles in your own home, consider grouping them in odd numbers — threes and fives — at varying heights for a visually dynamic arrangement. Placing them on a mirrored tray amplifies the visual effect of the marbled ink patterns by reflecting the colors and light back upward. A cluster of alcohol ink candles in a coordinating palette arranged on a fireplace mantle, coffee table, or bathroom counter instantly elevates the entire space with artistic intention.
For gifting, presentation matters as much as the candle itself. A simple kraft paper box lined with shredded tissue in a complementary color provides a clean, artisanal backdrop that lets the candle’s colors speak for themselves. Adding a handwritten tag that includes the approximate burn time, any fragrance notes if the candle is scented, and a brief note about the alcohol ink technique personalizes the gift and gives the recipient context for the unique finish they’re admiring. Many recipients are so charmed by the artistry involved that they choose to display the candle without ever burning it, which is the highest compliment a candle maker can receive.
If your hobby grows into a small creative business, alcohol ink pillar candles photograph exceptionally well and perform strongly on visual platforms such as Pinterest, Instagram, and Etsy. Their dramatic colors and intricate patterns catch the eye as a person scrolls, and the handmade, one-of-a-kind nature of each piece appeals powerfully to buyers who are looking for something beyond mass-produced retail options. Investing time in beautiful product photography — natural light, clean backgrounds, and thoughtful styling with complementary props — will translate your craft skills into compelling content that attracts an audience and builds a loyal customer base enthusiastic about your next collection.








What do you think?
It is nice to know your opinion. Leave a comment.