










How To Blend Candle Colours With Liquid Dye: A Complete Guide
Introduction to Liquid Candle Dye
Liquid candle dye is one of the most versatile and beginner-friendly colouring options available to candle makers today. Unlike dye chips or blocks, liquid dye blends seamlessly into melted wax with minimal effort, giving you precise control over the intensity and tone of your final colour. Whether you are crafting a soft pastel for a spring collection or a deep, jewel-toned candle for autumn, liquid dye opens up a world of creative possibilities that solid dyes simply cannot match with the same ease.
Understanding how liquid dyes behave in different wax types is essential before you begin blending colours. Soy wax, paraffin, and coconut wax each interact with dye slightly differently due to their varying chemical compositions and melting points. Soy wax, for example, tends to produce slightly muted tones compared to paraffin, which yields brighter, more saturated results. Knowing your base wax will help you predict how your blended colours will appear once the candle has fully cured and cooled, preventing unwanted surprises.
One of the greatest advantages of working with liquid dye is the ability to mix colours directly in your pouring pot before adding fragrance. This means you can experiment freely, adjust your blend on the fly, and replicate results more consistently from batch to batch. Keeping a dedicated notebook for recording your dye ratios is strongly recommended, as even small variations in the number of drops used can dramatically shift the final appearance of your candle. A methodical approach from the very beginning will save you both time and materials in the long run.
Essential Tools and Safety Precautions
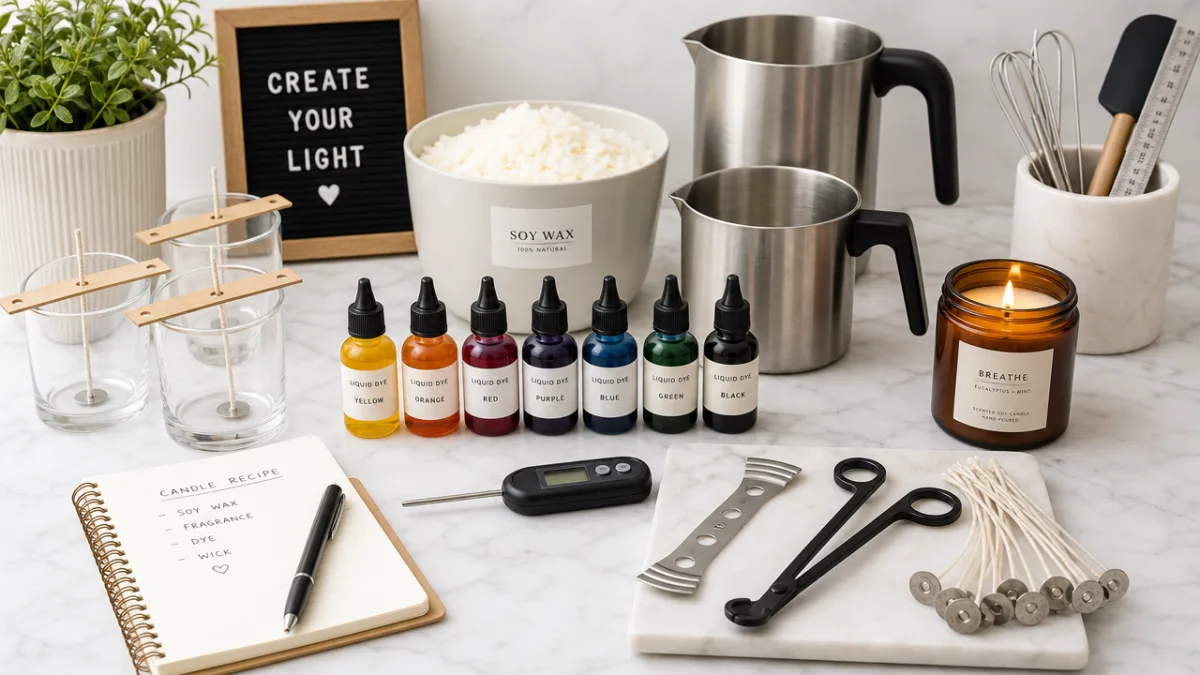
Before you begin blending candle colours with liquid dye, assembling the right tools is critical to a smooth and safe crafting experience. You will need a dedicated pouring pot or heat-resistant pitcher, a reliable thermometer, and a set of measuring spoons or a precision dropper for accurate dye measurement. Stainless steel or silicone tools are ideal because liquid dye can permanently stain porous materials and is notoriously difficult to remove from equipment once it has set. Keeping a dedicated set of tools solely for dyeing will protect your other candle-making supplies.
Safety should always be your first priority when working with liquid candle dyes and hot wax. Most liquid dyes are synthetic and contain chemical compounds that should not be inhaled in large quantities, so working in a well-ventilated area or using a small fan to circulate air is highly advisable. Always wear heat-resistant gloves when handling your pouring pot, and consider wearing an apron or old clothing, as liquid dye stains are almost impossible to remove from fabric. Having paper towels and rubbing alcohol close at hand will make cleanup significantly easier if a spill occurs.
You should also have a selection of small test containers ready before committing to a full batch. Pouring tiny tester candles allows you to evaluate your colour blend under different lighting conditions — natural daylight, warm lamplight, and even candlelight itself — before scaling up your production. Colours can look dramatically different in their liquid state compared to when the wax has fully solidified and cooled. This testing phase is not optional; it is a fundamental part of the professional candle-making process and will consistently improve the quality of your finished products.
- Heat-resistant stainless steel or silicone pouring pot
- Precision dropper or calibrated measuring pipettes
- Digital kitchen scale accurate to 0.1 grams
- Thermometer (infrared or clip-on candy thermometer)
- Heat-resistant gloves and protective apron
- Small test moulds or tea light cups for colour sampling
- Dedicated notebook for recording dye ratios and results
- Rubbing alcohol and paper towels for cleanup
Understanding Colour Theory for Candle Making
A solid grasp of basic colour theory will transform your candle blending from guesswork into a genuinely creative and repeatable skill. The traditional colour wheel divides hues into primary colours — red, yellow, and blue — from which all other colours can be theoretically mixed. Secondary colours such as orange, green, and purple are created by combining two primaries in roughly equal proportions, while tertiary colours emerge from mixing a primary with an adjacent secondary. Understanding these relationships gives you a reliable starting point for predicting the outcome of any dye combination before you add a single drop to your wax.
When blending liquid candle dyes, it is important to remember that the concentration of each colour dramatically affects the final result. Adding just one or two extra drops of a dominant hue can completely overpower a more subtle colour in your blend. This is particularly true for very saturated dyes such as deep red or black, which have an extraordinary tinting strength and should always be introduced into a blend gradually and cautiously. Starting with your lighter, weaker colours first and slowly adding the stronger ones gives you far greater control over the blending process and reduces the risk of accidentally creating a muddy or unintended shade.
Complementary colours — those sitting directly opposite each other on the colour wheel, such as blue and orange or red and green — will neutralise and grey out each other when mixed in equal quantities. This is a useful technique for intentionally desaturating or muting a colour that appears too vivid or artificial in your candle. Conversely, analogous colours — those sitting adjacent to each other, such as yellow, yellow-orange, and orange — blend harmoniously and create rich, layered tones that feel natural and sophisticated. Experimenting with both complementary and analogous blends will significantly expand your creative vocabulary as a candle maker.
Neutral colours such as white, cream, and black play an important supporting role in candle colour blending. Adding a small amount of white dye to any colour lightens and softens it toward a pastel tone, which is particularly popular for wedding or spa candle ranges. Black, used sparingly, adds depth and sophistication, helping to produce smokey charcoal shades or to deepen jewel tones like emerald and sapphire. Understanding how neutrals interact with your primary blends gives you an enormous additional range of achievable colours without needing to purchase dozens of individual dye colours.
Step-by-Step Guide to Blending Candle Colours
Begin the blending process by melting your chosen wax to the manufacturer’s recommended temperature, typically between 170°F and 185°F for most paraffin waxes and around 160°F for soy wax. Use a double boiler method by placing your pouring pot inside a larger pot of simmering water to maintain even, gentle heat and reduce the risk of overheating your wax. Never leave melting wax unattended on a direct heat source, and always monitor the temperature with a reliable thermometer throughout the process. Consistent temperature control at this stage sets the foundation for an even and well-distributed colour throughout your finished candle.
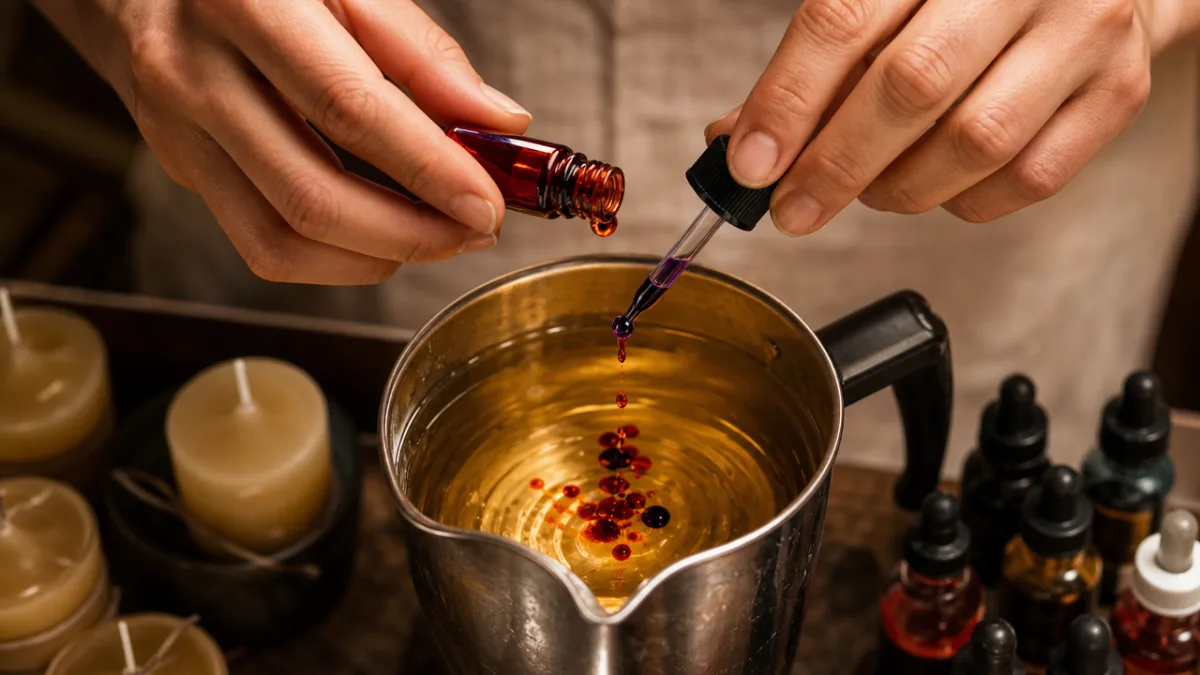
Once your wax has fully melted and reached the correct pouring temperature, you are ready to begin adding your liquid dye. Start by adding your base colour — the dominant hue you want your candle to express — one drop at a time using your precision dropper. Stir slowly and thoroughly after each addition, using a long-handled silicone or stainless steel spoon, and allow the colour to fully distribute before evaluating the depth of tone. It is far easier to darken a colour than to lighten it once the dye has been added, so building up gradually is always the wisest approach regardless of the shade you are aiming to achieve.
After establishing your base colour, begin introducing your secondary or accent dyes one drop at a time to shift the hue in your desired direction. For example, if you are targeting a warm terracotta tone starting from an orange base, you might introduce small amounts of red and a trace of brown or dark yellow to achieve depth and earthiness. Stir thoroughly between each addition and periodically test your colour by drizzling a few drops of dyed wax onto a piece of white paper or a cooled test tile, as this will give you a much more accurate preview of the final cured colour than evaluating the liquid wax itself.
- Melt wax to the correct temperature using a double boiler method.
- Add your primary or base colour dye one drop at a time.
- Stir thoroughly after each addition to ensure even distribution.
- Test colour by drizzling wax onto white paper and allowing it to cool.
- Introduce secondary dyes gradually to shift the hue toward your target colour.
- Adjust intensity by adding more base colour or a neutral dye as needed.
- Add fragrance oil once your colour is confirmed, then pour at the correct temperature.
- Record your exact dye ratios in your notebook before cleaning up.
Adding your fragrance oil should always come after your colour has been confirmed and finalised, as some fragrance oils contain compounds that can slightly alter the appearance of certain dyes, particularly those in the yellow and orange spectrum. Add your fragrance at the temperature recommended by your fragrance supplier, stir gently but thoroughly for at least two full minutes to ensure complete incorporation, and then allow the wax to cool slightly before pouring into your prepared moulds or containers. Pouring at the correct temperature ensures a smooth, even surface finish and helps prevent common candle defects such as sinkholes or rough tops.
Achieving Specific Colour Effects and Techniques
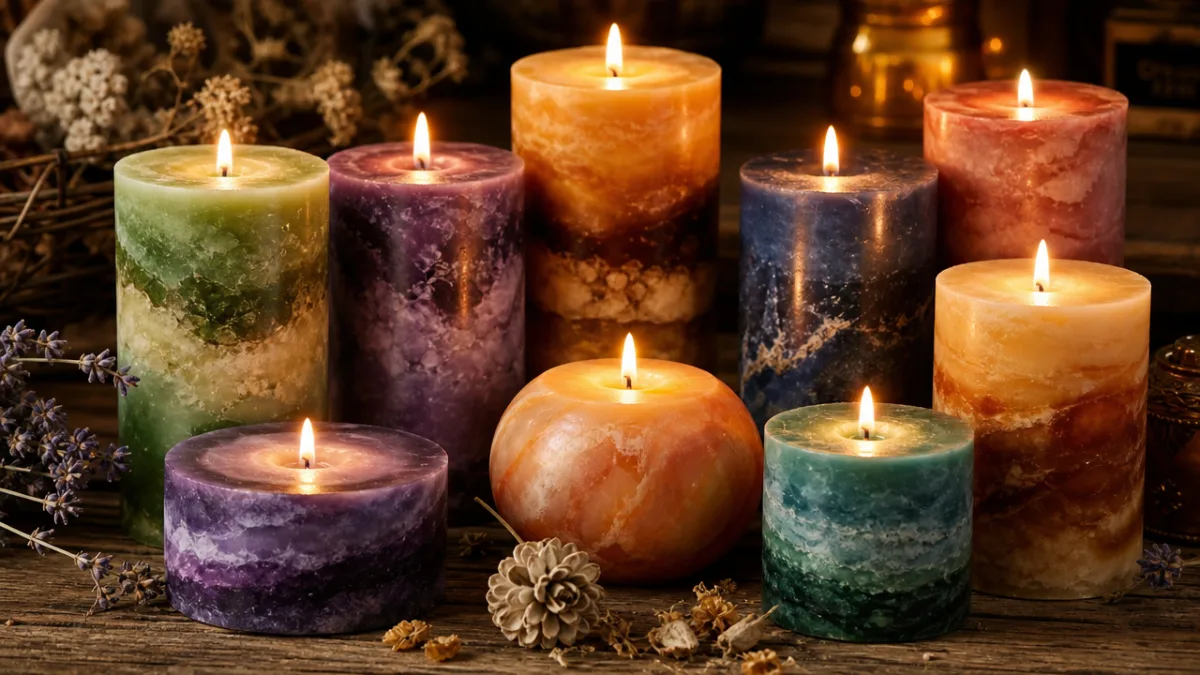
One of the most popular and visually striking candle colour techniques is the layered or ombre effect, which involves pouring different shades of the same hue in successive layers as each previous layer cools and sets. To achieve clean, distinct layers, you will need to allow each poured layer to cool until it forms a firm skin on the surface before carefully pouring the next shade on top. Tilting your container at an angle during the first pour and then straightening it for subsequent pours can create beautiful diagonal layering effects. This technique requires patience but produces stunning results that are impossible to achieve with a single solid colour pour.
Swirl effects are another visually exciting technique that uses liquid dye to dramatic advantage. For swirls, you pour your base colour into the container first and then, before it sets, carefully drizzle one or more contrasting dye colours directly onto the surface of the warm wax. Using a skewer, chopstick, or heat gun on a low setting, you can manipulate these colour streams into organic, flowing patterns before the wax solidifies. The key to beautiful swirls is working quickly and decisively once the wax begins to cool, as the window of workable time is relatively short and the wax firms up faster than many beginners expect.
For those interested in creating a marbled effect, a slightly different approach is required. Marble effects work best in container candles where the dye is introduced in a partially cooled state, creating streaks and veins through the wax as it thickens. By adding undiluted drops of contrasting liquid dye directly to wax that has cooled to around 130°F to 140°F and giving it only one or two slow, gentle stirs, you can preserve the separation between colours and create the distinctive irregular patterning associated with marble. Using colours that contrast strongly — such as deep charcoal with cream white, or cobalt blue with sandy beige — will make the marble effect most visually impactful.
Troubleshooting Common Colour Blending Problems
One of the most frequent issues that new candle makers encounter when blending liquid dye is colour fading after the candle has fully cured. This is often caused by using too little dye relative to the quantity of wax, or by using a wax type that naturally mutes pigment. If your candles consistently appear lighter than expected after cooling, try increasing your dye concentration gradually across successive test batches until you achieve the depth of colour you are looking for. UV stabilisers can also be added to your wax to help preserve colour vibrancy over time, particularly in candles that will be displayed in bright or naturally lit environments.
Uneven or blotchy colour distribution is another common problem, and it is almost always caused by insufficient stirring after adding the dye to the melted wax. Liquid dye needs to be stirred for a full one to two minutes after each addition to fully incorporate into the wax at a molecular level. If you are consistently experiencing patchy results, consider extending your stirring time and also check that your wax temperature has not dropped too low before adding the dye, as cooler wax is thicker and more resistant to even dye distribution. Reheating your wax gently to the correct temperature before adding dye will resolve many distribution issues.
Colour bleeding or migration, where the dye gradually moves through the finished candle over time, is a problem more commonly associated with certain dye types and wax combinations. To minimise migration, always use dyes specifically formulated for candle making rather than general craft or soap dyes, as candle-specific liquid dyes are designed to bind more stably with wax at the molecular level. Keeping your pouring temperature consistent and avoiding over-fragrance loading will also help stabilise your colour results. If migration remains an issue despite these measures, experimenting with a different wax blend or dye brand may ultimately be the most effective solution.
- Colour too light after curing: increase dye concentration gradually across test batches
- Blotchy or uneven colour: extend stirring time and check pouring temperature
- Dye not dissolving: ensure wax is at correct melting temperature before adding dye
- Colour shifting after adding fragrance: test fragrance and dye compatibility in small batches
- Colour fading over time: add a UV stabiliser to your wax formula
- Muddy or grey tones: avoid mixing complementary colours in equal quantities
Recording, Replicating, and Scaling Your Colour Blends
Consistency is the hallmark of a professional candle maker, and achieving it across multiple production batches requires meticulous documentation of every colour blend you create. After each successful test batch, record the exact wax weight, the precise number of drops of each dye colour used, the temperature at which the dye was added, and any observations about how the colour developed during cooling and curing. Photographs taken under consistent lighting conditions are an invaluable addition to your records and allow you to visually compare batches at a glance. Building a well-organised colour library in this way will save you enormous amounts of time and frustration as your candle business or hobby grows.
Scaling a colour blend from a small test batch to a larger production pour requires a proportional approach rather than a simple addition of more drops. Because liquid dyes have such high tinting strength, even slight miscalculations in scaling can produce noticeably different results. Converting your drop measurements to percentage-by-weight figures — for example, expressing your dye usage as grams of dye per kilogram of wax — gives you a more mathematically reliable foundation for scaling up. Many experienced candle makers invest in a precision scale that measures to at least 0.01 gram accuracy specifically for this purpose, as it transforms colour replication from an approximate art into a genuinely repeatable science.
When working with a range of colours across a product line, developing a master colour palette with clearly documented blending formulas allows you to maintain visual cohesion across your entire catalogue. Consider organising your palette around a seasonal or thematic structure — for example, a warm autumn range built around amber, rust, and deep plum tones — and develop the blending formulas for each colour within that palette in a single extended working session. This approach not only saves time but ensures that your colours work harmoniously together as a collection, which is particularly important if you are selling your candles commercially or gifting them as coordinated sets.
Finally, do not underestimate the importance of sharing your colour knowledge and continuing to learn from the wider candle-making community. Online forums, candle-making groups on social media, and craft workshops are rich sources of inspiration, troubleshooting advice, and new techniques that can dramatically accelerate your development as a candle colourist. Documenting your own journey — including your failures and unexpected discoveries — contributes to this shared knowledge base and often leads to collaborative creativity that pushes your craft in exciting new directions. The art of blending candle colours with liquid dye is one that genuinely rewards curiosity, patience, and a willingness to experiment without fear of imperfection.








What do you think?
It is nice to know your opinion. Leave a comment.