










Easy Beginner Candle Making Using Soy Wax: A Complete Guide
Why Soy Wax Is the Perfect Choice for Beginner Candle Makers
If you’ve ever thought about making your own candles at home, soy wax is hands down the best place to start. Unlike paraffin wax, which is derived from petroleum, soy wax is a natural, renewable resource made from soybean oil. It burns cleaner, produces significantly less soot, and is biodegradable, making it a far more environmentally conscious choice for the eco-minded crafter. Once you understand what makes soy wax unique, you’ll quickly see why it has become the go-to material for hobbyists and small-batch candle makers across the world.
Beyond its environmental benefits, soy wax is wonderfully forgiving for beginners. It has a lower melting point than paraffin, which means it’s easier and safer to work with at home. It also adheres well to glass containers, which reduces the frustrating problem of sink holes and tunneling that plagues many first-time candle makers working with other wax types. Soy wax is also known for its excellent scent throw, meaning the fragrance it carries fills a room beautifully when the candle is lit, giving you professional-quality results even on your very first attempt.
Another often-overlooked advantage of soy wax is how easy it is to clean up. Because it is water-soluble, any spills or residue on your tools and surfaces can be wiped away with warm, soapy water. This makes the entire candle-making process far less intimidating, especially when you’re still learning the ropes. When you combine all of these qualities — safety, sustainability, scent performance, and ease of cleanup — it becomes clear that soy wax isn’t just a beginner-friendly material; it’s simply an excellent material by any standard.
Essential Supplies You’ll Need Before You Begin
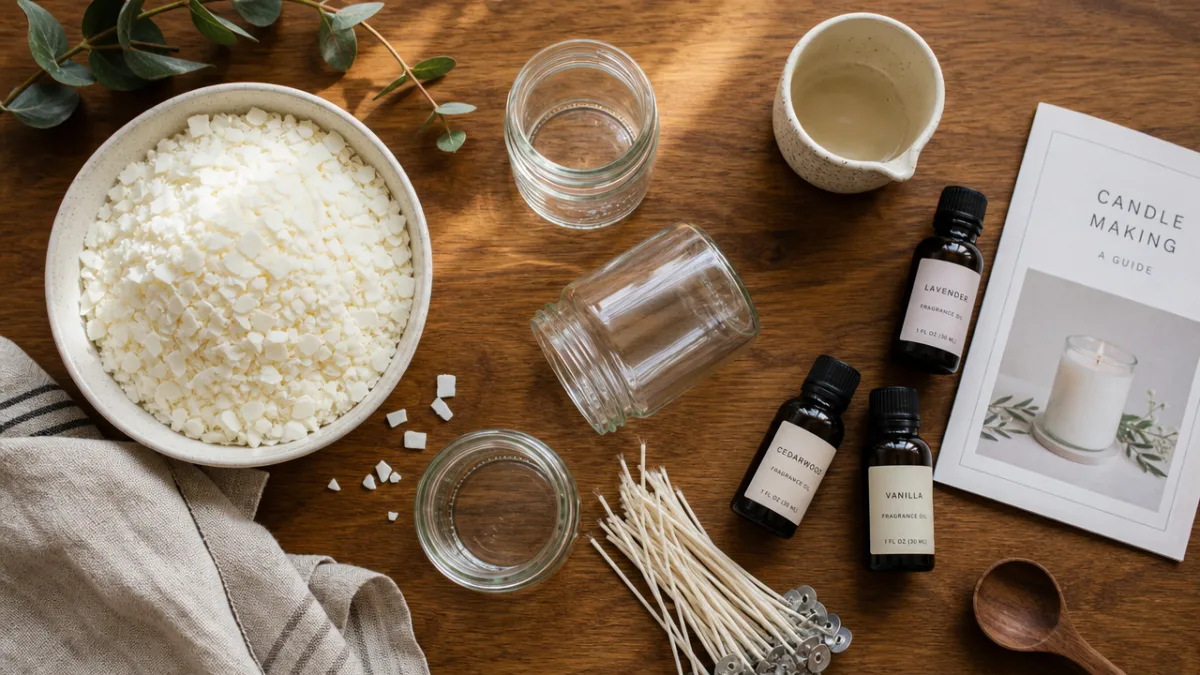
Getting your supplies organized before you start is one of the most important steps toward a successful candle-making session. You don’t need a fully stocked craft studio to get going, but having the right core materials on hand will prevent frustration mid-project. The basic supply list for beginner soy candle making is refreshingly short and affordable, and most items can be sourced from craft stores, online retailers, or even repurposed from your own kitchen. Planning ahead is simply part of the craft.
Here is a list of the essential supplies you will need to get started:
- Soy wax flakes — Look for container-grade soy wax, which is specifically formulated to adhere to glass jars and provide a smooth finish.
- Candle wicks — Pre-tabbed cotton wicks are easiest for beginners; make sure to choose the correct wick size for your container’s diameter.
- Fragrance oil or essential oils — Use skin-safe, candle-grade fragrance oils for the best scent throw and safest burn.
- Glass jars or containers — Mason jars, apothecary jars, and repurposed glassware all work wonderfully.
- A double boiler or heat-safe pouring pitcher — Never melt wax directly on an open burner; a double boiler setup is essential for safety.
- A thermometer — A simple candy or infrared thermometer helps you monitor wax temperature with precision.
- Wick centering tools or chopsticks — These keep your wick perfectly centered while the wax sets.
- A kitchen scale — Measuring by weight rather than volume gives you far more consistent results.
- Candle dye chips or blocks (optional) — If you want colored candles, dye made specifically for candles is the safest choice.
It’s worth noting that quality matters most when it comes to your wax, wicks, and fragrance oils. Skimping on these three core materials is the most common reason beginner candles disappoint. A high-quality cotton wick, for instance, makes a dramatic difference in how cleanly and evenly your candle burns. Similarly, using fragrance oils designed specifically for candles — rather than perfume oils or essential oils not rated for candle use — ensures your finished candle is safe to burn and carries a beautiful scent that lasts throughout the life of the candle.
Step-by-Step Instructions for Making Your First Soy Candle
Now that your supplies are ready, it’s time to walk through the actual candle-making process from start to finish. The beauty of soy candle making is that the steps are logical, sequential, and easy to remember once you’ve done it once. Your first batch may not be absolutely perfect, and that’s completely normal — every candle maker has a story about their first lumpy, slightly off-center, or oddly scented creation. What matters is that you follow the process carefully, pay attention to temperatures, and enjoy every step of the journey.
Follow these steps to make your first soy wax candle:
- Prepare your containers. Clean your glass jars thoroughly and make sure they are completely dry. Attach your pre-tabbed wick to the bottom center of each jar using a dab of hot glue or a wick sticker, pressing firmly to secure it in place.
- Measure your wax. A general rule is to use roughly twice the volume of wax flakes as the container’s capacity. Weigh your wax flakes on a kitchen scale for accuracy.
- Melt your wax. Place your wax flakes in a heat-safe pouring pitcher or the top of a double boiler. Melt over medium-low heat, stirring occasionally, until the wax reaches between 170°F and 185°F (76°C to 85°C).
- Add fragrance oil. Remove the wax from heat and let it cool slightly to around 140°F to 150°F (60°C to 65°C). Add your fragrance oil at a usage rate of about 6% to 10% by weight, then stir slowly and steadily for two full minutes to ensure it binds properly.
- Add dye if desired. At this point, you can add a small amount of candle dye and stir until it is fully incorporated and the color is even.
- Pour your candles. Allow the wax to cool to between 120°F and 140°F (49°C to 60°C) before pouring into your prepared containers. Pour slowly and steadily to avoid air bubbles.
- Center your wicks. Use a wick bar, two chopsticks, or a pencil across the top of the jar to hold the wick upright and centered while the wax cools.
- Allow to cure. Let your candles cool at room temperature for at least 24 to 48 hours before trimming the wick and lighting them. For the best scent throw, allow the candles to cure for a full week.
One of the most important tips to take away from these steps is patience. The curing period in particular is something that many beginners want to skip, eager to test their creation. However, the curing process allows the fragrance molecules to fully bind with the wax, which dramatically improves scent throw when the candle is eventually burned. Think of it the same way you would think of resting a freshly baked loaf of bread — the wait is part of what makes the end result so satisfying and so much better than if you’d rushed the process.
Understanding Fragrance, Scent Throw, and Safe Usage Rates
Fragrance is arguably the most personal and expressive element of candle making. The scent you choose transforms a plain wax vessel into something that can evoke memory, calm anxiety, energize a morning routine, or make a house feel like a home. With so many fragrance oils available — from classic vanilla and lavender to complex blends like mahogany teakwood, sea salt and orchid, or spiced cranberry — the creative possibilities are genuinely endless. Understanding how fragrance works in soy wax, however, is what separates candles that smell wonderful from candles that disappoint.
Scent throw refers to how effectively a candle releases its fragrance into the surrounding space. There are actually two types to be aware of as a beginner. Cold throw is the scent you detect when the candle is unlit — what you smell when you hold it under your nose in a shop or receive it as a gift. Hot throw is the scent dispersed into the air when the candle is burning, and this is typically the more important measure of a candle’s quality. Soy wax is well-regarded for its hot throw, but achieving excellent results still depends on using the right fragrance load and pouring at the correct temperature.
The fragrance load — meaning the percentage of fragrance oil by weight relative to the total wax weight — is something every beginner candle maker needs to understand and respect. For most container-grade soy waxes, the recommended fragrance load falls between 6% and 10%. Going below 6% tends to produce candles with a disappointing, faint scent. Going above 10% or 12% can cause the fragrance oil to separate from the wax, creating safety hazards such as fragrance pooling on the surface, which can catch fire. Always check the specific guidelines for your chosen wax, as different formulations have different maximum fragrance loads, and always follow those recommendations carefully.
Common Beginner Mistakes and How to Avoid Them
Every craft has its learning curve, and candle making is no exception. The good news is that most beginner mistakes are entirely predictable and entirely avoidable once you know what to look out for. Understanding why things go wrong — and more importantly, how to fix them — is what accelerates your growth from hesitant beginner to confident candle crafter. Most problems in soy candle making can be traced back to a handful of recurring issues related to temperature, wick sizing, or fragrance handling.
Some of the most common mistakes beginners make include the following:
- Pouring at the wrong temperature. Pouring too hot causes cracking and sinkholes; pouring too cool results in an uneven, lumpy surface. Aim for 120°F to 140°F for most soy waxes.
- Using the wrong wick size. A wick that’s too small creates tunneling, where only a small pool melts in the center. A wick that’s too large produces excessive soot and a dangerously large flame. Always test wick sizes before committing to a large batch.
- Adding fragrance oil when the wax is too hot. Heat causes fragrance oils to flash off, meaning the scent evaporates before the wax sets. Always add fragrance at or below 150°F.
- Not stirring the fragrance long enough. Two full minutes of slow, steady stirring is the minimum needed to properly bind fragrance oil with soy wax.
- Burning candles before they’ve cured. Testing your candle too soon produces a weak scent throw and gives you an inaccurate reading of how the final product will actually perform.
- Skipping the wick trim. Before every burn, trim your wick to approximately 1/4 inch. This prevents mushrooming, excessive soot, and an overly large flame.
Perhaps the most universal piece of advice for avoiding mistakes is to keep detailed notes. Candle making is as much a science as it is a craft, and small variables — the room temperature when you poured, the exact fragrance load you used, the wick brand and size, the specific wax lot — all affect the final outcome. When something goes right, you want to be able to replicate it exactly. When something goes wrong, you want to be able to identify the variable that caused the problem. A simple notebook or a spreadsheet is all you need to transform trial and error into a reliable, repeatable creative practice.
Tips for Personalizing and Gifting Your Handmade Soy Candles
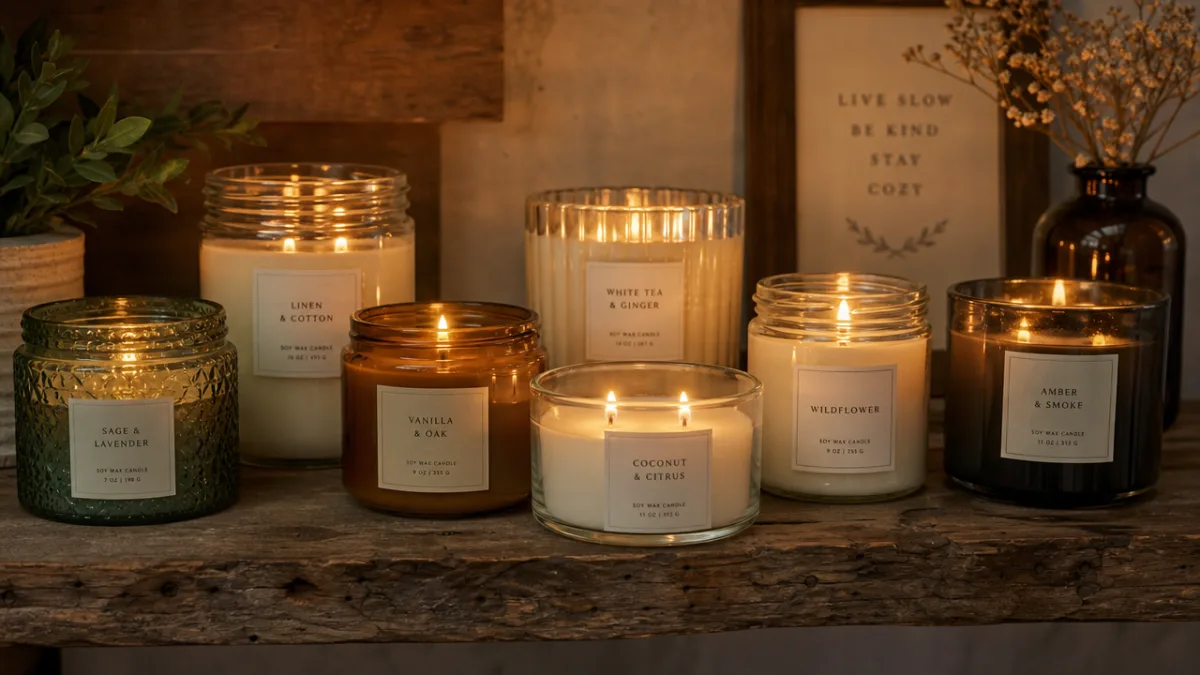
Once you’ve mastered the basics, the real joy of candle making begins: personalization. A handmade soy candle is one of the most thoughtful, versatile gifts you can give. The ability to customize the scent, color, container, and label means that every candle you make can be perfectly tailored to the person receiving it or the space it will inhabit. A candle made with someone’s favorite scent, poured into a beautiful vintage jar, and finished with a handwritten label carries a warmth and intention that no store-bought product can replicate.
There are countless ways to personalize your candles to make them feel extra special. Consider experimenting with layered colors, pouring your wax in stages to create distinct bands of complementary hues. You can also embed dried botanicals — lavender buds, rose petals, or dried citrus slices — on the top surface of the candle for a visually stunning effect, keeping in mind that only heat-safe, dried botanicals should be used and they should be placed away from the wick for fire safety reasons. Decorative containers like vintage teacups, copper tins, or geometric concrete vessels can also elevate the aesthetic appeal of your candles enormously.
For gifting, presentation makes a significant difference in how your candles are received. A simple kraft paper label printed with the candle’s scent name and burn time instructions gives your creation a professional, polished finish. Wrapping the jar in tissue paper, nestling it in a small gift box with a personalized note, or tying a piece of twine around the lid with a small sprig of dried herbs can transform your handmade candle into a truly memorable gift. Many beginner candle makers find that gifting their creations to friends and family not only spreads joy but also generates the kind of honest feedback that helps them improve their craft with every batch they pour.
Getting Started on Your Candle Making Journey Today
The best time to start making candles is right now. You don’t need to wait until you have every possible supply, a perfect workspace, or a deep well of prior experience. The entry point for soy candle making is genuinely accessible — a basic starter kit costs very little, the learning curve is gentle, and the results are rewarding from the very first pour. Many people who pick up candle making as a casual weekend hobby find that it quickly becomes a beloved ritual, a creative outlet, and in some cases, even the foundation of a small handmade business.
As you build your skills, consider joining online communities of fellow candle makers. Forums, social media groups, and platforms like Pinterest are rich with inspiration, troubleshooting advice, and encouragement from makers at every level of experience. Seeing what others create, sharing photos of your own batches, and participating in the wider candle-making community adds a social dimension to what might otherwise feel like a solitary hobby. These communities are also invaluable resources when you hit a snag — because no matter how carefully you follow the steps, questions and challenges inevitably arise, and having experienced makers to consult makes all the difference.
Candle making with soy wax is ultimately a craft that rewards attention, patience, and a willingness to experiment. Each batch teaches you something new — about temperature, about fragrance, about the subtle art of getting a clean, even burn. But more than the technical knowledge you accumulate, candle making offers something rarer: the deep, quiet satisfaction of creating something beautiful with your own hands, filling your home with light and fragrance that you chose and crafted yourself. Start simple, stay curious, and let each candle you make be a little better than the last.








What do you think?
It is nice to know your opinion. Leave a comment.