










DIY Garden Basket: A Complete Guide to Crafting Your Own Beautiful Planter
Introduction to DIY Garden Baskets
Garden baskets have always held a special place in both outdoor and indoor decorating. There’s something about that rustic, handmade charm that just works — whether you’re hanging one from a porch railing, tucking it into a garden bed, or setting it on a sunny windowsill. And when the basket itself is something you made? The whole experience feels different. Growing something beautiful inside a container you built with your own hands adds a layer of satisfaction that no store-bought planter can really touch.
The good news is that making your own DIY garden basket is way more approachable than most beginners expect. With a handful of materials, a few basic tools, and a free afternoon, you can put together a planter that’s both gorgeous and genuinely useful — and one that reflects your own style. Everything about the process is flexible, so you can tweak the size, shape, liner, and plant choices to fit any space, from a big backyard to a tiny balcony to a kitchen corner just waiting for fresh herbs.
And beyond just looking good, DIY garden baskets have real practical advantages. When you make your own, you can tailor the drainage and soil setup to exactly what your plants need. You get to choose the materials, so you know they’re durable, weather-appropriate, and safe for edibles if that’s the direction you’re going. This guide covers the whole process — materials, tools, building, planting, and keeping it thriving season after season — so let’s dig in.
Materials and Tools You Will Need
Before you start building, it’s worth taking a few minutes to gather everything you need. Having it all laid out in front of you makes the whole process feel much smoother. The most important piece is the basket itself, and you’ve got a few good options here. You might already have an old wicker or wire basket sitting around that would work perfectly, or you can pick one up cheaply at a thrift store or craft shop. If you’re feeling ambitious, you can even weave your own from willow, rattan, or twisted vines — but that’s entirely optional.
You’ll also need a liner to keep the soil and moisture from falling straight through. Coco coir liners — made from coconut fiber — are the go-to choice for most gardeners, and for good reason. They’re natural, biodegradable, breathable, and really good at holding just enough moisture without letting things get waterlogged. If coco coir isn’t handy, burlap, sphagnum moss pressed into a thick layer, or even repurposed landscape fabric all work well. Your best pick will depend a bit on what you’re planning to grow.
For soil, grab a quality potting mix made for containers rather than straight garden soil, which tends to compact and block drainage over time. A lot of experienced gardeners mix their potting soil with perlite or coarse sand to boost drainage and keep the roots happy. You’ll also want some slow-release granular fertilizer to work into the mix, a hand trowel, scissors or a craft knife for trimming the liner, and whatever hanging hardware you need — hooks, chains, jute twine, or wall brackets — depending on where you plan to put the finished basket.
- Wicker, wire, or handwoven basket frame in your preferred size and shape
- Coco coir liner, burlap, sphagnum moss, or landscape fabric for the interior
- High-quality container potting mix blended with perlite for drainage
- Slow-release granular fertilizer appropriate for your chosen plants
- Hand trowel, scissors or craft knife, and a watering can with a gentle rose head
- Hanging hardware including S-hooks, jute twine, chains, or wall brackets as needed

Step-by-Step Construction Process
Once everything is ready to go, start with the basket frame. If you’re working with a vintage or secondhand wicker basket, take a good look at it first — check for any broken or soft spots and reinforce them with natural twine or wire before you add the weight of soil and plants. For wire hanging baskets, make sure the frame is solid and all the attachment points feel secure. This stuff really matters, so don’t rush through it. A sturdy frame is what makes a garden basket last.
Next, fit your liner in. If you’re using a pre-cut coco coir liner, just press it firmly into the basket so it follows the shape and covers the sides and base completely without any gaps. If you’re working with loose sphagnum moss, dampen it a little first, then press it against the inside walls in generous handfuls, building up at least a two-inch layer. For burlap or landscape fabric, cut a circle a bit larger than the basket’s diameter, press it in, fold the excess over the inner edge, and tack it down with a few stitches or staples to hold it in place.
With the liner sorted, mix your potting medium in a separate container — roughly three parts potting mix to one part perlite works well. Add a good handful of slow-release fertilizer and stir it in according to the package directions. Fill the basket with this mix, pressing it down gently now and then to get rid of any big air pockets. Stop about two inches below the rim, which leaves room for your plants and means water won’t splash out every time you irrigate.
Before you start planting, take a moment to plan your arrangement. For hanging baskets, the classic approach works really well: a tall or upright plant in the center, mounding plants in the middle ring around it, and trailing plants along the outer edge to cascade down. Lay everything out on a flat surface first and play with the composition. Think about color contrast, texture, and how big each plant will eventually get. A little planning here makes a big difference — your finished basket will look full, intentional, and like you knew exactly what you were doing.
Choosing the Right Plants for Your Basket
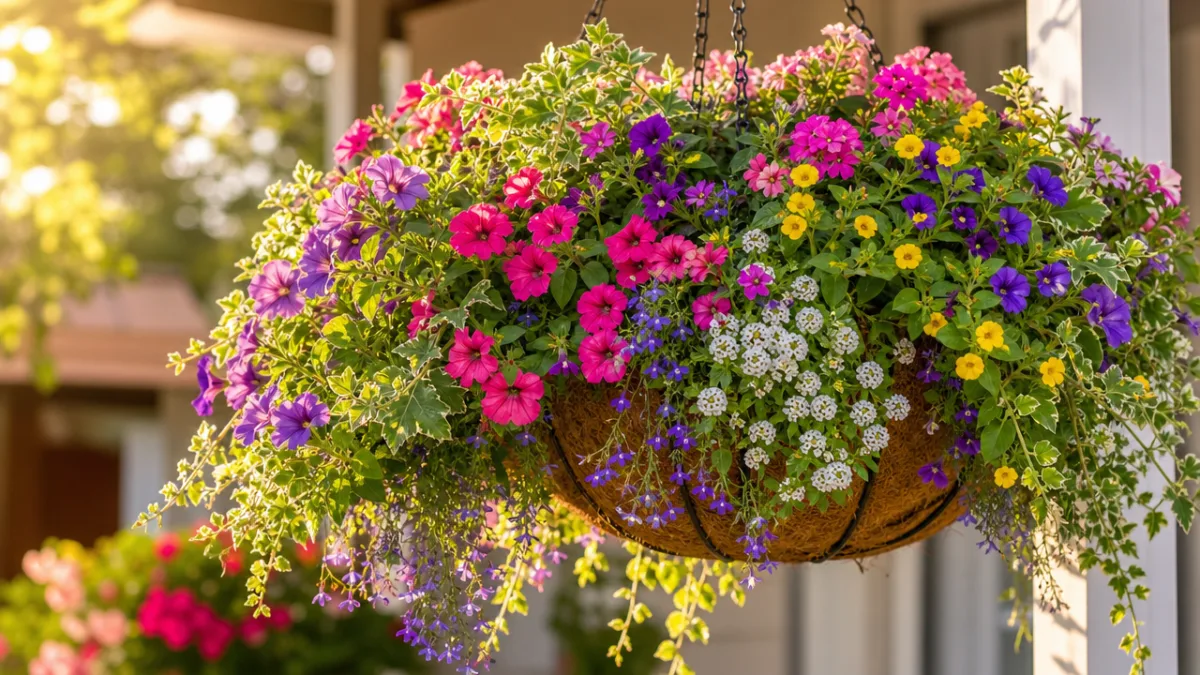
Plant selection is honestly the most fun part of the whole project, and the most personal. What you choose sets the tone for everything — the look, the mood, and whether the basket is purely decorative or something you actually harvest from. For ornamental baskets, some combinations have been refined over generations of gardening and for good reason. Trailing lobelia in blue, purple, and white pairs beautifully with cascading ivy, cheerful calibrachoa, and the airy delicacy of bacopa. A compact fuchsia or upright geranium in the center adds height and pulls the whole thing together.
If you’d rather have something functional, a herb basket is a genuinely rewarding option. Compact herb varieties do really well in containers and love the well-draining, fertile environment of a properly prepared basket. Basil, parsley, chives, and trailing thyme all grow happily together and have similar needs. Mint is a popular addition, but it’s worth potting it separately and dropping that pot into the basket rather than planting it directly — left to its own devices, it’ll take over and crowd everything else out. Having a herb basket near the kitchen door makes cooking with fresh ingredients feel effortless, which is one of those small daily pleasures that adds up.
There’s also a strong case for succulent baskets, especially in drier climates or for anyone who wants something that doesn’t need constant attention. Echeveria, sedum, sempervivum, and trailing string-of-pearls all look wonderful together and are remarkably low-maintenance. For succulents, you’ll want a liner that drains really well — a coarse mesh with a gritty, lean soil mix is ideal. The main thing to watch is overwatering, which is the number one way succulent baskets fail. Keep it disciplined and you’ll be rewarded with a beautiful display that asks very little of you in return.
- Trailing lobelia combined with ivy and calibrachoa for a classic cascading ornamental look
- Compact herbs such as basil, parsley, chives, and thyme for a functional kitchen basket
- Hardy annuals like petunias, impatiens, and verbena for reliable season-long color
- Succulent combinations using echeveria, sedum, and string-of-pearls for drought tolerance
- Edible nasturtiums paired with trailing herbs for a beautiful and edible display
Planting and Arranging Your Garden Basket
Now comes the most hands-on and satisfying part: actually getting the plants in. Start with your tallest or centerpiece plant, setting it into a hole you’ve made in the middle of the soil. To remove a plant from its nursery pot, squeeze the sides gently and slide it free, then use your fingers to tease apart any roots that are tightly wound or circling — this encourages them to spread out into the fresh soil around them. Set the root ball so its top sits level with, or just slightly below, the soil surface in the basket.
Work your way outward, adding the mounding mid-tier plants next. Space them evenly around the center plant, giving each one enough room to fill out naturally as it grows. Firm the soil around each root ball gently to make sure there aren’t any air gaps, which can dry out roots quickly. It’s perfectly fine — actually encouraged — to plant basket plants a bit more closely together than you would in the ground. The goal is a full, lush look, and because you’ll be watering and feeding regularly, the plants can handle the higher density just fine.
Finish by placing your trailing plants around the outer edge of the basket, where they’ll have the most room to spill over the sides. If you’re working with a wire basket or one with open sides, you can also tuck trailing plants through the liner to fill in the sides and create a rounder, more globe-like effect — this looks absolutely spectacular once it fills in. Once everything is planted, give the whole basket a thorough watering until it runs freely from the bottom. This settles the soil, gets rid of any remaining air pockets, and gives your plants a proper first drink in their new home.
Care, Maintenance, and Seasonal Tips
Garden baskets need a bit more attention than plants growing in the ground, mainly because there’s less soil to hold onto moisture. In warm weather especially — and even more so if your basket is in a breezy spot — you might find yourself watering once or even twice a day. The easiest way to check is to push your finger about an inch into the soil. If it’s dry at that depth, it’s time to water. When you do water, go slowly and thoroughly enough that the whole root zone gets a good drink, not just the surface.
Feeding is just as important. Basket plants grow quickly and burn through the nutrients in their limited soil volume faster than you might expect. The slow-release fertilizer you mixed in at planting will handle the baseline nutrition for about three months, but you’ll want to supplement that with a liquid fertilizer applied weekly or every couple of weeks through a watering can. Many seasoned basket gardeners like a high-potassium formula made for flowering plants, since the extra potassium encourages more blooms and keeps plants generally healthy and disease-resistant.
Deadheading — removing spent blooms before they set seed — is one of those tasks that sounds small but makes a really noticeable difference. Once a plant starts producing seeds, it shifts its energy away from making new flowers, and blooming drops off sharply. If you pinch or snip off faded flowers every few days, you keep redirecting that energy back into new buds, and the result is a basket that stays in continuous flower from late spring right up until the first frost. Build it into your morning or evening garden routine and it stops feeling like a chore.
When the seasons shift, use it as a chance to reimagine the basket. At the end of summer, pull out any spent annuals and compost them, then replant with cool-season plants like pansies, violas, ornamental kale, cyclamen, or trailing ivy to carry you through autumn. In winter, bring the basket frame somewhere sheltered to protect it from the weather. Give it a good clean, check for anything that needs fixing, and store it somewhere dry. Come spring, you’ll be glad you did — and you’ll probably be excited to start the whole process again.
- Water daily or twice daily in hot weather, checking soil moisture with a finger test before each watering
- Feed weekly with liquid fertilizer after the initial slow-release charge begins to diminish
- Deadhead faded blooms every two to three days to encourage continuous flowering throughout the season
- Trim overly long trailing stems periodically to keep the basket looking tidy and well shaped
- Refresh planting for autumn with cool-season varieties to extend seasonal interest and enjoyment
- Store and inspect the basket frame each winter to keep it in excellent condition for future seasons

Display Ideas and Inspiration for Your Finished Basket
Figuring out where to show off your finished basket is one of the best parts of the whole project. The classic hanging display — suspended from a hook on a porch beam, pergola, fence post, or wall bracket — never gets old, and for good reason. If you’re hanging several baskets together, try varying the heights slightly so they create a layered, dimensional look that draws the eye up and turns a plain fence or porch into something that feels like a real garden. You can match the color palettes across baskets for a cohesive, curated feel, or mix complementary schemes for something more exuberant and cottage-garden-ish.
Don’t overlook how great baskets look at ground level either. A large, generously planted basket placed along a garden path, beside a front door, or nestled into a border among low perennials creates a beautiful focal point right at eye level. Grouping baskets of different sizes on a tiered plant stand makes a striking display that works especially well on a balcony, patio, or deck where hanging overhead isn’t an option — and the bonus is you can pull individual baskets out for maintenance without disrupting the whole arrangement.
Inside the house, smaller DIY garden baskets fit beautifully on kitchen windowsills, bathroom shelves, and living room side tables. A basket of trailing pothos, compact ferns, or fresh kitchen herbs brings genuine life into any interior space and doubles as a decorative object with an actual story behind it. And if you’re looking for a gift idea, a beautifully planted, handmade garden basket is one of those presents that genuinely stands out — thoughtful, personal, and useful in a way that a store-bought planter just can’t match. Housewarmings, birthdays, Mother’s Day — it works for almost any occasion where you want to give something that means something.








What do you think?
It is nice to know your opinion. Leave a comment.