










How to Make a Beaded Plant: Easy & Cute DIY Decor
Introduction to Beaded Plants: A Charming Craft for Every Home
Beaded plants have quietly become one of the most beloved trends in the DIY decor world, blending the tactile satisfaction of beadwork with the timeless appeal of botanicals. Whether you live in a small apartment where real plants struggle to survive, or you simply want to add a pop of permanent color to your shelves and tabletops, a beaded plant offers a whimsical, low-maintenance solution that never wilts, never needs watering, and never drops a single leaf. The result is a charming decorative piece that looks handcrafted and personal in a way that store-bought decor rarely achieves.
What makes this craft particularly appealing is its accessibility. You do not need years of experience in jewelry making or wire sculpting to create a beautiful beaded plant. The basic techniques can be picked up in a single afternoon, making this an ideal project for beginners who want a satisfying, finished product without an overwhelming learning curve. Children, teenagers, and adults alike can enjoy the meditative rhythm of threading beads onto wire and watching a tiny succulent or flower gradually take shape in their hands.
Beyond the creative joy of making them, beaded plants serve as wonderful gifts. A small potted beaded succulent wrapped with a ribbon communicates thoughtfulness and effort in a way that a store-bought CANDLE simply cannot. They are also endlessly customizable: choose colors that match a friend’s bedroom palette, select beads that reflect a particular aesthetic, or build miniature versions of someone’s favorite plant. Once you learn the foundational method, the possibilities expand into an entire garden of creative options.
Materials You Will Need Before You Begin
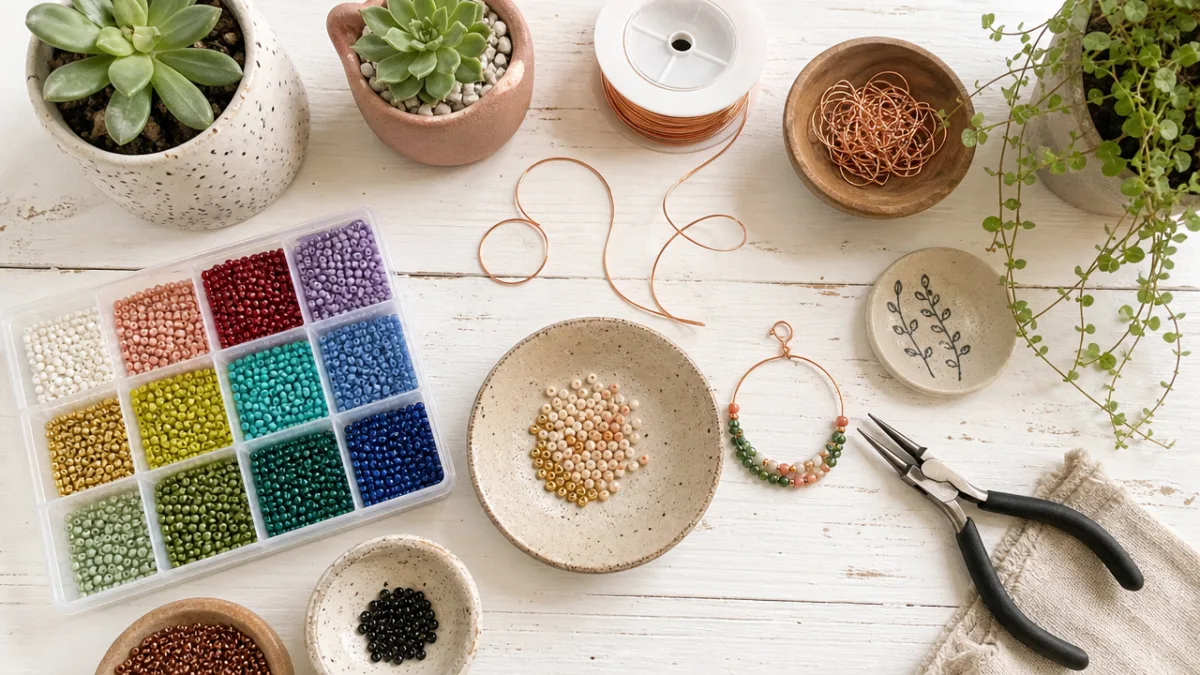
Gathering your materials before starting any craft project is essential, and beaded plants are no exception. The core of this project is wire, and the type you choose matters quite a bit. Craft wire in 26-gauge or 28-gauge thickness is ideal for this project because it is flexible enough to bend and shape easily but sturdy enough to hold its form once twisted. You can find craft wire in gold, silver, copper, and green tones at most craft stores or online retailers. Green wire is particularly popular for beaded plants because it mimics the look of real stems, but any color can work beautifully depending on your design vision.
Beads are the heart and soul of this project, and the variety available to crafters is genuinely staggering. Seed beads are the most commonly used for beaded plants because their small, uniform size allows for detailed leaf and petal shaping. Glass seed beads tend to catch the light beautifully and come in an enormous range of colors, finishes, and transparencies. Opaque green beads are the go-to for succulent-style plants, while translucent or iridescent beads can create a magical, ethereal effect for floral designs. You can also mix bead sizes to add dimension, using larger beads for flower centers and smaller ones for delicate petals or leaves.
In addition to wire and beads, you will need a few basic tools and supplies to complete your beaded plant. A pair of needle-nose pliers will help you twist wire tightly and create neat, secure joins. Wire cutters are essential for snipping stems and branches to the right length. A small pot or planter filled with floral foam, air-dry clay, or decorative stones will anchor your finished plant and give it a realistic, potted presentation. Optional extras include green floral tape for wrapping stems, a ruler for consistent measurements, and a bead mat or tray to keep your beads organized and prevent them from rolling away mid-project.
- 26-gauge or 28-gauge craft wire in green, gold, or your preferred color
- Seed beads in assorted colors and finishes, primarily greens for foliage
- Needle-nose pliers and wire cutters
- Small pot, planter, or decorative container
- Floral foam, air-dry clay, or decorative pebbles for the base
- Green floral tape (optional but recommended)
- Bead tray or mat to keep materials organized
Step-by-Step Guide to Making Beaded Leaves and Petals
The foundational unit of any beaded plant is the individual leaf or petal, and mastering this simple structure opens the door to creating virtually any plant design you can imagine. The most popular technique for beaded leaves is called the loop method or basic loop technique. To begin, cut a length of wire approximately 18 to 24 inches long. Thread your desired number of beads onto the wire, sliding them to the center. Then fold the wire so both ends are parallel, creating a loop of beads at the top. Twist the two wire ends together several times just below the loop to secure it. This single twisted loop becomes one leaf or one petal.
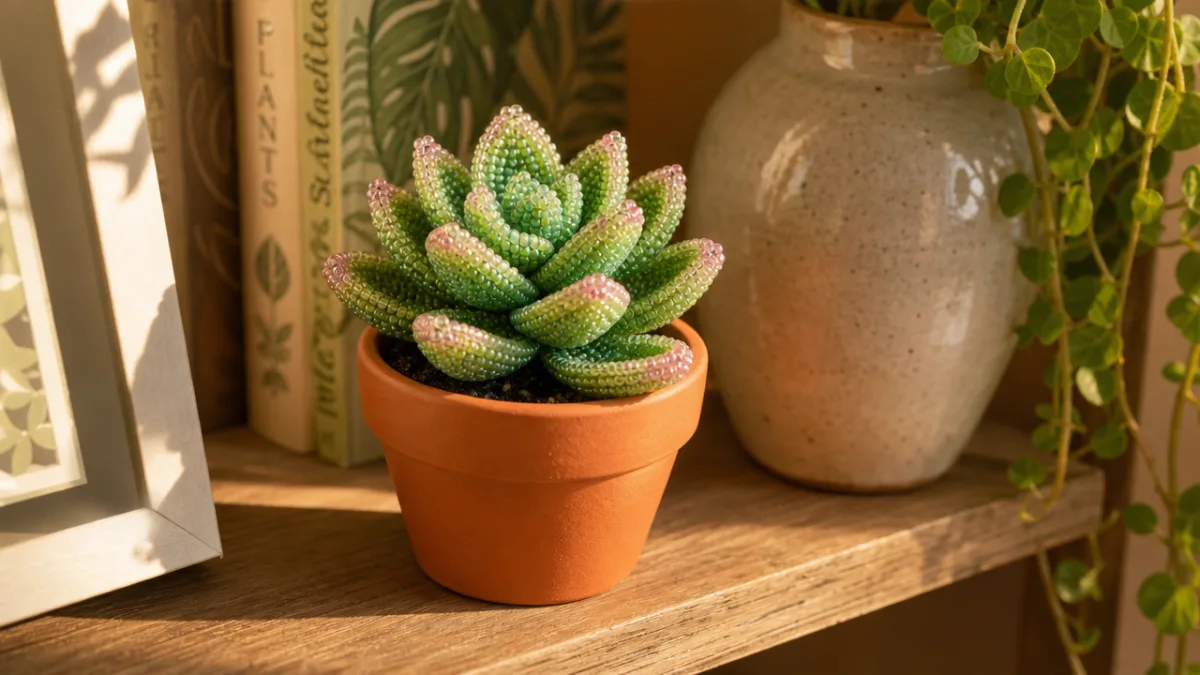
For succulents, which are among the most popular beaded plant designs, you will typically make leaves in varying sizes to mimic the natural layered rosette shape of real succulents. Start by making your smallest leaves first, using perhaps five to seven beads per loop. Gradually increase the number of beads per loop as you work outward, so your outer leaves are noticeably larger than the inner ones. The color gradient from a lighter center to deeper, richer greens on the outer leaves adds a remarkably realistic touch. You can also use slightly different bead finishes, such as matte beads for the interior and glossy or metallic beads for the outer leaves, to add further visual depth.
Once you have made all of your individual leaves or petals, the next step is to assemble them into a plant shape. Begin with your smallest leaves, grouping two or three together and twisting their wire tails together to form the center bud of the succulent. Continue adding slightly larger leaves in a circular pattern around this center, twisting the wire of each new leaf around the growing central stem. Use your needle-nose pliers to pull the twists tight and ensure everything stays securely in place. The more carefully you space and layer your leaves, the more convincingly the finished plant will resemble its living counterpart.
- Cut a length of wire between 18 and 24 inches long for each leaf or petal.
- Thread the desired number of seed beads onto the wire and slide them to the center.
- Fold the wire in half, creating a bead loop, and twist the ends together tightly below the loop.
- Make leaves in graduated sizes, from small for the center to large for the outer layers.
- Assemble by grouping center leaves first, then adding larger leaves in a circular pattern, twisting all wire tails into a single central stem.
Assembling Your Beaded Plant and Planting It in a Pot
With all of your individual leaves or flowers assembled into a cohesive plant shape, the next and deeply satisfying step is bringing your creation to life in a pot. The way you anchor your beaded plant will determine how stable it looks and how convincingly it resembles a real potted plant. Floral foam is one of the easiest and most effective anchoring materials because it is firm enough to hold wire stems securely but soft enough to allow you to push and reposition stems as needed. Cut the floral foam to fit snugly inside your chosen pot or container, then simply press your assembled plant’s central wire stem down into the foam.
Air-dry clay is another excellent anchoring option, particularly if you want a more polished, permanent result. Press the clay into the pot and smooth the top surface, then insert your plant’s stem while the clay is still soft. Allow it to dry completely according to the package instructions before handling. The firm set of dried clay holds wire stems more rigidly than foam, which is advantageous for taller or more elaborate designs that might otherwise lean or tip. Once the clay has dried, you can cover its surface with decorative pebbles, colored sand, dried moss, or small shells to complete the planted effect.
Finishing touches make an enormous difference in the overall appearance of your beaded plant. Wrapping the central stem and any visible wire with green floral tape gives the plant a cleaner, more professional look by covering the raw wire and adding a subtle texture that resembles a real plant stem. If your design features multiple stems, like a small arrangement of beaded flowers, you can wrap each stem individually before grouping them in the pot. Consider adding a thin layer of decorative gravel or preserved moss on top of the soil filler to complete the illusion of a living, thriving potted plant sitting on your shelf.
Design Variations: Beyond the Basic Succulent
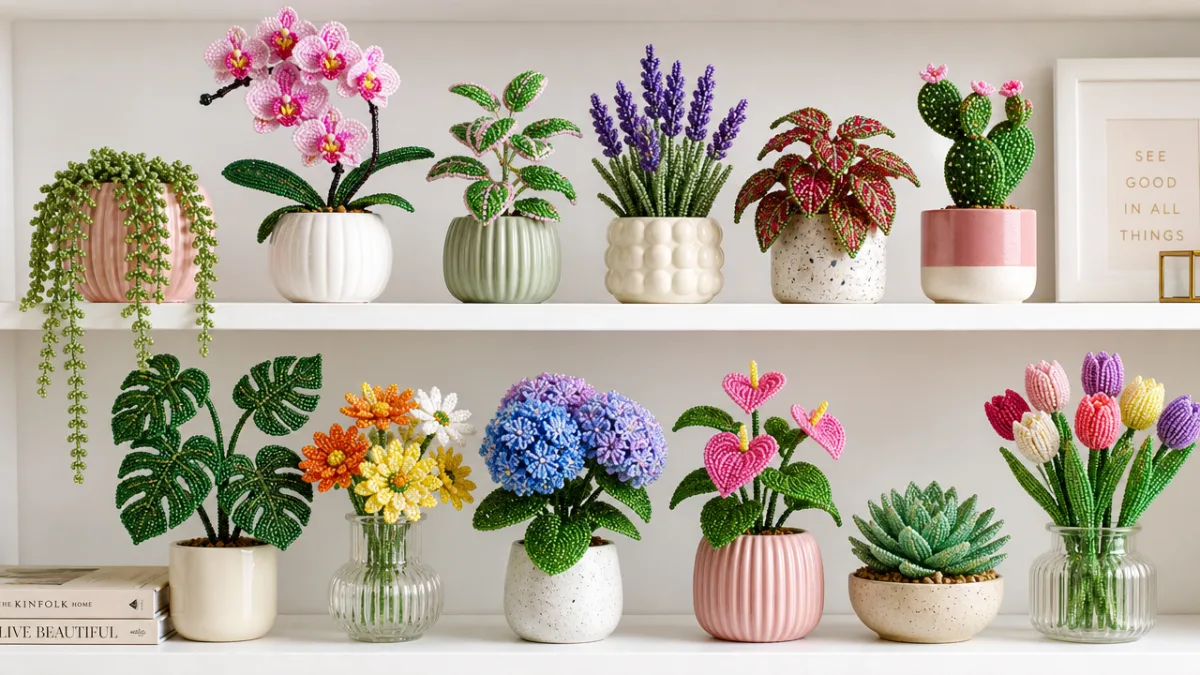
Once you have mastered the fundamental loop technique, a whole world of beaded plant designs opens up before you. Beaded flowers are a particularly popular next step for crafters who want to add more color and drama to their arrangements. Roses, daisies, cherry blossoms, and lotus flowers can all be recreated using variations of the basic petal loop method. For a beaded rose, you might create tightly coiled inner petals using fewer beads and more curved loops, then surround them with flatter, broader outer petals that gradually open outward. The effect, especially in deep red or blush pink beads, can be genuinely stunning.
Cacti are another wonderfully fun design to try. Using green seed beads on green wire and building a tall, cylindrical or paddle-shaped form, you can create a beaded cactus that captures the quirky charm of the real thing. Add tiny loops of red or yellow beads at the top to simulate blooms, or use short straight pieces of wire threaded with a single bead to mimic the spines of a barrel cactus. A beaded cactus displayed in a small clay pot with a layer of fine sand creates an adorable miniature desert scene that is practically irresistible as a desk decoration or windowsill display.
For those who enjoy more intricate projects, beaded trees offer a beautiful challenge. A beaded bonsai or cherry blossom tree is built on a thicker gauge wire trunk, with many smaller branching wires spreading outward and upward. Tiny loops of pink or white beads are clustered along each branch to suggest delicate blossoms, while green bead clusters can represent leafy foliage. The finished tree, mounted in a shallow dish or pot with decorative stones, can become a genuine centerpiece or a treasured keepsake. These more ambitious designs reward patience and practice, making them ideal goals to work toward as your beadwork skills develop.
- Beaded roses and wildflowers in pink, red, yellow, and white
- Quirky cacti with bead spine detailing and tiny floral tops
- Miniature bonsai and cherry blossom trees with branching wire structures
- Tropical leaves like monstera, crafted with large statement loops
- Lavender stalks using elongated purple bead clusters on single wires
- Mixed arrangements combining multiple plant styles in one pot
Tips for Displaying, Gifting, and Expanding Your Beaded Plant Collection
A single beaded plant is delightful, but a curated collection of them arranged together creates a genuinely striking display. Think of your beaded plants as a tiny permanent garden that you can arrange and rearrange on a windowsill, bookshelf, desk, or mantelpiece without worrying about light conditions, watering schedules, or seasonal changes. Group plants of varying heights together for visual interest, just as you would with real plants. A tall beaded cactus next to a low, spreading beaded succulent rosette and a mid-height beaded flower creates a dynamic, layered display that draws the eye and invites closer inspection.
When it comes to gifting beaded plants, presentation matters as much as the piece itself. Tuck a small beaded succulent into a kraft paper box with tissue paper lining, or place a beaded flower arrangement inside a glass cloche for a truly elegant gift. Add a handwritten note explaining that the plant is handmade and requires absolutely no care, which tends to bring a smile to any recipient’s face. For baby showers, housewarmings, birthdays, or teacher appreciation events, a beaded plant in a pretty pot is a distinctive, memorable gift that stands apart from conventional options and signals genuine thoughtfulness.
As you grow more comfortable with the craft, consider expanding your skills by exploring different bead types and wire gauges. Memory wire, aluminum wire, and even repurposed jewelry wire all behave differently and open up new creative possibilities. Experiment with crystal beads for a glamorous, light-catching effect, or use matte earth-tone beads for a more organic, naturalistic aesthetic. Joining an online beading community or following bead art creators on social media can provide a constant stream of inspiration and technique tutorials that keep your practice growing. The world of beaded plants is vast, creative, and endlessly rewarding, and every plant you make becomes a small, permanent celebration of your own creativity and patience.
Beaded plants represent far more than a simple craft project. They are a meditation in patience, a practice in color theory, a small act of creation that results in something genuinely beautiful and lasting. Whether you are looking for a new hobby, a meaningful handmade gift, or a unique way to decorate your living space, beaded plants offer an accessible entry point into a richly rewarding craft tradition. Pick up some wire and beads, clear a corner of your kitchen table, and give yourself permission to grow something that will never fade.








What do you think?
It is nice to know your opinion. Leave a comment.