










🌷 Easy Tricks for the Prettiest Bulb Flowers: A Complete Growing Guide
Understanding Bulb Flowers and Why They’re Worth Growing
Bulb flowers hold a special place in the gardening world because they reward even the most inexperienced gardener with spectacular results. Unlike seeds that require careful nurturing from the very beginning, bulbs come pre-loaded with everything a plant needs to burst into bloom. Tucked inside that papery, onion-like shell is a complete embryonic plant, a store of nutrients, and the genetic blueprint for one of nature’s most breathtaking performances. When the conditions are right, bulbs essentially do the hard work for you.
The range of bulb flowers available to home gardeners is staggeringly beautiful and diverse. From the classic elegance of tulips and the heady fragrance of hyacinths to the exotic drama of dahlias and the cheerful simplicity of daffodils, there is a bulb flower for every taste, every garden style, and every climate zone. Many gardeners make the mistake of thinking bulbs are only for spring, but with careful planning you can have bulb flowers blooming from late winter all the way through the first frosts of autumn, creating a continuously evolving tapestry of color.
What makes bulb gardening particularly satisfying is the element of anticipation it builds into your outdoor space. You plant them in autumn when the garden is going to sleep, and then you wait through the cold months knowing that beneath the soil something magical is preparing itself. That first green spear pushing through the earth in late winter feels like a personal gift from the garden, a promise kept after months of patience. Understanding this rhythm is the first step toward growing the prettiest bulb flowers you have ever seen.
Choosing the Right Bulbs for Stunning Results
Selecting high-quality bulbs is arguably the single most important decision you will make in your entire bulb-growing journey. A large, firm, blemish-free bulb contains significantly more stored energy than a small or soft one, and that energy directly translates into taller stems, larger flowers, and more vibrant colors. When shopping at a garden center, always choose the biggest bulbs available in the bin. Pick them up and feel their weight — a good bulb should feel dense and heavy for its size, never hollow or spongy.
Matching your bulb selection to your local climate and soil conditions will make an enormous difference in the final display. Spring-blooming bulbs like tulips, crocuses, and muscari require a period of cold dormancy to trigger their flowering mechanism, which is why they thrive naturally in temperate regions with genuine winters. In warmer climates, gardeners often pre-chill these bulbs in the refrigerator for six to eight weeks before planting. Summer bulbs such as gladiolus, cannas, and begonias, on the other hand, prefer warmth and are typically lifted and stored indoors before winter arrives in colder zones.
When sourcing your bulbs, consider buying from reputable specialty nurseries or trusted online retailers rather than relying solely on supermarket bins late in the season. The difference in quality is often remarkable. Look for bulbs that have been virus-tested and certified disease-free, as diseased bulbs can spread problems through your garden for years. Some gardeners also choose to invest in top-size exhibition bulbs for containers and focal points, reserving standard sizes for mass planting in borders where sheer volume creates the most impact.
- Tulips: Choose bulbs with no visible mold and at least the size of a golf ball for the best blooms.
- Daffodils: Look for double-nosed bulbs, which will produce two stems and double your flower count.
- Dahlias: Select firm tubers with at least one visible eye or growing point near the crown.
- Alliums: The larger the bulb, the larger the dramatic spherical flower head — size really matters here.
- Hyacinths: Top-size bulbs (18-19 cm circumference) produce the most densely packed, fragrant flower spikes.

Soil Preparation and Planting Depth: The Secrets Nobody Tells You
The foundation of every spectacular bulb display is soil that has been thoughtfully prepared before a single bulb goes into the ground. Bulbs are uniquely vulnerable to one particular enemy: waterlogged conditions. Sitting in saturated soil will cause even the healthiest bulb to rot within weeks. This is why improving drainage before planting is absolutely non-negotiable. If your garden has heavy clay soil, work in generous amounts of horticultural grit or sharp sand along with well-rotted compost to open up the structure and allow excess water to drain away freely between the bulb scales.
Planting depth is one of those technical details that many beginner gardeners gloss over, but it has a profound effect on the health and performance of your bulbs. The general rule of thumb is to plant each bulb at a depth equal to approximately three times its own diameter. So a tulip bulb that measures about 5 cm across should be planted roughly 15 cm deep. Deeper planting in loose, well-drained soil encourages stronger root systems, protects bulbs from temperature fluctuations, and helps prevent them from being heaved out of the ground by frost cycles. It also tends to delay flowering slightly, which can be useful for extending the season.
Orientation matters more than most people realize. Bulbs should always be planted with the pointed or growing tip facing upward and the flatter, basal plate facing down into the soil. This is where the roots will emerge. While bulbs are remarkably good at correcting themselves if planted sideways or even upside down, they expend precious stored energy making that correction, which can result in weaker, shorter-stemmed flowers. Taking just a moment to orient each bulb correctly before covering it with soil costs you nothing but pays dividends come flowering time. For very large planting projects, a long-handled bulb planter tool makes the process faster and ensures consistent depth throughout.
- Loosen the soil to at least 30 cm depth using a garden fork.
- Incorporate well-rotted compost and horticultural grit to improve fertility and drainage.
- Dig individual holes or a broad trench to the correct planting depth for each variety.
- Place bulbs pointed-side up, spacing them according to the variety’s recommendations.
- Cover with soil and firm it down gently to eliminate large air pockets.
- Water in lightly to settle the soil and begin encouraging root development.
- Mark the area clearly so you don’t accidentally dig up the bulbs before they emerge.
Watering, Feeding, and Care Throughout the Growing Season
Once your bulbs are in the ground and have been watered in, the immediate care requirements are blessedly minimal. Nature does most of the work through autumn and winter, with cool temperatures and natural rainfall encouraging steady root development without any visible above-ground growth. However, during spring and summer when your bulbs are actively growing and flowering, a thoughtful watering regime makes a meaningful difference to flower quality. The key principle is to water consistently and deeply during dry spells but never to allow the soil to become permanently saturated, which returns us to the ever-present threat of rot and disease.
Feeding bulb flowers is one of the most underutilized tricks for producing genuinely spectacular blooms. Many gardeners plant their bulbs and simply hope for the best, but providing targeted nutrition gives your plants the fuel to produce flowers of exceptional size and color. A low-nitrogen, high-potassium fertilizer applied as bulbs begin to emerge in spring encourages strong flowering rather than excessive leafy growth. Specialist bulb fertilizers are widely available and take the guesswork out of the process. Even more importantly, continue feeding after the flowers have finished, because this post-flowering period is when the bulb is replenishing its energy stores for the following year’s performance.
Deadheading spent flowers promptly is another simple but highly effective technique for improving the health of your bulb collection over time. Once a tulip or daffodil flower has faded, the plant naturally wants to put energy into forming seeds. By removing the spent flower head before seeds can develop, you redirect all of that stored energy back into the bulb itself, resulting in a larger, more vigorous bulb that will produce an even better display the following season. Always leave the foliage intact until it has turned completely yellow and died back naturally, because those leaves are still photosynthesizing and charging the bulb below. Tying daffodil leaves into knots is an old-fashioned practice that actually harms this process and is best avoided entirely.

Creative Planting Combinations for Maximum Visual Impact
Growing bulb flowers becomes truly transformative when you begin thinking about them not as individual plants but as elements in a larger composition. The most stunning bulb displays in the world — from the famous Keukenhof gardens in the Netherlands to the celebrated Chelsea Flower Show borders — all share a common characteristic: they layer different varieties with complementary colors, contrasting textures, and staggered bloom times to create a display that evolves and changes over many weeks. You can bring this same thoughtful approach to even the smallest garden or container planting at home with remarkable results.
The technique known as “lasagna planting” or “layered bulb planting” is one of the cleverest tricks in the bulb grower’s repertoire and produces extraordinarily lush containers and borders with a succession of blooms. The method involves planting bulbs in overlapping layers at their correct depths within the same pot or planting hole. Larger, later-blooming bulbs like tulips or alliums go deepest, followed by a layer of soil, then mid-sized bulbs such as daffodils, another layer of soil, and finally the smallest and earliest-blooming bulbs like crocuses or grape hyacinths near the surface. When spring arrives, each layer emerges in sequence, creating a continuously refreshed display from a single container.
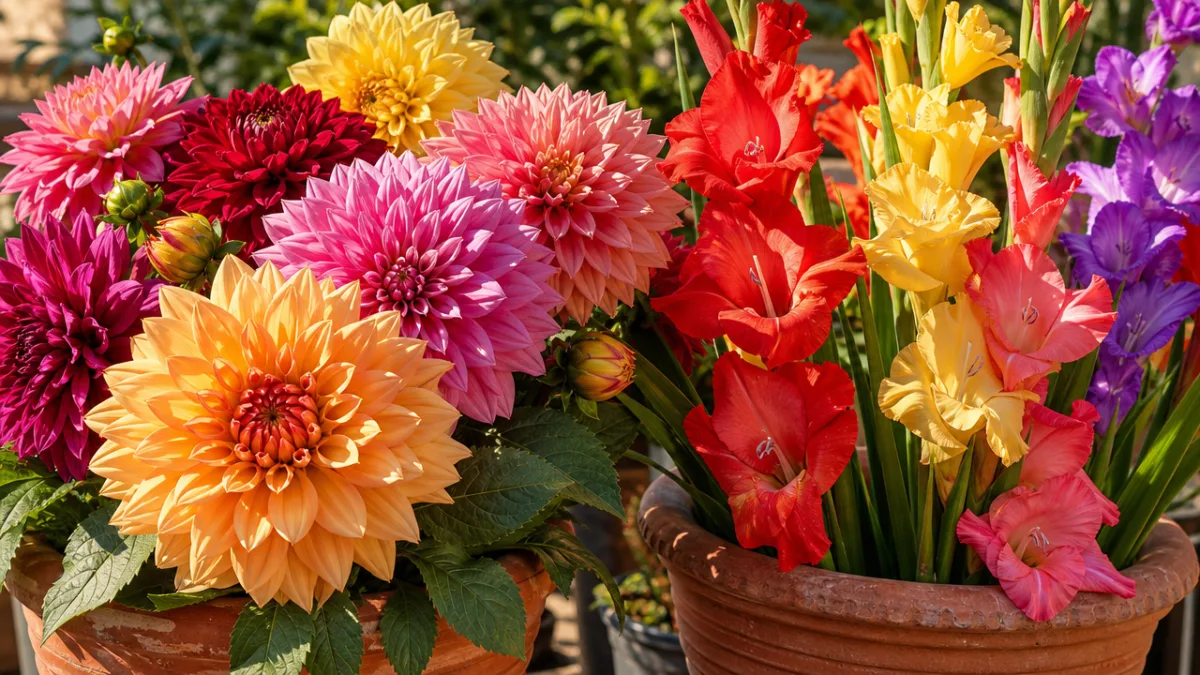
Color theory plays a beautifully practical role in designing bulb combinations that feel harmonious and intentional rather than accidental. Monochromatic schemes using different shades of the same color — imagine a gradient from pale cream tulips through soft butter yellow to rich golden yellow — create a sophisticated, elegant effect that feels cohesive in formal or contemporary gardens. Complementary color pairings, such as the classic purple and yellow combination of purple alliums rising above a carpet of golden daffodils, generate maximum visual excitement and energy. Analogous schemes using colors that sit next to each other on the color wheel, such as orange, coral, and red dahlias together, create warm, richly saturated borders that absolutely glow in late summer sunshine.
- Early spring combination: Snowdrops, purple crocuses, and blue muscari for a jewel-like carpet effect.
- Mid-spring combination: Pink Darwin tulips, white daffodils, and deep blue forget-me-nots for a cottage garden classic.
- Late spring combination: Purple alliums, creamy white tulips, and ornamental grasses for contemporary drama.
- Summer combination: Orange dahlias, yellow gladiolus, and bronze heleniums for rich autumnal warmth.
Troubleshooting Common Problems and Maximizing Longevity
Even experienced gardeners encounter problems with their bulb flowers from time to time, and being able to diagnose and address these issues quickly is the difference between a disappointing season and a genuinely beautiful one. The most common problem is blind bulbs — bulbs that produce healthy-looking foliage but no flowers whatsoever. This frustrating outcome is usually caused by one of three things: bulbs planted too shallowly, bulbs that were not adequately chilled before planting in warm climates, or bulbs that have become overcrowded underground over several years and need to be lifted and divided to restore vigor and flower production.
Pests and diseases represent another set of challenges that bulb growers must learn to manage proactively rather than reactively. Tulip fire, caused by the fungus Botrytis tulipae, is one of the most destructive diseases affecting spring bulbs and can spread rapidly through a planting if left unchecked. It manifests as distorted, scorched-looking leaves and stems in wet, cool springs. Prevention through good spacing for airflow, avoidance of overhead watering, and prompt removal of affected plant material is far more effective than attempting to treat an established outbreak. Squirrels and mice are enthusiastic and infuriating consumers of freshly planted bulbs, particularly tulips and crocuses, and physical barriers such as wire mesh laid just below the soil surface remain the most reliable deterrent.
Maximizing the longevity of your bulb collection requires thinking beyond the current flowering season and making decisions that benefit the plants over multiple years. For bulbs like daffodils, alliums, and most minor bulbs that naturalize reliably, the strategy is largely one of benign neglect: plant them well, feed them occasionally, and let them multiply naturally into ever-larger clumps. Tulips, which are more prone to deteriorating after the first year in most garden conditions, benefit from being treated as semi-annuals in heavier soils, lifted after flowering, dried, and replanted in fresh positions each autumn. Understanding which of your bulbs will return reliably and which need annual attention allows you to plan your garden budget and time investment more effectively each season.
Extending the Season and Bringing Bulb Flowers Indoors
One of the greatest pleasures of growing bulb flowers is discovering just how flexible and generous they can be when you learn to work with them creatively. By selecting varieties carefully from the full spectrum of what is available — from the very earliest snowdrops and winter aconites that bloom while snow is still possible to the late-season nerines and autumn crocuses that flower as summer draws to a close — a dedicated bulb gardener can maintain a near-continuous parade of flowers for eight or nine months of the year. This kind of extended seasonal planning transforms the garden from a place with one spectacular spring moment into a truly dynamic, year-round landscape.
Forcing bulbs indoors is a wonderfully rewarding technique that brings the joy of spring blooms into your home during the coldest, darkest months of winter. Hyacinths are particularly well suited to indoor forcing and fill a room with extraordinary fragrance that few other plants can match. Place pre-chilled hyacinth bulbs in specially designed hyacinth vases so that the basal plate just touches the water, then keep them in a cool, dark location for several weeks until the root system is well established and the flower bud has begun to emerge. Then bring them into a warm, brightly lit room and watch them develop from bud to magnificent bloom over the course of a week or two.
Cutting bulb flowers for indoor arrangements is a pure delight and does far less harm to the plant than many gardeners fear, provided you follow a few simple guidelines. Always cut tulips and daffodils in the early morning when stems are turgid and temperatures are cool. Make the cut at a steep angle to maximize the surface area available for water uptake, and always cut just above the lowest leaf rather than removing all foliage, which the plant still needs for photosynthesis. One important note: daffodil stems exude a sap that is toxic to other flowers and will cause them to collapse prematurely if mixed together. Either condition cut daffodil stems in water for 24 hours before combining them with other flowers, or simply enjoy them in arrangements on their own, where their cheerful yellow faces and elegant simplicity are more than enough.
With the knowledge of how to choose, plant, care for, and creatively combine your bulbs, you now have everything you need to create genuinely breathtaking displays season after season. The world of bulb flowers rewards curiosity and experimentation generously. Each new variety you try, each planting combination you explore, and each problem you successfully solve teaches you something that makes next year’s garden even more beautiful than the last. Plant with intention, care with consistency, and let nature’s most reliable performers do what they were born to do — fill the world with color, fragrance, and joy.








What do you think?
It is nice to know your opinion. Leave a comment.