










Josephine Corduroy Tote Bag: A Complete Guide to This Beloved PDF Sewing Pattern
Introduction to the Josephine Corduroy Tote Bag Pattern
The Josephine Corduroy Tote Bag has won over sewists all over the world, and honestly, it’s not hard to see why. It hits that sweet spot between timeless style and everyday practicality in a way that feels almost effortless. Whether you’ve been sewing for years or you’re just starting to explore making your own accessories, the Josephine tote is the kind of project that feels rewarding without being overwhelming — and the finished bag is something you’ll actually reach for every morning. The classic shape, generous size, and thoughtful little construction details set it apart from the dozens of other tote patterns floating around out there.
Part of what makes this pattern so appealing is that it works beautifully with a whole range of fabrics — but the name really does give away its best pairing. Corduroy just makes sense here. That richly textured surface gives the finished bag a structured, put-together look that feels a step above your average tote. The ridges catch light in a really flattering way, and the natural weight of the fabric helps the bag hold its shape as you carry it around. The end result looks like something you’d find in a boutique, not something you whipped up at home on a Sunday afternoon.
PDF sewing patterns have genuinely changed things for home sewists, and the Josephine leans into that format completely. You can download it the moment you purchase, print it at home or drop it off at a copy shop, and get started right away no matter where you live. You’ll never have to worry about losing a tissue paper piece to a rogue breeze or the bottom of a drawer. You can print extras for testing, resize for different printers, and keep a clean copy saved forever. If you’ve ever spent twenty minutes hunting for a missing pattern piece, you’ll appreciate that alone.
Understanding the Pattern Design and Features
The Josephine isn’t one of those patterns that produces a floppy, shapeless bag you feel slightly embarrassed pulling out in public. It’s been thoughtfully engineered to give the finished piece real structure — think a defined body, a flat or boxed base, and seams that look clean and intentional from both the inside and out. Interfacing, carefully placed seam allowances, and smart construction choices all work together here. You can tell the designer actually thought about how a bag gets used day to day, and it shows throughout.
Something sewists consistently rave about with this pattern is the interior organization. A good tote bag isn’t just a glorified open pouch, and the Josephine usually includes pockets, dividers, or other interior details that make it genuinely useful for real life. Whether you’re hauling a laptop, a mountain of craft supplies, or just the usual chaos of a busy day, having a place for everything inside makes the difference between a bag you love and one that quietly drives you nuts every time you can’t find your keys.
The handles are worth talking about on their own. They really do make or break a tote — affecting how comfortable it is over your shoulder, how it hangs in your hand, and how the whole bag looks in profile. The Josephine pattern gives you clear guidance on building handles with clean, even edges and attachment points sturdy enough to handle both regular use and the inevitable moment when you’ve packed in way more than you planned. Those reinforced attachment points might seem like a small detail, but they’re the difference between a bag that lasts years and one that gives out after a few months.
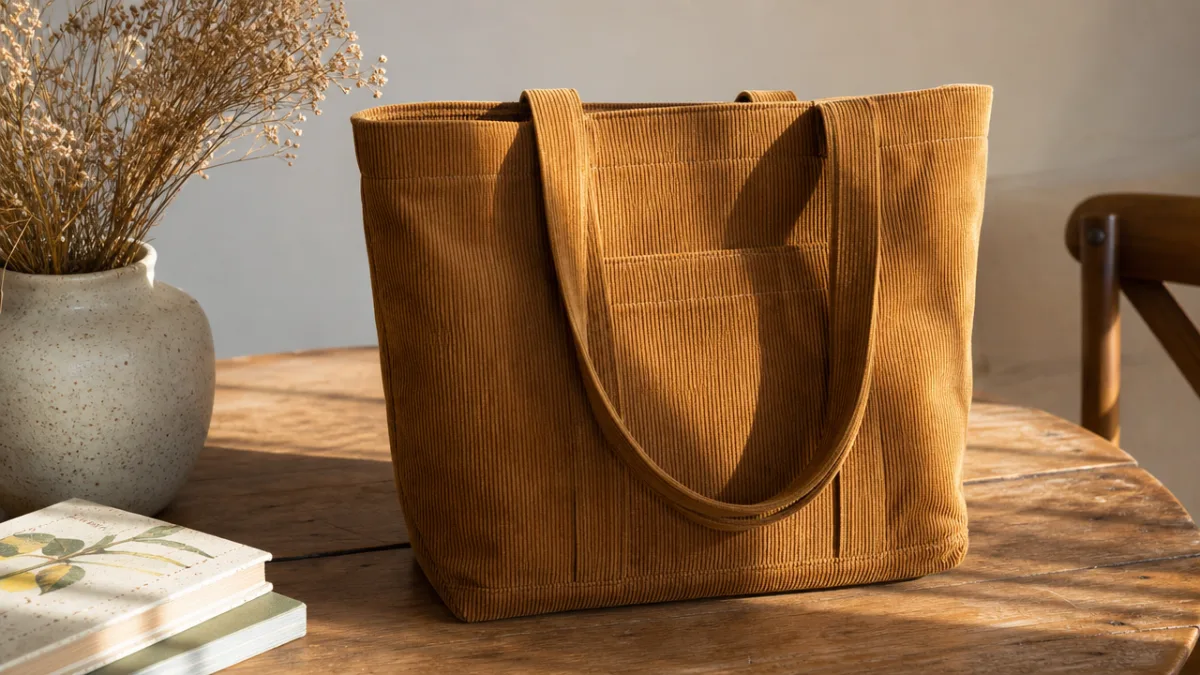
Choosing the Right Corduroy Fabric for Your Josephine Tote
Picking the right corduroy is honestly one of the most fun parts of this project, and there’s a lot more variety out there than you might expect. Corduroy is measured by its wale — basically, how many ridges fit per inch of fabric. Fine-wale or pinwale corduroy has lots of narrow ridges and gives you a smooth, almost velvety surface that lends itself to a more polished, refined bag. Wide-wale corduroy has bold, chunky ridges with loads of visual personality and a more relaxed, casual feel. Standard mid-wale sits right in the middle and is the easiest to find at most fabric shops.
Color is where corduroy really shines. Something about the fiber structure makes the dye look especially rich and deep, so classics like forest green, burnt orange, camel, burgundy, and navy all look absolutely gorgeous. A neutral camel or tan will coordinate with just about anything in your wardrobe, while a jewel tone becomes a genuine statement piece. It’s always worth picking up a small sample before committing to full yardage — not just to check the color in your own lighting, but to get a feel for how that particular fabric behaves before you start cutting.
Beyond the main corduroy, the Josephine is typically designed for medium-weight wovens, which opens things up nicely for lining and contrast details. A cotton print lining in a complementary color adds a little surprise of pattern and personality that’s only visible when the bag is open — the kind of detail that feels personal and considered. Canvas, denim, or even a second corduroy in a contrasting color can work beautifully for exterior pockets or handle wrapping. Honestly, shopping for fabrics with this pattern in mind turns into its own little creative adventure.
Tools and Supplies You Will Need
Getting everything together before you start cutting is one of those things that’s easy to skip but really does make the whole process smoother and more enjoyable. When you’re not stopping to hunt down a seam ripper mid-project or realizing you’re out of the right interfacing, you stay in the flow and produce better work. Most of what you’ll need are standard sewing room staples, but a few specific items make working with corduroy noticeably easier. Think of it as doing a kindness to your future self.
Here’s what you’ll typically need for a project like the Josephine Corduroy Tote Bag:
- Exterior fabric in your chosen corduroy or medium-weight woven, usually one to two yards depending on the pattern size
- Lining fabric in a complementary cotton or canvas, similar yardage to the exterior
- Fusible or sew-in interfacing to add structure to key panels and handles
- A sewing machine in good working order with a fresh needle appropriate for medium-weight fabrics
- A walking foot or even-feed foot, particularly helpful when sewing through multiple layers of corduroy
- Sharp fabric scissors or a rotary cutter with a self-healing cutting mat
- Matching thread in good quality polyester or cotton
- Pins or Wonder Clips for holding layers together without damaging the fabric
- An iron and ironing board for pressing seams as you sew
- A point turner or chopstick for pushing out corners cleanly
Needles deserve a special mention when you’re working with corduroy. A dull or wrong-size needle can crush or snag the pile, and the thick layers you’ll sew through during bag construction need a needle that can push through cleanly without bending or skipping stitches. A universal needle in size 80 or 90 is a decent starting point, but a denim or topstitch needle often handles the heavier sections better. Swapping in a fresh needle before you start a new project costs almost nothing and saves you so much grief — skipped stitches, thread breakage, and that low-level irritation of fighting with your machine all tend to disappear when you’re working with a sharp needle that’s right for the job.
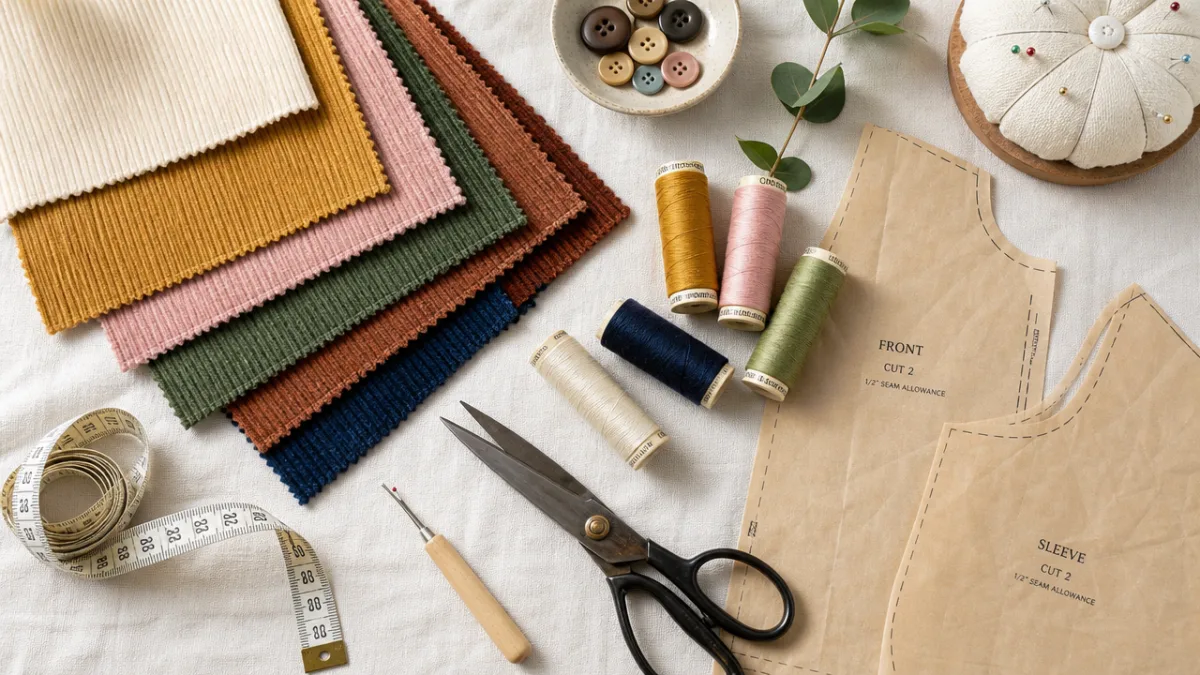
Step-by-Step Overview of the Sewing Process
Your downloaded pattern will walk you through every specific step, but having a sense of the overall construction sequence before you dive in makes the whole thing feel a lot less intimidating. Most structured tote patterns move through the same general arc: prepare your pieces, build the exterior, build the lining, then bring the two together for a clean, professional finish. Knowing where you’re headed means that when you hit a step that feels fiddly or a little confusing, you can mentally place yourself in the larger picture and keep moving forward with confidence.
The preparation phase is the one that eager sewists most often rush through, and it’s consistently where shortcuts come back to bite you. Cutting on grain, applying interfacing properly, pressing every piece before it gets sewn, and marking all your notches and reference points accurately — none of it feels exciting, but all of it pays off at every step that follows. With corduroy especially, it’s worth taking a few minutes to check that the pile direction is consistent across all your exterior pieces. Fabric cut in different directions will actually appear to be slightly different colors depending on the light, and that difference becomes very obvious in the finished bag.
Assembly generally moves through these stages, though your specific pattern instructions should always be your primary guide:
- Cut all fabric pieces according to the pattern, checking grain lines carefully
- Apply interfacing to all pieces that require it, pressing firmly and evenly
- Construct any exterior pockets and attach them to the main exterior panels
- Sew the exterior panels together, creating the main bag body
- Create and attach the handles, pressing and top-stitching for clean edges
- Construct the lining panels, including any interior pockets
- Sew the lining together, leaving an opening for turning
- Join the exterior and lining at the top opening, right sides together
- Turn the bag right side out through the lining opening
- Close the lining opening and push it inside the bag
- Top-stitch around the top edge to finish and secure the lining
Pressing at every stage really is the thing that separates a bag that looks homemade from one that looks genuinely professional. Every seam, every folded edge, every completed section — press it before moving on. With corduroy, always press from the wrong side or use a pressing cloth on the right side so you don’t crush the pile. A tailor’s ham or seam roll helps when you’re working with curved or shaped seams that don’t want to lie flat on a regular ironing board. It sounds like a lot of stopping and starting, but you’ll feel the difference immediately when you hold up the finished piece.
Customization Ideas and Creative Variations
One of the real joys of sewing your own bag rather than just buying one is the freedom to make it completely yours. The Josephine gives you a strong, well-thought-out foundation to build on, and there are so many ways to take it in your own direction — from quick, simple swaps to more involved modifications. Even small changes can shift the whole character of the finished bag. Swapping standard webbing handles for leather straps, or adding a magnetic closure at the top opening, can take it from casual and relaxed to sleek and sophisticated without changing a single structural element.
Embellishment is another area where this pattern really invites creativity. Hand embroidery looks especially lovely on corduroy because the texture of the fabric adds depth and dimension to even the simplest stitches. A monogram, a botanical motif, or a simple geometric design worked onto an exterior pocket before the bag is assembled can turn a beautiful handmade tote into something that genuinely feels like a piece of art. Machine embroidery works just as well if you want more complexity with less time. Fabric paint, iron-on patches, or decorative buttons are all worth considering too — the options are pretty much endless once you start thinking about it.
Size modifications are a natural next step once you’ve made the pattern as written and understand how it fits together. A smaller version makes a sweet project bag for knitting or crochet, a stylish everyday purse, or a really thoughtful handmade gift. A larger version becomes a serious market bag, a weekend carryall, or something big enough to haul everything you need for a full day of crafting away from home. Once you’ve made the Josephine once and gotten a feel for its construction logic, scaling the dimensions up or down becomes much less daunting — and a lot more fun.
Tips for Success and Common Mistakes to Avoid
Every pattern has its tricky spots, and the Josephine is no different. Knowing in advance where makers tend to run into trouble lets you slow down and pay extra attention in exactly the right places, rather than charging ahead confidently and then wondering what went wrong. The tips here come from the collective experience of lots of sewists who’ve made this pattern and taken the time to share what they learned — in reviews, online sewing communities, and maker blogs. Their hard-won insights are genuinely useful.
Bulk is probably the most common challenge people mention when sewing with multiple layers of corduroy. At corners and junctions where several seam allowances converge, the fabric can pile up to the point where your machine struggles to feed it evenly, and the finished seam can look lumpy or uneven. Grading your seam allowances — trimming each layer to a slightly different width — takes care of a lot of that bulk. Clipping corners diagonally close to (but not through) the stitch line lets the seam allowance spread out when you turn the bag, giving you crisp, flat corners instead of rounded, stuffed-looking ones. These are small moves that make a genuinely noticeable difference.
Consistent seam allowances are another thing worth staying vigilant about. In garment sewing you can often fudge things a little during fitting, but bag construction really does depend on precise seam allowances to make sure panels line up, handles end up the right length, and the lining fits neatly inside the exterior. Using the guide lines on your machine’s throat plate — or sticking down a strip of tape as a quick makeshift guide — makes consistency automatic rather than something you have to consciously monitor with every single seam. And finally: read through the entire pattern instructions before you cut anything. It’s the step almost every experienced sewist swears by and almost every new sewist skips, usually with regrets they could have completely avoided.








What do you think?
It is nice to know your opinion. Leave a comment.