





DIY Fabric Crafter Organizer Bag: Your Complete Guide to Free Sewing Patterns and Fabric Art
Introduction to the Fabric Crafter Organizer Bag
If you’ve ever looked at your sewing table and thought “how did it get this bad,” you already know the problem this project solves. Fabric scraps everywhere, spools of thread rolling off the edge, a rotary cutter buried under a pile of notions — it’s a familiar kind of chaos. The DIY fabric crafter organizer bag is the answer, and it’s a genuinely satisfying one. Every tool gets its own pocket, loop, or compartment, so you can actually find things when you need them. Even better, there are free sewing patterns all over the internet, so you don’t have to spend anything on a commercial template to get started.
What makes this bag so appealing is that you build it around how you actually work. Wide flat pockets for fat quarters and pattern tissue? Done. Narrow loops that keep your scissors and seam rippers upright and ready? Also done. This isn’t a rigid, one-size-fits-all product you grabbed off a shelf — it’s something you designed yourself, and that difference shows every time you reach into it.
On top of the practical payoff, this is a genuinely great intermediate sewing project. You’ll work through zipper installation, boxing corners, applying interfacing, and clean topstitching, all in one cohesive build. By the time you’re admiring the finished bag hanging in your studio or sitting open on your worktable, you’ll have picked up skills that carry over into dozens of future projects. It’s one of those rare makes where the process is just as worthwhile as the thing you end up with.
Choosing the Right Fabrics and Supplies
Fabric choice really does make or break this project, so it’s worth slowing down here. For the outer shell, you need something sturdy enough to hold its shape under the weight of actual tools — canvas, duck cloth, denim, and home-décor-weight cotton all work well. As a rough guide, aim for at least 8 to 10 ounces per yard on the exterior so it doesn’t go floppy on you when loaded up.
For lining and pocket panels, quilting cotton is hard to beat. It’s workable, durable, resists fraying at pocket edges, presses beautifully, and comes in such an enormous range of prints that you can really have fun with the interior. A lot of sewists talk about that small daily moment of opening their bag and catching a glimpse of a cheerful floral or bold geometric lining — it turns something functional into something you’re genuinely glad to own. Picking a lining print that plays well against your outer fabric is one of the easiest ways to make the finished piece feel intentional and polished.
Interfacing is the part people sometimes skip, and they always regret it. Fusible fleece adds soft padding that protects things like rotary cutters and rulers from banging around. Woven fusible interfacing like Pellon SF101 stabilizes your exterior without adding a ton of bulk. Foam stabilizer such as Bosal In-R-Form gives the base panel a nice semi-rigid structure that helps the bag hold its shape on a table. Before you cut into anything, pull together the rest of your supplies:
- Heavy-duty thread in a coordinating or contrasting color, size 40 or 50 weight
- A zipper or two in your preferred length — typically 14 to 18 inches for the main compartment
- D-rings, swivel clips, and adjustable sliders for a removable shoulder strap
- A rotary cutter, self-healing mat, and acrylic ruler for precision cutting
- Basting clips or wonder clips, which grip thick bag layers without distorting them
- A leather or denim needle for your sewing machine to power through heavy seams
Understanding the Free Sewing Pattern Layout
Free sewing patterns for this style of bag are easy to find on sewing blogs, Pinterest, and craft sites, and most of them follow the same basic logic once you’ve read through a couple. They’re usually spread across several letter-sized or A4 pages that you print, trim, and tape together at the alignment marks to get the full-size template. Always print at exactly 100% — no scaling, no page fitting — and double-check against the test square on the first page before you cut a single piece of fabric.
A typical pattern will include a main body panel cut twice for front and back, a base panel, two side gusset pieces, a zipper panel or placket, and a collection of pocket rectangles in different sizes. Some patterns throw in separate pieces for strap tabs and a hanging loop too. Each piece will tell you its name, which direction the grain line runs, and how many to cut from outer fabric, lining, and interfacing. Read all of this before you pick up your scissors — it only takes a few minutes and it will save you the frustration of cutting something on the wrong grain or forgetting to mirror a panel.
Check whether seam allowances are included in the pieces, because not all patterns handle this the same way. Most bag patterns use a half-inch seam allowance, though some designers go with three-eighths on lighter fabrics. Pocket rectangles often have their own separate folding notes for the top hem edge. Spending ten minutes with a highlighter to annotate your printed pieces with grain lines, notes, and cut counts before you start is one of those small habits that pays for itself many times over in saved fabric and avoided mistakes.
Step-by-Step Sewing Instructions
Start by pressing all your pieces with a hot iron and fusing your interfacing using a slow press-and-lift motion rather than sliding the iron across — this gives you a more even bond with less bubbling. Once everything is interfaced and pressed flat, sort your pieces into labeled piles: exterior pieces together, lining pieces together, pocket panels in their own stack. It sounds like a small thing, but not having to dig through a jumbled pile mid-project makes the whole build feel much more manageable.
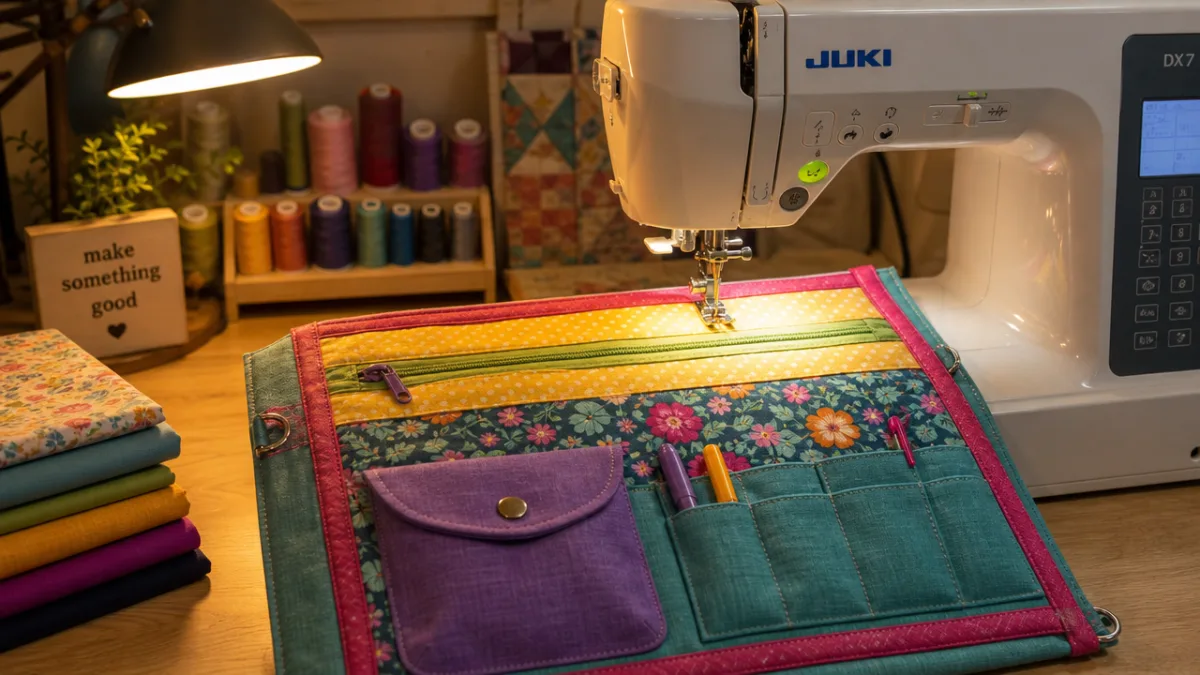
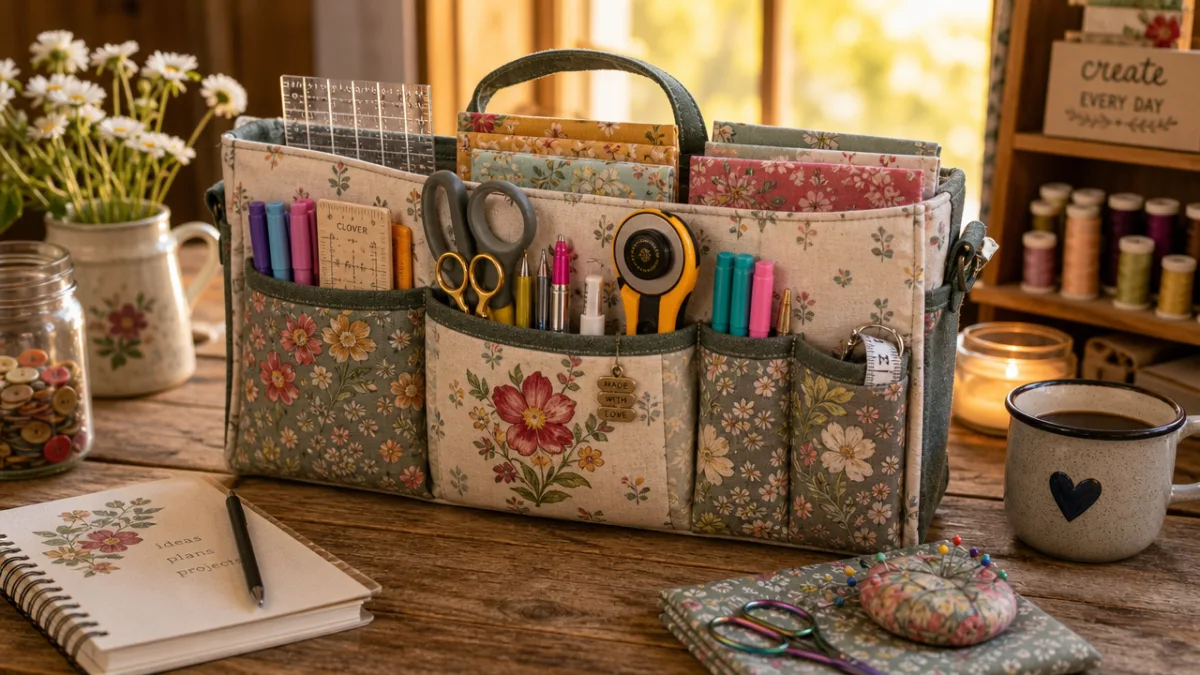
Tackle the pockets first, because this is where the bag really takes shape. For a standard tool-pocket panel, fold the top raw edge down a half inch, press, fold again, press, then edgestitch along the lower fold for a clean, strong hem. Pin the finished panel to its corresponding lining or exterior piece, then stitch vertical dividing lines wherever your tools need them. A row of narrow loops for pens and marking tools, a wide flat pocket for your cutting mat, and a medium pocket for your pin cushion will cover most people’s needs without overcomplicating things.
Zipper installation has a reputation for being scary, but it’s really just a matter of slowing down and working methodically. Use a zipper foot and sew with the zipper teeth facing down toward the feed dogs so you can actually see your seam line. Basting the zipper in place with fabric glue or a glue stick before you sew is a game-changer — you can check the placement and adjust without leaving pin holes in the fabric. After both sides are stitched, add a topstitched line about an eighth of an inch from the original seam for a polished finish that also reinforces the attachment. From there, the final assembly goes like this:
- Sew exterior front and back panels to the base, matching notches carefully at the curved corners
- Add the side gussets to complete the three-dimensional exterior shell
- Assemble the lining the same way, but leave a 5-inch gap at the base seam for turning
- Insert the zipper panel between the exterior and lining at the top opening
- Turn the bag right side out through the lining gap, push out all the corners, and press thoroughly
- Edgestitch all the way around the top opening, closing the turning gap as you go
- Attach your strap hardware through the tab pieces and adjust to the length you want
Customization Ideas and Variations
A free base pattern is really just a starting point, and the variations you can build from it are almost endless. Add a tall central compartment wide enough for a 14-inch straight needle set and it becomes a knitting project tote. Swap the tool loops for deep brush holders and line the interior with ripstop nylon or oilcloth and it’s an art supply bag. If you travel to sewing bees or workshop retreats, a retractable ID window pocket on the front panel doubles as a name badge holder and a business card display — a small addition that gets used every single time.
Color and print choices are honestly your biggest lever for making this bag feel like yours. A monochromatic build — waxed canvas exterior, linen lining, cotton webbing straps — has a clean, minimal quality that works really well in a home office setting. On the other end of the spectrum, throwing together several bold quilting cotton prints in colors that make you happy turns the bag into something that announces your love of fabric every time you carry it. Neither direction is wrong; the only miss is making a bag that doesn’t feel like you when you reach for it in the morning.
Hardware is one of the easiest upgrades you can make without changing a single pattern piece. Swapping plastic D-rings for solid brass hardware immediately pushes the finished piece into heirloom territory. Trading a standard nylon zipper for one with metal teeth in an antique brass finish adds a vintage workshop feel that’s especially nice with waxed canvas or heavy denim. And if you’d rather have a wall-mounted system than a portable bag, just skip the strap hardware entirely, add a dowel sleeve at the top, and you’ve got a hanging tool roll that mounts above your sewing table like a small piece of textile art.
Tips for a Professional Finish
A truly professional-looking handmade bag is absolutely achievable — it mostly comes down to a few habits you build in from the start. The biggest one is pressing at every single stage. Press seams open rather than to one side wherever the thickness allows, because it distributes bulk more evenly and gives you flatter, crisper edges. Press pocket hems before you stitch them, press seam allowances before turning pieces right side out, and give the finished bag a thorough final press with a damp cloth to lock everything into place for good.
Clipping and notching curved seams is the other technique that really separates a smooth result from a lumpy one. On convex curves like the rounded bottom corners, cut small V-shaped notches into the seam allowance every half inch or so, getting as close to the stitching line as you can without cutting through it. On concave curves, make straight clips perpendicular to the seam. These cuts let the fabric spread or contract so it lies flat when turned right side out. Skip this step and you’ll end up with puckered corners that pressing can’t fully fix — it’s one of those things that’s much easier to do right than to work around later.
Topstitching is where you put your signature on the whole piece, and it rewards patience. Bump your stitch length up to 3.0 or 3.5mm, which creates a bolder, more visible line that looks deliberate rather than incidental. Use your presser foot edge or a seam guide to keep a consistent distance, and watch the guide rather than the needle. If something goes wrong, pull it out completely — sewing over a mistake leaves doubled topstitching lines that are one of the most obvious signs of a correction. Steady, even topstitching ties every element of the bag together and tells anyone who picks it up that it was made with real care.
Caring for Your Finished Organizer Bag
A well-made fabric organizer bag can last for years — even decades — if you treat it right from the beginning. Before you load it up for the first time, consider giving the exterior a light spray with a textile protector like Scotchgard. It creates an invisible barrier against the small spills and dye transfers that happen in any active craft space. Spray outdoors or in a well-ventilated area, hold the can about six inches from the surface, and do two light coats instead of one heavy one. Let it dry fully before you start filling it up.
When it needs washing, turn it inside out if you can and run it through a gentle cold cycle inside a mesh laundry bag — this protects the hardware and pocket edges from banging against the drum. Avoid hot water, which can cause interfacing to delaminate and dull the finish on your hardware. Air drying is much better than the dryer, especially for bags made with foam stabilizer or fusible fleece, where high heat can warp the interfacing and permanently change the shape of the bag. Hang it by the strap so gravity does some of the work keeping everything in the right shape as it dries.
Over time you might notice pockets stretching out from regular use, or a seam starting to show wear at a high-stress point like a strap tab. Catching these things early makes them trivial to fix. A bar-tack stitch — a dense zigzag worked back and forth across the seam line — reinforces a strap attachment in under two minutes and adds a surprising amount of tensile strength. Replacing a tired zipper pull takes five minutes and makes the whole bag look refreshed. A little maintenance goes a long way, and a bag you’ve looked after well will stay a genuinely useful, genuinely cherished part of your making life for a long time to come.








What do you think?
It is nice to know your opinion. Leave a comment.