










How To Make An Easy Recycled Magazine Basket: A Complete Step-by-Step Guide
If you’ve got a pile of old magazines gathering dust, here’s a genuinely fun way to deal with them — turn them into a basket. Not a flimsy, novelty-craft basket, but a real, sturdy, actually-useful-around-the-house basket. This project hits a sweet spot between sustainability and creativity, and the results are honestly a bit surprising for something made from glossy pages. Whether you’ve never picked up a glue gun in your life or you’re a seasoned crafter looking for a new project, this one’s very doable.
Why Recycled Magazine Baskets Are Worth Making
There’s a growing push toward more sustainable living, and making things from recycled materials is one of the most satisfying ways to join that movement. Magazine baskets are a perfect starting point — the materials cost you nothing (assuming you already have the magazines), the tools are minimal, and you end up with something genuinely useful. Most of us feel a little guilty chucking magazines in the bin knowing how much went into making them, and this project is a pretty great answer to that guilt.
There’s also something visually special about these baskets that you just can’t buy in a shop. The layers of coiled and woven printed pages create a texture and pattern that’s completely unique to the magazines you happen to use. Every basket turns out slightly different depending on which colors dominate the pages, how tightly you rolled the tubes, or whether you mixed publications. That unpredictability is part of the charm — what you end up with is genuinely one of a kind.
And they’re more practical than they look. Once you’ve properly constructed and sealed a magazine basket, it’s surprisingly solid — sturdy enough to work as a fruit bowl, desk organizer, plant pot cover, bathroom storage, or a decorative shelf piece. Add a coat of varnish and it can even handle a bit of light moisture. Once you’ve made your first one and seen how well it holds up, it’s hard not to want to keep going.
Gathering Your Materials and Tools
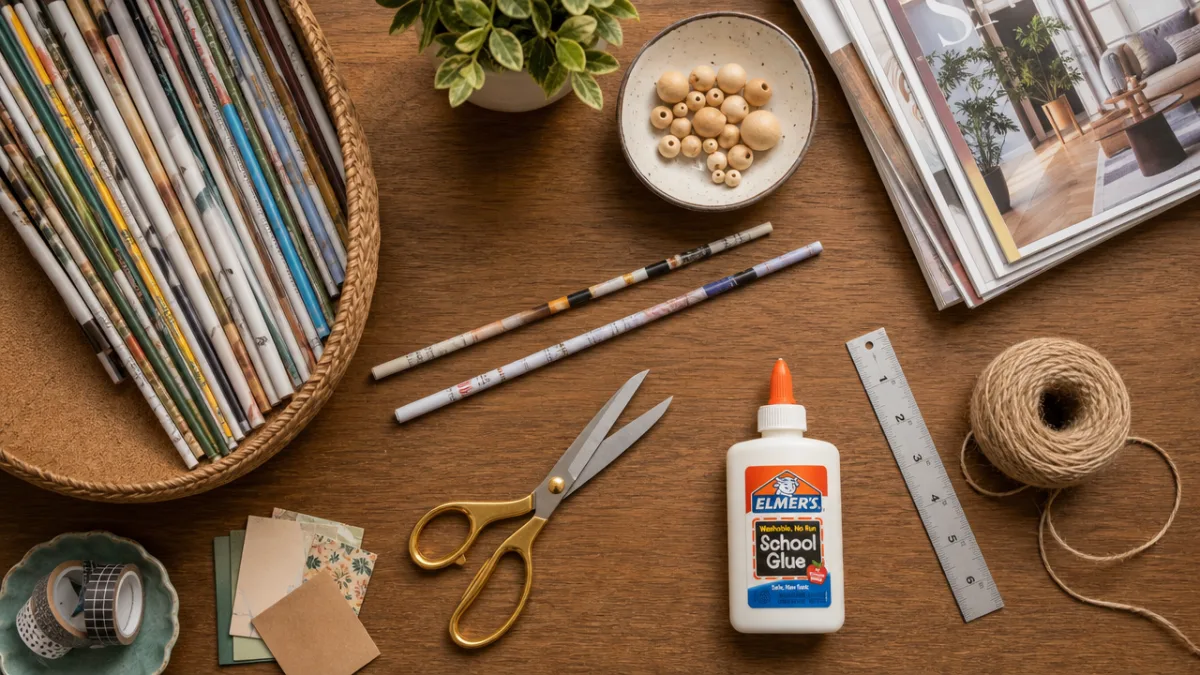
Before you dive in, it’s worth getting everything together so you’re not stopping mid-project to hunt down a pair of scissors. The main material is obviously old magazines — you’ll want at least ten to fifteen for a small basket, more if you’re going bigger. Glossy pages are ideal because they’re strong and flexible enough to roll tightly without tearing. Avoid thin, newspaper-style pages for your main tubes if you can, as they tend not to hold up as well.
For tools, you probably already have most of what you need. A long knitting needle or bamboo skewer is the key one — it’s what you’ll roll your tubes around, so you want something thin and smooth. You’ll also need craft glue or a hot glue gun, scissors, and a ruler. A circular piece of cardboard cut to your intended basket diameter makes a great base to work from, and a handful of clothespins or small clips will save you a lot of frustration when you’re waiting for glue to dry.
On top of that, it’s worth having some varnish, Mod Podge, or decoupage medium on hand for the finishing step — this is what gives the basket its durability. Acrylic paint is handy if you want a more unified look, and ribbons or twine are nice for decorative touches. Some people also dye their tubes before building by painting them with watered-down acrylics or even strong tea for an earthy, natural tone. Getting all of this sorted beforehand makes the whole process much smoother.
- Old magazines (at least 10–15 issues for a small basket)
- Long knitting needle or bamboo skewer for rolling tubes
- Craft glue or hot glue gun with glue sticks
- Scissors and a ruler
- Circular cardboard base cut to your desired size
- Clothespins or small binder clips
- Varnish, Mod Podge, or decoupage medium for sealing
- Optional: acrylic paint, ribbons, or twine for decoration
Rolling the Perfect Magazine Tubes
Everything in this project comes down to the tubes. Rolling them consistently and tightly is genuinely the most important skill here, and once you get the hang of it, it becomes almost meditative. Start by cutting or tearing your magazine pages into strips — around five to six centimeters wide is a good starting point, though you can adjust based on the look you’re going for. Cutting diagonally across the page rather than straight across gives you a slightly tapered tube, which some people prefer.
Lay your knitting needle or skewer at one corner of a strip at a slight angle and begin rolling the paper around it, keeping steady, even tension the whole way. The tighter the roll, the stiffer and stronger your tube will be — so it’s worth slowing down here rather than rushing. When you reach the last couple of centimeters of paper, dab on a little glue and press it down to seal the tube, then slide the needle out. That’s it. Your first tube is done.
To make longer tubes — which you’ll need for the vertical stakes that form the sides of your basket — just slide one tube into the open end of another and glue the join. This means you can essentially make tubes as long as you like, so the size of your basket is really only limited by how many magazines you have and how much patience you’re working with. It helps a lot to roll a big batch of tubes before you start building, because running out halfway through is annoying and breaks your flow.
One thing worth paying attention to: the color of the pages you use affects the final look more than you might expect. Pages with lots of white space make lighter tubes, while pages heavy on dark photography or bold graphics produce richer, darker tones. Some crafters sort their pages by color intentionally and use the variation to create stripes or gradients in the finished basket. It’s a small extra step that can make a big difference if you’re after a more deliberate, designed look.
Constructing the Base and Building Up the Sides
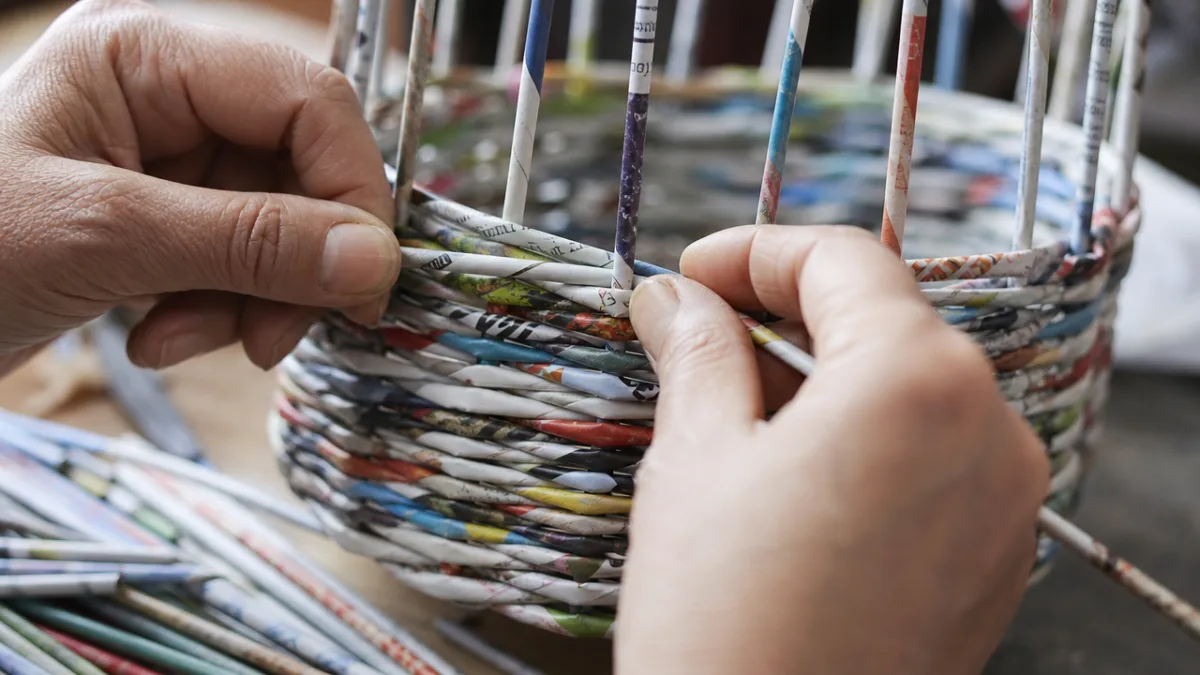
Once you’ve got a good stock of tubes ready, it’s time to start building. Take your circular cardboard base — about fifteen to twenty centimeters across works well for a medium basket — and lay straight tubes across it in a spoke pattern, gluing each one down firmly. These spokes are what you’ll weave around, so try to space them fairly evenly. Once the glue is dry, bend each spoke upward so it stands more or less perpendicular to the base. Clipping them in place while you start weaving helps keep things from shifting around.
Now take a fresh tube and begin weaving it in and out of the upright spokes, working your way around continuously. It’s the same basic over-under technique used in traditional basket weaving — simple once you get going, and it builds up surprisingly quickly. After a few rows, the structure starts to feel genuinely solid, especially once the glue starts doing its job.
As you build up the sides, add small dots of glue between the woven rows and the stakes, particularly in the lower rows near the base where the most stress ends up when the basket is loaded. Press each new tube firmly against the last one as you go to avoid gaps. How tall you take it is completely up to you — a shallow bowl needs only four or five rows, while a proper deep storage basket might need ten to fifteen or more.
When you’ve reached the height you want, it’s time to tidy up the top. Fold each protruding spoke end down over the last row of weaving and tuck it under the nearest inner tube, securing with glue. This gives you a clean, finished rim with no sharp or ragged edges poking out. If you want to go a step further, wrap a final tube tightly around the entire rim as a continuous coil, gluing as you go and tucking the end underneath. It takes a few extra minutes but makes the whole basket look much more finished and considered.
Finishing, Sealing, and Decorating Your Basket
Once the construction is done and all the glue has had a good chance to cure, you move into the finishing stage — which is honestly where the real transformation happens. The most important thing here is sealing the whole basket with varnish, Mod Podge, or decoupage medium. Apply two or three coats with a wide brush, letting each one dry completely before adding the next. This is what binds everything together, stiffens the structure, and makes the basket genuinely resistant to moisture and daily wear.
If you’d like a cleaner, more unified look, painting the basket before your final seal coats works really well. Acrylic paint takes to the surface nicely, and you’ve got a lot of options — crisp white, warm neutrals, bold statement colors, whatever suits your space. A thinned-down brown or ochre wash is lovely if you want something that looks more like wicker or rattan, since it settles into the texture and adds depth without covering it. Whatever you choose, thin layers are better than thick ones — heavy paint tends to fill in the weave and flatten the effect you worked hard to create.
Then there’s the fun part: decorative touches. A ribbon around the rim, some twine threaded through the weave, a strip of fabric decoupaged around the base — all of these can take a basket from “nice handmade thing” to something you’d genuinely be proud to give as a gift. Some crafters add twisted paper tube handles for extra practicality, while others attach small dried flowers, shells, or beads as accents. This is really where your own taste gets to come through, so don’t be shy about experimenting.
Creative Ways to Use and Display Your Magazine Basket
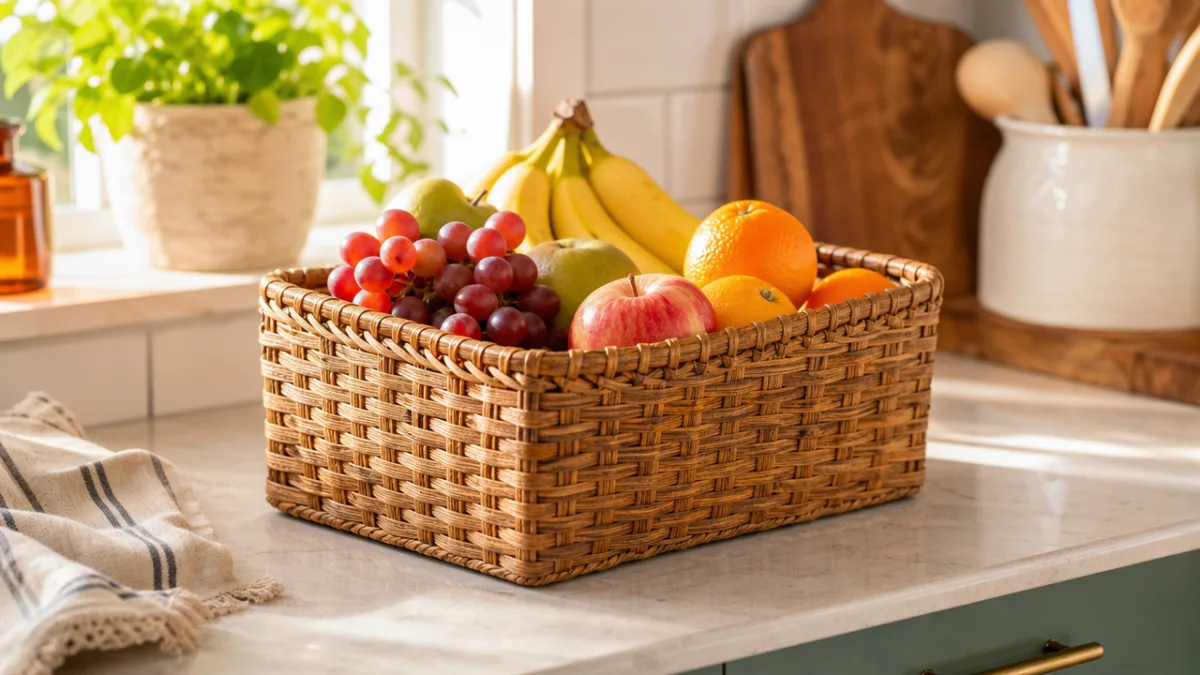
Once your basket is finished and sealed, you’ll probably find yourself wondering why you don’t have more of them. In the kitchen, a medium-sized one makes a lovely fruit bowl — practical, sturdy, and a lot more interesting to look at than a plain ceramic bowl. A shallower version lined with a cloth napkin works beautifully as a bread basket on the table. And in the pantry, larger baskets are great for corralling loose packets, jars, and bits and pieces that would otherwise create chaos on shelves.
On a desk, a tall cylindrical basket makes a great pen holder, while a wider, flatter one handles papers, notebooks, or incoming mail perfectly. In the bathroom, a well-sealed basket can hold rolled towels, toiletry bottles, or cotton rounds — it brings a warm, handmade quality to a room that often feels a bit cold and clinical. The main thing is to think about what size and shape you actually need before you start building, since you have complete control over that from the very beginning.
They also make genuinely thoughtful gifts — especially when filled with something the recipient loves. The fact that the basket itself is handmade communicates something no shop-bought item really can. For seasonal gifts, you can tailor the color palette to suit the occasion: warm oranges and reds for autumn, soft pastels for spring, deep jewel tones for winter. Tie in the recipient’s favorite colors and it becomes something personal rather than just pretty.
- Kitchen fruit bowl: A classic and practical use that shows off the basket’s durability and natural texture at its best.
- Desk organizer: Keep pens, scissors, and small supplies tidy in a handmade container that adds warmth to your workspace.
- Bathroom storage: After thorough sealing, use baskets for rolled towels, cotton rounds, or toiletry bottles.
- Plant pot cover: Slip a plastic pot inside for a stylish, eco-friendly plant display that suits any interior style.
- Gift basket: Fill with treats and small gifts for a personalized present that’s as beautiful as what it contains.
- Bread basket: Line with a cloth napkin and use as a charming table centerpiece during meals or gatherings.
Displaying your baskets around the home also tends to spark conversations — people are often genuinely surprised when you tell them what they’re made from. Grouping a few different sizes together on a shelf, or nesting a set inside each other, makes for a striking arrangement that also doubles as a talking point. There’s something quietly meaningful about an object made from pages that might otherwise have ended up in landfill — it’s functional, it’s handmade, and it carries a small story about choosing to make something rather than just throw it away.








What do you think?
It is nice to know your opinion. Leave a comment.