










Mirror Makeover: Transforming Dull Mirrors Into Stunning Focal Points
The Power of a Mirror Makeover: Why Upcycling Changes Everything
There’s something almost magical about giving a mirror a second life. That sad, forgotten frame gathering dust in a garage sale bin? It can become the most eye-catching thing in your entire home — and honestly, it usually takes nothing more than a free weekend, a few supplies, and a willingness to just try something. The upcycling world has fully embraced this kind of creative rescue mission, and mirrors might be the best candidates of all for a DIY reinvention.
Mirrors have this interesting dual role in a home — they’re functional objects and decorative statements at the same time. A beautifully framed or artfully painted mirror doesn’t just show you your reflection; it reflects your taste, your color choices, the care you’ve put into a space. When you upgrade a mirror, you’re not just fixing up one piece — you’re changing the whole energy of a room, adding light and depth and a little personality to what might have felt like a forgettable wall.
On top of all that, mirror makeovers are genuinely one of the most budget-friendly home projects out there. You can find thrift store mirrors for just a few dollars, and the materials to bring them back to life — spray paint, mosaic tiles, rope, molding, decorative trim — are cheap and easy to track down. When you stack that up against what a designer mirror costs at a high-end furniture store, the case for doing it yourself basically makes itself.
Assessing Your Mirror and Preparing the Surface
Before you reach for any paint or embellishments, take a good hard look at what you’re working with. Start with the frame — if there is one — and check whether it’s actually sound. Look for loose joints, cracked wood, chipped plaster, or peeling veneer. Any of those things need to be fixed first, with wood glue, filler, or some reinforcing hardware, because even the most beautiful paint job won’t hide a corner that keeps separating or a frame that wobbles on the wall.
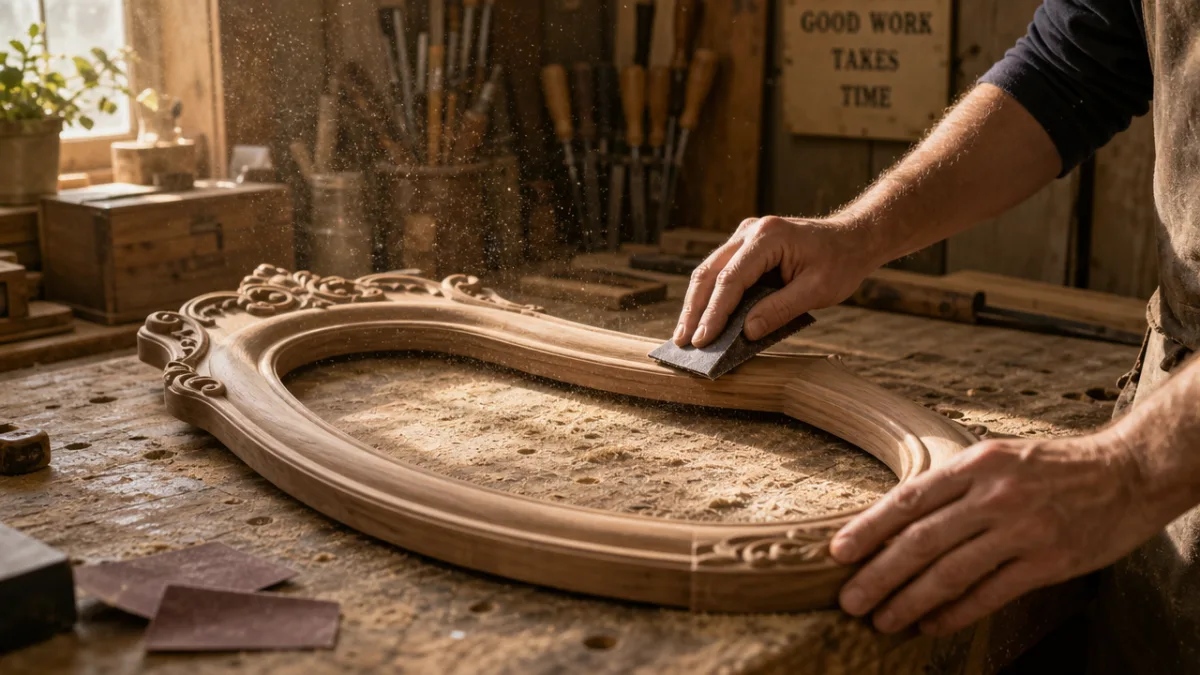
Cleaning might actually be the most important step in the whole process, and it’s also the one people are most likely to rush through. Grease, dust, and old finish residue will stop paint and adhesive from bonding properly, and you’ll end up with peeling and flaking within weeks. Give the frame a good wash with a degreasing cleaner or just warm water and dish soap, and then let it dry completely — overnight if you can. If the surface is glossy, a light pass with fine-grit sandpaper gives the paint something to grip without damaging what’s underneath.
Don’t forget to protect the glass while you work. Even the most careful person slips occasionally, and dried paint on mirror glass is a real pain to remove cleanly. Run painter’s tape along the edges where the glass meets the frame, pressing it down firmly so nothing seeps underneath. For spray paint projects, go ahead and cover the whole glass surface with paper or plastic sheeting. It feels like extra work in the moment, but it’ll save you a lot of frustration when you’re trying to finish up.
Five Transformative Techniques for a Stunning Mirror Makeover
Spray painting is probably the fastest and most dramatic trick in the DIY mirror toolkit. One can of metallic gold, matte black, or pearl white can completely transform a plain wooden or plastic frame in under an hour. The secret to getting that clean, professional finish is patience — thin coats, not one thick one. Hold the can about twelve inches away, keep moving, and let each coat dry fully before adding the next. Thin coats prevent drips and bubbles, which are the two things most likely to ruin an otherwise great result.
Rope and jute wrapping has taken off in coastal and bohemian design circles, and it’s easy to see why — it’s inexpensive, beginner-friendly, and produces this warm, organic texture that looks effortlessly at home in almost any neutral interior. The process is straightforward: apply hot glue or a heavy-duty craft glue to a small section of the frame, press the rope into it, and work your way around in tight, even coils. Work in small sections so the glue doesn’t dry before you get the rope in place, and finish with a clean trim and a good dab of glue to hold the end down.
Mosaic tiling takes things in a completely different direction, and it’s a wonderful option for bathroom mirrors, outdoor pieces, or anywhere you want a jewel-like, textural focal point. Broken ceramic tiles, glass pieces, mirrored fragments, sea glass — all of it works. Arrange your pieces into a pattern or just go freeform, adhere them with tile adhesive or craft glue, and once everything’s cured, grout between the pieces to give it that polished, finished look. It takes time, but the result is genuinely one of a kind — something you truly can’t buy anywhere.
Adding architectural molding is the move if you want a mirror that looks like it was pulled from a European manor or a high-end design showroom. Flat wooden molding, chair rail pieces, or decorative trim can be cut to size, mitered at the corners, and glued right onto an existing frame — or even directly onto a frameless mirror — to build an entirely new profile. Paint the whole thing one unified color once it’s dry, and it looks like something built into the room. This technique plays well in both maximalist and minimalist spaces depending on what molding and color you choose.
Faux finishes — marble, tortoiseshell, aged bronze — open up another layer of creative possibilities for anyone ready to take things up a notch. These take a bit more practice than a simple spray paint job, but there are tons of tutorials out there and the learning curve really isn’t steep. A marble effect, for instance, uses just two or three coordinating paint colors, a fine artist’s brush for veining, and a feather or sponge for blending. No special training required. Done well, the frame looks far more expensive and elaborate than anything you actually spent on it.
Choosing the Right Frame Style for Every Room
The living room is where most people feel comfortable going bold, and that instinct is right — it’s the room guests see most often and the one that does the most work communicating your personal style. In contemporary or Scandinavian-leaning spaces, minimalist frames in matte black or brushed brass feel right at home alongside clean lines and neutral palettes. In more traditional or maximalist living rooms, ornate gilded frames, heavily textured molding, or layered mixed-material designs create exactly the kind of dramatic, conversation-starting focal point a room like that deserves.
Bathrooms need a little extra thought, mainly because of the moisture and humidity that builds up in those spaces. Whatever materials you use need to be moisture-resistant or properly sealed — otherwise you’re looking at warping, peeling, or worse over time. Exterior-grade spray paint, marine varnish over decorative finishes, and waterproof adhesives are all solid choices for bathroom projects. Style-wise, clean spa-like finishes tend to work well — brushed nickel, crisp white, soft greens — though a powder room is one place where a bold, graphic approach can really shine.
Entryways and hallways don’t get nearly enough credit as mirror locations, but they really should. A well-chosen mirror in one of these transitional spaces improves both the look and the function of your home in a hurry. Narrow hall mirrors make tight spaces feel less cramped, and the frame gives visitors an early preview of the design language running through the rest of your home. A leaner propped casually against the wall feels editorial and relaxed; a wall-mounted mirror with a substantial frame feels more curated and formal. Either way, a thoughtful makeover is what connects the piece to everything around it.
- Living Rooms: Oversized frames in gold, black, or mixed materials; consider sunburst or arch-top designs for maximum visual impact and architectural interest.
- Bathrooms: Moisture-resistant finishes in brushed metals, sealed wood, or tile; keep proportions in relation to the vanity size for a balanced, purposeful look.
- Bedrooms: Warm, soft finishes that complement bedding and furniture tones; full-length mirrors with upholstered or rope frames add a luxurious, serene quality.
- Entryways: Statement frames that set the tone for your home’s interior; consider high-contrast finishes that draw the eye and create a welcoming first impression.
- Outdoor Spaces: Weather-resistant materials only; mosaic, sealed metal, or painted concrete frames can transform a garden wall or covered porch into a striking design moment.
Future Décor Ideas: Incorporating Your New Mirror Into a Refreshed Space
A newly transformed mirror rarely stays a standalone project for long — it tends to kick off a broader design refresh, and that momentum is worth running with. Once your mirror is finished and on the wall, use it as the anchor for everything else in the room. The colors, textures, and materials in the frame can ripple outward into throw pillows, vases, artwork, and textiles, building the kind of cohesive, intentional interior that actually feels pulled together rather than assembled by accident. Starting from one strong piece and building outward is honestly one of the most reliable ways to end up with a room you love.
Gallery walls built around a statement mirror are a natural next step and one of the most rewarding ways to expand on your upcycling project. The mirror becomes the visual centerpiece — bigger than everything around it, positioned at the optical center of the arrangement — while framed prints, photos, wall sculptures, and decorative objects fill in the surrounding space. Before you commit to a single nail hole, lay the whole arrangement out on the floor and audition different configurations. The frame finish on your mirror should guide the frames you pick for everything else, so the wall reads like a composed collection rather than a random pile.
Lighting is probably the most underused tool in a home decorator’s kit, and it pairs beautifully with a freshly remade mirror. A picture light mounted above a beautiful frame makes the piece feel like illuminated artwork — suddenly it looks genuinely important in the room. Sconces flanking a bathroom or entryway mirror add symmetry and warmth while actually improving the functional light in the space. And if you want to get a little more atmospheric about it, positioning a mirror directly across from a window maximizes how much natural daylight bounces back into the room — a trick that’s especially valuable in north-facing spaces or anywhere that tends to feel a bit dim.
Styling around your mirror with the seasons is a low-effort way to keep the space feeling alive all year without undertaking a full redecoration every few months. A wreath hung over the frame transitions naturally from spring greenery to dried summer botanicals to autumn foliage to winter evergreen. Objects on a console table or shelf beneath the mirror — candles, vases, small sculptures — can be swapped whenever you want a change of mood. This kind of layered, evolving approach keeps your mirror at the living center of the room’s story rather than fading into the background like furniture you’ve stopped seeing.
Sustainability and the Upcycling Mindset: Decorating with Purpose
Every mirror you rescue from a thrift store, estate sale, or curbside pickup is a small but real act of environmental stewardship. The furniture and home goods industries contribute significantly to landfill waste, and manufacturing new decorative items burns through energy, raw materials, and transportation resources at every step. Choosing to upcycle instead of buying new keeps an object out of the waste stream and extends its useful life — a choice that lines up with both personal creativity and a genuine commitment to consuming more consciously. And these habits are contagious in the best way: one person’s practice of rescuing and repurposing inspires others, and those habits, multiplied across a community, start to add up to something that actually matters.
There’s also a personal satisfaction to upcycling that you simply can’t get from buying something off a shelf. When you look at a mirror you transformed yourself — when you see the light catch a frame you painted, or run your fingers over rope you coiled into place — there’s a sense of pride and ownership that no manufactured product can replicate. Interior designers and psychologists alike will tell you this connection to handmade and hand-transformed objects is genuinely meaningful: our homes feel more like us when they hold things we’ve made, altered, or chosen with real care.
Building an upcycling practice also quietly builds real skills over time. Every project teaches you something new — surface prep, color theory, how adhesives actually behave, how proportions work in a space. That knowledge stacks up. A lot of people who start with a simple spray-painted mirror find themselves taking on bigger furniture makeovers, full room redesigns, and increasingly ambitious creative projects as their confidence grows. In that sense, the mirror is more than just a piece of décor — it’s a starting point, a first step into a creative practice that can bring genuine joy, real savings, and a much more intentional relationship with the things you surround yourself with.
- Source responsibly: Look for mirrors at thrift stores, estate sales, Facebook Marketplace, and neighborhood buy-nothing groups before purchasing anything new.
- Choose low-VOC paints: Many excellent spray paints and craft paints now come in low-VOC or water-based formulations that reduce indoor air pollution and are safer to use in enclosed spaces.
- Reuse packaging and materials: Save glass jars for mixing paint, use old newspapers for drop cloths, and repurpose cardboard as masking material during spray paint projects.
- Share your projects: Documenting and sharing your upcycling work online inspires others to try similar projects, multiplying the environmental and creative benefits of your individual effort.
- Plan before purchasing: Sketch your design and make a complete materials list before shopping to avoid waste from impulse purchases or misjudged quantities.
A mirror makeover is really a story about potential — the potential hiding in overlooked objects, in blank walls, in rooms that have stopped feeling alive. With a clear vision, a handful of inexpensive materials, and a willingness to get your hands a little messy, you can turn a dull, forgotten mirror into the most dazzling thing in the room. And along the way, you transform more than just the object — you change the feeling of the space, the experience of walking into it, and maybe most importantly, what you see reflected back when you look at your own creative capabilities.








What do you think?
It is nice to know your opinion. Leave a comment.