










DIY Squishy Vending Machine: Make Your Own Squeezy Fun
What Is a DIY Squishy Vending Machine?
If you have ever wandered past an arcade or a toy shop and spotted a vending machine packed with colorful, irresistibly squeezable squishy toys, you already know the magnetic appeal these little gadgets hold. A DIY squishy vending machine brings that same excitement into your own home, classroom, or craft room, letting you build something functional and genuinely fun from scratch. Whether you are a parent looking for a weekend project to share with your kids or a crafting enthusiast hunting for your next satisfying build, this project delivers on every level and is far more achievable than it might initially sound.
At its core, a squishy vending machine is a dispensing contraption — usually box-shaped — that holds a collection of small squishy toys and releases them one at a time through a simple mechanical or gravity-fed system. The DIY version strips away the electronics and coin mechanisms of commercial machines and replaces them with clever low-tech solutions involving cardboard, wooden boards, PVC pipes, or even repurposed shoeboxes. The result is a charming, personalized machine that you can decorate, customize, and stock with whatever squishies you love most, from cute food-shaped foam toys to slow-rising animals and mini kawaii characters.
Making your own squishy vending machine also has an educational dimension that often surprises people. Planning the build introduces basic concepts in engineering and spatial reasoning, such as calculating how wide a chute needs to be for squishies to slide through freely without jamming. Decorating it taps into graphic design thinking, while the dispensing mechanism offers a gentle introduction to simple machines and cause-and-effect mechanics. It is the kind of project that sneaks learning into play so naturally that nobody even notices it is happening, making it a perennial favorite for teachers, homeschooling parents, and after-school program coordinators.
Gathering Your Materials and Tools
Before you cut a single piece of cardboard, it pays to spend a few minutes assembling everything you will need so the build flows smoothly from start to finish. The beauty of this project is that most of the core materials are either already in your home or available for just a few dollars at a craft or hardware store. Starting with a solid materials list prevents the frustrating mid-project pauses that can sap momentum and enthusiasm, especially when building alongside children who are eager to see results quickly. Take the time upfront and the rest of the process will feel almost effortless by comparison.
For a basic cardboard version — which is the most beginner-friendly starting point — you will need several large sheets of sturdy corrugated cardboard, a sharp craft knife or box cutter, a cutting mat, a metal ruler, strong craft glue or a hot glue gun, clear packing tape for reinforcement, and a pencil for marking measurements. You will also want a selection of decorating supplies, including acrylic paints, markers, colored paper, stickers, and washi tape, to give your machine its personality once the structure is complete. Sandpaper is useful if you are working with a wooden version and want smooth edges on the finished product.
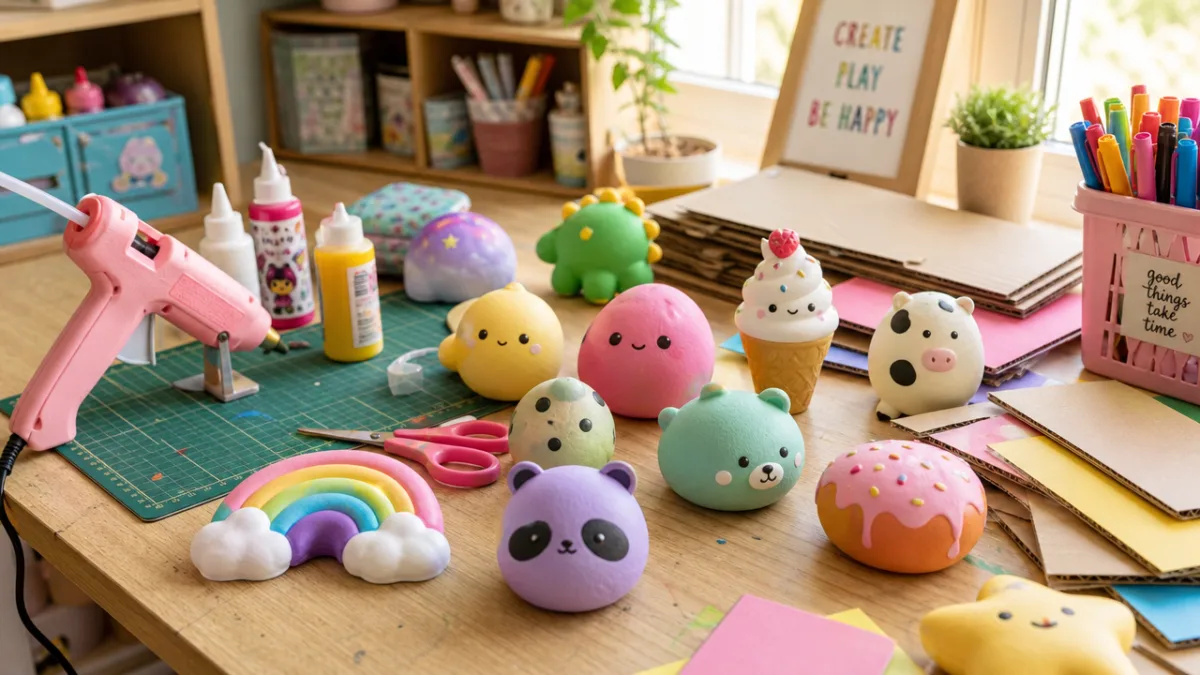
The squishies themselves deserve some thought at the planning stage because their size will dictate virtually every measurement of your machine. Measure the largest squishy you intend to use and add at least half an inch of clearance on all sides so items can move through the dispensing channel without snagging. A collection of similarly sized squishies makes engineering the mechanism much simpler, so if you are buying new ones specifically for this project, try to select a consistent size range. Small, dense foam squishies in the two-to-three-inch range tend to work best for most homemade machine designs, flowing smoothly while still being satisfying to squeeze.
- Corrugated cardboard sheets or a wooden craft board (at least 12 x 18 inches)
- Hot glue gun with plenty of glue sticks
- Craft knife, box cutter, or a jigsaw for wooden builds
- Metal ruler and set square for accurate measurements
- Acrylic paints, markers, and decorative paper or vinyl
- Clear acetate or thin plastic sheet for the display window
- A small drawer pull, bead, or coin slot façade for decorative detail
- A collection of uniformly sized squishy toys to stock the machine
Designing Your Vending Machine: Layout and Dimensions
The design phase is where imagination and practicality need to shake hands and work together. Your machine needs to look like the toy it is imitating while also functioning as a real dispensing system, which means the interior architecture has to be thought through carefully before a single piece is cut. Start by sketching your design on paper, drawing a front view, a side view, and a rough cross-section that shows how squishies will stack inside the holding chamber and travel down to the dispensing exit. Even a simple pencil sketch helps you anticipate problems before they show up in cardboard form, saving both materials and frustration.
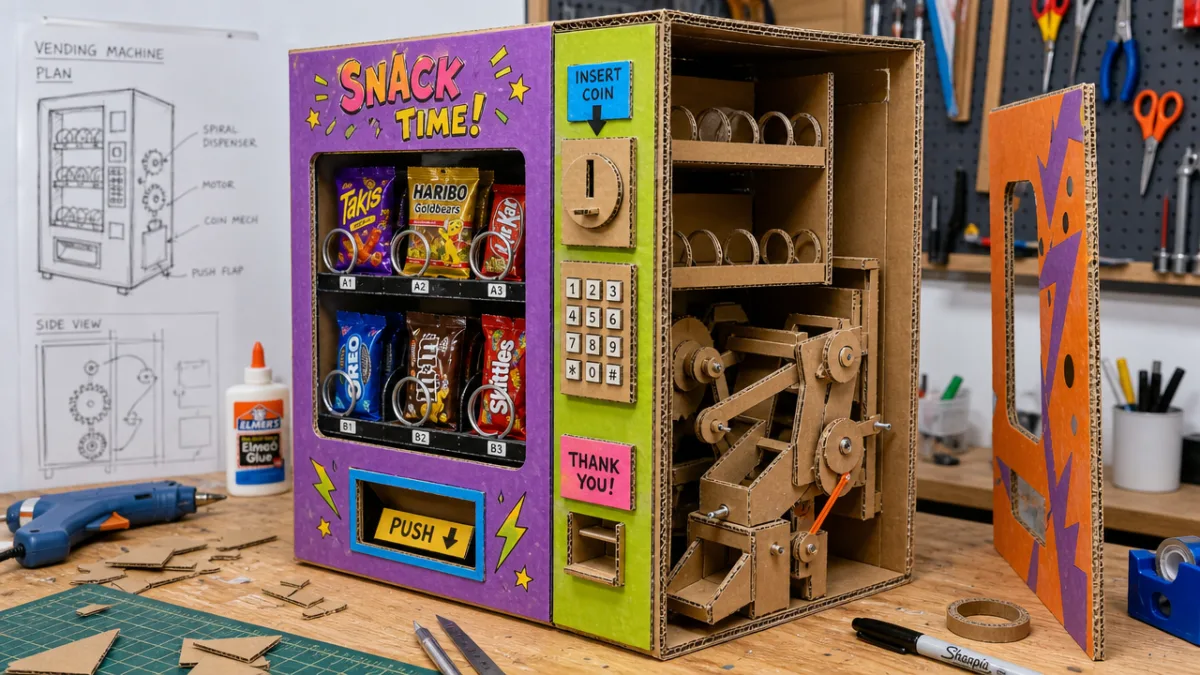
A workable beginner design divides the machine into three main zones. The top zone is the storage chamber, a tall enclosed column where squishies stack vertically, held in place by gravity. The middle zone is the mechanism zone, where a sliding panel, rotating wheel, or tilted shelf controls how squishies are released one at a time. The bottom zone is the dispensing tray or exit chute, an open or partially open compartment where the released squishy lands and can be retrieved by the user. Keeping these three zones conceptually distinct as you design makes the whole project far less overwhelming, since you can solve each zone as a separate engineering problem.
Standard dimensions for a satisfying cardboard squishy vending machine fall somewhere between twelve and sixteen inches tall, eight to ten inches wide, and five to seven inches deep. These proportions give the machine a recognizable vending-machine silhouette while keeping the build manageable. The storage column should be at least as wide and deep as your largest squishy plus a half-inch of clearance on each side. The dispensing chute needs to angle downward at roughly thirty to forty-five degrees so gravity does the work of sliding the released squishy toward the exit. Drawing all of this to scale on graph paper before you cut anything is time well spent and experienced crafters rarely skip this step.
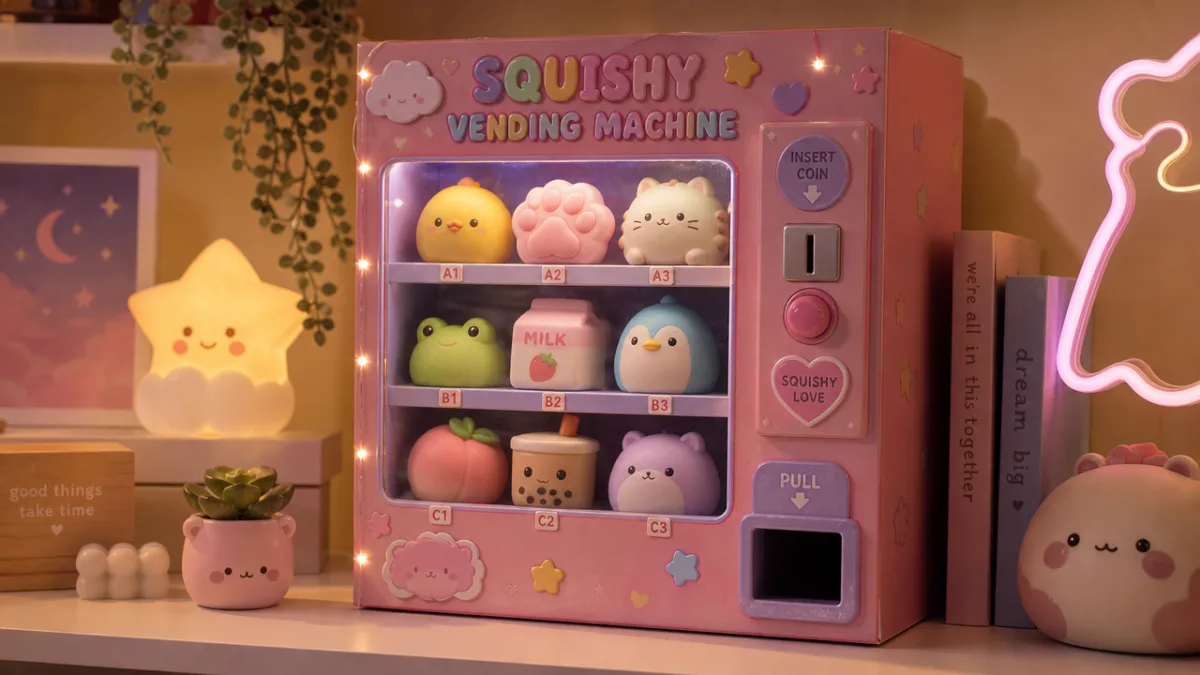
Consider also where your display window will go. Commercial vending machines always have a clear panel so you can see the tempting products inside, and recreating this feature dramatically increases the charm and playability of your DIY version. A rectangle of clear acetate, a piece cut from a plastic report cover, or even the transparent face of a photo frame can serve as this window beautifully. Position it on the front face of your storage chamber so the stacked squishies are visible from outside. Framing the window with colored tape or painted borders gives it a polished, finished look that elevates the entire machine.
Building the Dispensing Mechanism
The dispensing mechanism is the beating heart of the whole machine, and it is the part that tends to spark the most creative problem-solving. There are several approaches that work well at a DIY scale, and the right one for your build depends on your skill level, the tools you have available, and how complex you want the finished mechanism to be. The simplest approach involves a sliding panel — essentially a flat piece of cardboard that sits between the storage column and the exit chute. When pushed in, the panel blocks the exit; when pulled out, it lets the bottom squishy drop through. It is low-tech, highly reliable, and deeply satisfying to operate.
A slightly more complex and visually impressive option is the rotating barrel or wheel mechanism. In this design, a cylindrical drum with a single squishy-sized pocket sits horizontally across the base of the storage column. When the barrel is turned — usually by rotating an external knob or handle — the pocket rotates from a loading position directly beneath the column to a dispensing position above the exit chute, depositing one squishy at a time with every full rotation. This design mimics the mechanisms found in actual commercial gumball machines and produces a wonderfully tactile experience. It can be built from a short section of PVC pipe with a notch cut into it, or fabricated entirely from layered cardboard discs.
Whichever mechanism you choose, testing it repeatedly before you glue everything permanently in place is absolutely essential. Load the storage column with squishies and run the mechanism through ten or fifteen cycles, watching for jams, misalignments, or areas where the squishy gets stuck rather than dispensing cleanly. Squishies are compressible, which is part of their appeal but also a complicating factor in mechanism design, since they can deform and wedge in ways that rigid objects would not. If jamming occurs, the usual fix is to slightly widen the channel or add a small guide rail that keeps squishies oriented correctly as they travel through the mechanism. Patience during this testing phase pays enormous dividends in the final product.
- Cut and assemble the outer shell of your machine, leaving the top and one side panel unglued for interior access.
- Build and install the storage column, ensuring squishies can stack freely without tilting or jamming.
- Construct your chosen mechanism and test it dry before installing it permanently.
- Attach the mechanism at the base of the storage column, aligning it precisely with the exit chute.
- Install the exit chute at the correct angle and confirm the dispensed squishy lands neatly in the retrieval tray.
- Close and seal the outer shell, leaving only the control element (knob, handle, or slider) accessible from outside.
- Test again with a full load of squishies before beginning decoration.
Decorating and Personalizing Your Machine
Once the structure is built and the mechanism tested, the decorating phase arrives and it is genuinely one of the most joyful parts of the entire project. This is where your vending machine stops being a functional cardboard box and starts becoming a personality-filled creation that reflects your taste, humor, and artistic vision. The range of decorating approaches is wide enough to suit every skill level and aesthetic, from simple paint-and-sticker designs aimed at younger builders to more elaborate vinyl wrapping, hand-lettered signage, and LED accent lighting for older crafters who want a truly polished result.
Begin with a base coat of acrylic paint in your chosen background color, applying two thin layers rather than one thick coat to prevent warping on cardboard builds. Classic vending machine colors like bright red, electric blue, or sunshine yellow immediately read as the right visual archetype and make the machine look instantly recognizable. Once the base coat is dry, use painters tape to create crisp geometric details or panel lines that echo the look of real commercial machines. Adding a painted or printed logo to the front panel — perhaps your family name, a fun brand name you invent, or a kawaii character motif — transforms the machine from craft project to bespoke toy in a single creative step.
The display window area deserves particular attention during decoration because it is the visual focal point that draws the eye and communicates the machine’s purpose at a glance. Frame the window with contrasting color trim, decorative washi tape, or even small adhesive gems and rhinestones for a glamorous touch. Adding a small hand-lettered price tag or a sticker that reads “25¢” or “Insert Coin” in vintage lettering reinforces the vending machine aesthetic even though the machine is free to use. These small details accumulate into a convincingly themed finished product that consistently earns delighted reactions from everyone who sees it for the first time.
Consider adding functional decorative details that enhance the play experience alongside the purely visual ones. A small lever or button on the exterior that connects to your mechanism and travels smoothly when operated turns the dispensing action into a ritualistic moment rather than a casual gesture. You might add a coin slot cutout backed with a small internal cup that collects play coins, letting users go through the full vending machine ritual of inserting a coin, pressing the button, and collecting their squishy. These experiential details are what separate a good DIY toy from a great one, and they cost almost nothing to include if you plan for them from the beginning of the build.
Playing, Sharing, and Leveling Up Your Build
A finished squishy vending machine is more than a static display piece; it is an interactive prop that invites play, sparks imagination, and brings people together in the simple pleasure of anticipation and reward. The act of inserting a pretend coin, turning a knob, and watching a squishy tumble into the tray is a satisfying loop that children and adults return to repeatedly, long after the novelty of any individual squishy has faded. Setting the machine up in a playroom, classroom, or at a birthday party creates an instant focal point and a surprisingly effective tool for teaching patience, taking turns, and the concept of exchange in a completely stress-free context.
For classroom and party settings, consider introducing a simple economy around the machine that extends the play without any real money changing hands. Print or draw play tokens on cardstock, assign small tasks or achievements that earn tokens — finishing a reading assignment, helping tidy up, winning a party game — and let children spend their earned tokens at the squishy vending machine. This mechanic turns the machine into a motivational tool with genuine behavioral impact, and the squishies become meaningful rewards rather than just random toys. Teachers who have used this approach report that the machine quickly becomes one of the most motivating elements in their classroom environment, requiring virtually no ongoing maintenance beyond restocking.
Once you have mastered the basic build, a world of potential upgrades opens up that can keep the project evolving for months. Adding interior LED strip lighting powered by a small battery pack makes the machine glow attractively when the room lights are low and dramatically increases its visual appeal. Upgrading from cardboard to a plywood frame with a router-cut display window produces a machine sturdy enough to last for years and survive the enthusiastic handling of small children. More adventurous builders have incorporated simple Arduino-based electronic mechanisms that require a genuine button press or even a programmed coin sensor before dispensing, bringing the DIY machine genuinely close to its commercial inspiration in terms of functionality.
- Add battery-powered LED strip lighting inside the storage column to illuminate your squishies dramatically.
- Upgrade the exterior finish with adhesive vinyl wrap for a professional, waterproof surface.
- Build a second, narrower column alongside the first to offer two different squishy varieties.
- Introduce a simple lock mechanism so access to the interior for restocking requires a key.
- Create themed seasonal versions with holiday decorations and matching squishies.
- Document your build process and share it online to inspire other makers in the craft community.
Sharing your finished machine — whether by gifting it, using it at an event, or posting the build process online — connects you to a wider community of makers and squishy enthusiasts who share your enthusiasm for tactile, handmade fun. The DIY maker community around squishy toys and homemade dispensing machines is warm, creative, and full of people eager to trade tips, show off their variations, and celebrate each other’s builds regardless of skill level or budget. Your first squishy vending machine is really just the beginning of a creative journey that can go wherever your curiosity and imagination choose to take it, one satisfying squeeze at a time.








What do you think?
It is nice to know your opinion. Leave a comment.