










DIY Creative Vintage Desk Makeover: Transform Your Old Desk Into a Stunning Statement Piece
There is something deeply satisfying about breathing new life into a forgotten piece of furniture. A vintage desk makeover combines the charm of old-world craftsmanship with your own personal creative vision, resulting in a piece that tells a story while serving a practical purpose in your home. Whether you found your desk at a thrift store, inherited it from a grandparent, or simply want to refresh a tired piece you already own, this guide will walk you through everything you need to know to create something truly spectacular.
The beauty of a DIY vintage desk makeover lies not just in the finished product but in the process itself. Working with your hands, choosing colors and textures, and problem-solving along the way creates a deeply personal connection to the piece. When you sit down to work or create at a desk you have transformed yourself, the experience is entirely different from using something purchased new from a store. That desk becomes yours in a way that no retail item ever could.
This guide is designed for everyone from complete beginners to experienced DIY enthusiasts. We will cover sourcing the right desk, preparing it properly, choosing your aesthetic, applying finishes, and adding those final decorative touches that elevate a simple makeover into a genuine work of art. By the end, you will have all the knowledge and inspiration you need to get started on your own vintage desk transformation.
Finding and Selecting the Perfect Desk for Your Makeover
The foundation of any great vintage desk makeover is, of course, the desk itself. The most rewarding finds often come from unexpected places. Estate sales and garage sales are treasure troves for solid wood furniture that has been built to last for generations. Unlike modern flat-pack furniture, older desks were typically constructed from genuine hardwoods like oak, walnut, pine, or mahogany, which respond beautifully to sanding, staining, and painting. Take your time exploring these sales early in the morning when selection is best.
Thrift stores, charity shops, and antique markets are other excellent sources. Online marketplaces such as Facebook Marketplace, Craigslist, and local buy-and-sell groups frequently list old desks for very low prices, sometimes even free if the current owner simply wants them removed. When browsing listings, do not be discouraged by ugly paint colors, water stains, or superficial scratches. These are all problems that are entirely fixable with the right techniques. What you cannot easily fix is structural damage, so focus your attention on the bones of the piece.
When evaluating a potential desk for your project, there are several key things to check before committing. Run your hands along the joints where legs meet the surface and where drawers slide in and out. Wobbling or looseness here can often be repaired with wood glue and clamps, but it is worth knowing about upfront. Check for wood rot, which appears as soft, crumbling, or discolored areas and is very difficult to remediate. Look for veneer that is peeling or bubbling significantly, as repairing large sections of veneer requires intermediate skill. A solid, structurally sound desk with cosmetic issues is your ideal starting point.
- Estate sales and garage sales for well-built solid wood pieces at low prices
- Thrift stores and charity shops for regular affordable finds
- Online marketplaces for free or very cheap pieces requiring pickup
- Antique markets for more unique or ornate styles worth restoring
- Curb alerts and municipal bulk waste days for surprise discoveries
Preparing Your Desk: The Steps That Make or Break Your Makeover
Preparation is the single most important phase of any furniture makeover, and it is the stage that separates a truly professional-looking result from a disappointing one. Many beginners are tempted to skip or rush through prep work in their eagerness to get to the exciting parts, but every professional painter and furniture restorer will tell you the same thing: the finish is only as good as the surface beneath it. Taking your time here will pay dividends in the final appearance and longevity of your makeover.
Begin by giving your desk a thorough cleaning. Old furniture can carry decades of accumulated grease, wax, polish residue, and general grime, all of which will prevent new paint or stain from adhering properly. Use a degreaser or a solution of trisodium phosphate mixed with water, applied with a scrubbing sponge, to cut through buildup. Pay special attention to areas around drawer pulls and handles where hands touch most frequently, as these spots tend to have the heaviest grease accumulation. Allow the desk to dry completely, ideally overnight, before proceeding.
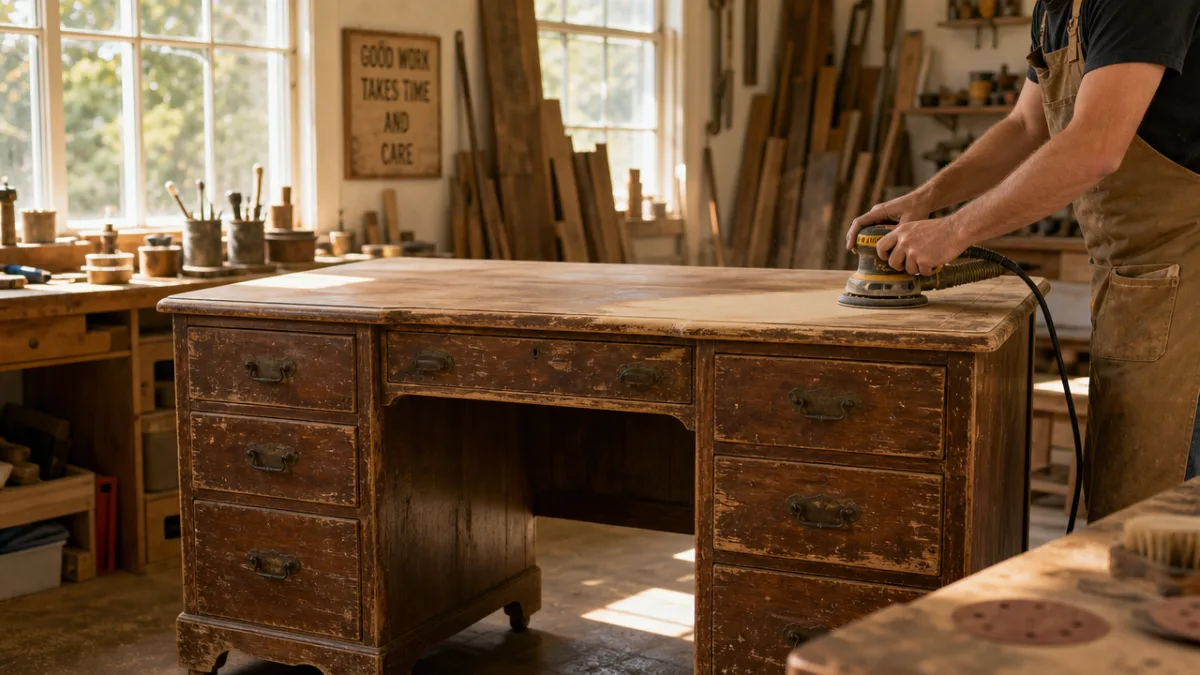
Next comes sanding, which serves multiple purposes simultaneously. Sanding removes any remaining old finish, smooths out surface imperfections, and creates a slightly rough texture called tooth that helps new paint or stain bond much more effectively to the wood. Start with a medium-grit sandpaper, around 120 grit, and work your way up to 220 grit for a smooth final surface. Always sand in the direction of the wood grain rather than against it or in circles, which can leave visible scratches. After sanding, wipe away all dust with a tack cloth or a damp rag, allow it to dry, and then apply a primer before painting.
- Clean the entire desk with a degreaser to remove wax, grease, and grime
- Allow the desk to dry completely, at least several hours or overnight
- Sand starting with 120-grit paper and finishing with 220-grit for smoothness
- Wipe away all sanding dust thoroughly with a tack cloth
- Apply a bonding primer suited to your chosen topcoat finish
- Lightly sand again with 220-grit after primer dries for an ultra-smooth base
Choosing Your Vintage Aesthetic and Color Palette
This is where the real creative excitement begins. The term vintage covers an enormous range of aesthetics, from the clean lines of mid-century modern to the ornate curves of Victorian-era furniture, from the rustic warmth of farmhouse style to the elegant patina of French provincial design. Before you pick up a paintbrush, spend some time exploring different directions and deciding which resonates most strongly with your personal taste and with the room where the desk will live. Creating a small mood board, whether physical or digital on Pinterest, helps clarify your vision considerably.
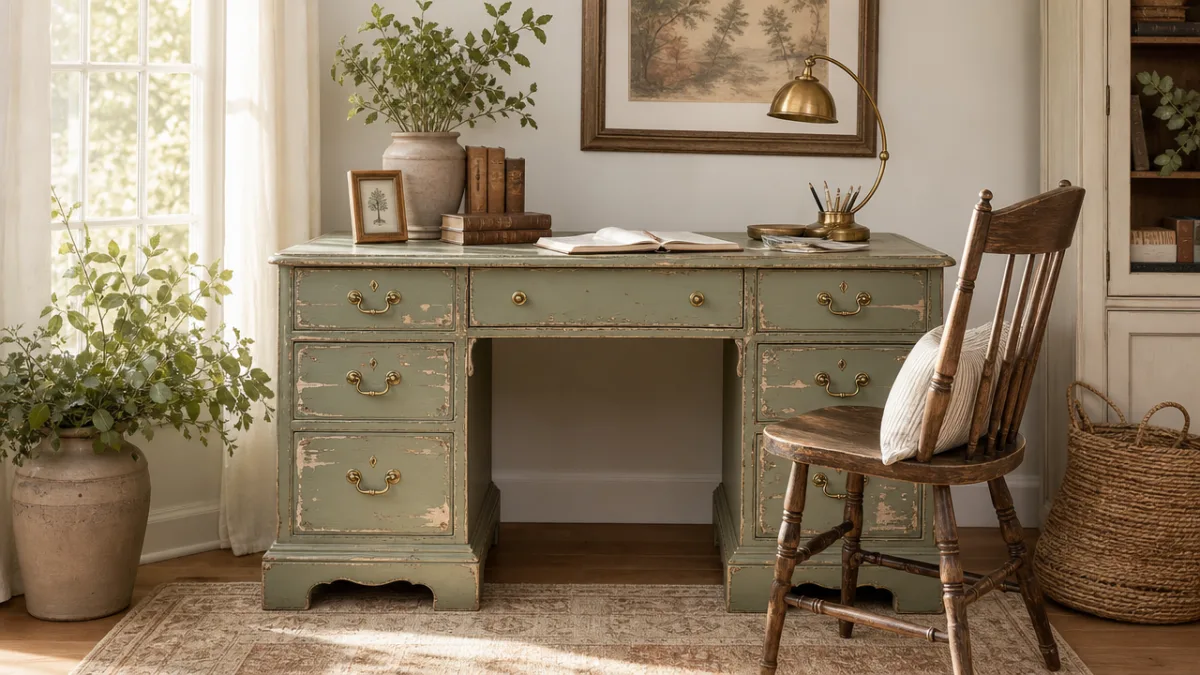
Color is one of the most powerful tools at your disposal. Classic vintage color palettes tend to lean toward muted, desaturated tones that evoke the feeling of aged charm. Soft whites, creamy off-whites, dusty sage greens, faded blues, warm terracottas, and deep charcoals all read as beautifully vintage depending on how they are used and layered. Chalk paint and milk paint are particularly well-suited to vintage furniture makeovers because they dry to a naturally matte finish that complements aged aesthetics. They also adhere well to many surfaces without requiring extensive priming, which can be a practical advantage.
Do not overlook the power of two-tone or contrasting color combinations, which can add tremendous visual interest and sophistication to your finished piece. A classic approach is to paint the main body of the desk in one color and the legs or drawer fronts in a complementary or contrasting shade. For example, a soft sage green body paired with warm cream legs creates a fresh yet vintage-feeling combination. Another widely beloved approach is to stain or paint the desktop in a warm wood tone while painting the rest of the piece in a solid color, preserving the natural beauty of the wood surface where you will actually be working.
Applying Finishes and Creating That Authentic Vintage Character
Once your base color is applied and fully dry, you can begin adding the finishing techniques that give a vintage makeover its distinctive character and depth. Distressing is one of the most popular techniques, and it involves deliberately creating the appearance of natural wear and age in strategic locations. The most common method uses fine-grit sandpaper, around 400 grit, to lightly sand through the paint at edges, corners, and raised details, areas where a real piece of furniture would naturally show wear over decades of use. The key is restraint; subtle distressing looks authentic, while heavy-handed distressing simply looks damaged.
Antiquing glaze is another transformative technique that adds enormous depth and richness to painted furniture. A dark antiquing glaze, typically brown, black, or raw umber, is brushed over the entire piece and then partially wiped away with a cloth, leaving the darker tone settled into recesses, carvings, corners, and grain lines. This mimics the natural accumulation of grime and patina that occurs over many years and gives flat paint a visual complexity that reads as genuinely old. You can purchase premixed antiquing glazes or make your own by thinning acrylic paint with a glazing medium available at any craft store.
Protecting your finished work is the final and absolutely essential step that is all too often underestimated. No matter how beautifully you have painted and distressed your desk, without proper sealing it will chip, scratch, and wear away quickly under regular use. For a vintage aesthetic, avoid high-gloss topcoats, which look modern and out of place. Instead, choose a matte or satin wax, a flat polyurethane, or a matte polycrylic sealer. Apply at least two to three thin coats, allowing each to dry thoroughly between applications, and lightly buff with a fine steel wool pad between coats for a silky smooth final finish that will stand up to daily use.
Hardware, Accessories, and Styling Your Finished Desk
Swapping out hardware is one of the highest-impact, lowest-effort upgrades you can make to any furniture piece, and for a vintage desk makeover, hardware selection is particularly important because it sets the tone of the entire aesthetic. Original hardware in good condition should be assessed carefully before you decide to replace it. Sometimes cleaning, polishing, or simply spray-painting existing hardware in a new finish is all that is needed to bring it into alignment with your vision. Brass hardware cleaner can work miracles on tarnished pulls that look hopeless at first glance.
When selecting new hardware, consider the overall style you are aiming for. Antique brass and aged gold tones suit French provincial and Victorian-inspired aesthetics beautifully. Oil-rubbed bronze and wrought iron pull handles look stunning on farmhouse or rustic vintage pieces. Ceramic or porcelain knobs with painted floral or geometric designs add a whimsical, cottage-core quality. Crystal or glass knobs bring a glamorous vintage Hollywood Regency feel. Measuring your existing holes carefully before purchasing is critical, and note that most standard drawer pulls are drilled on a 3-inch or 96mm center-to-center spacing, though this varies.
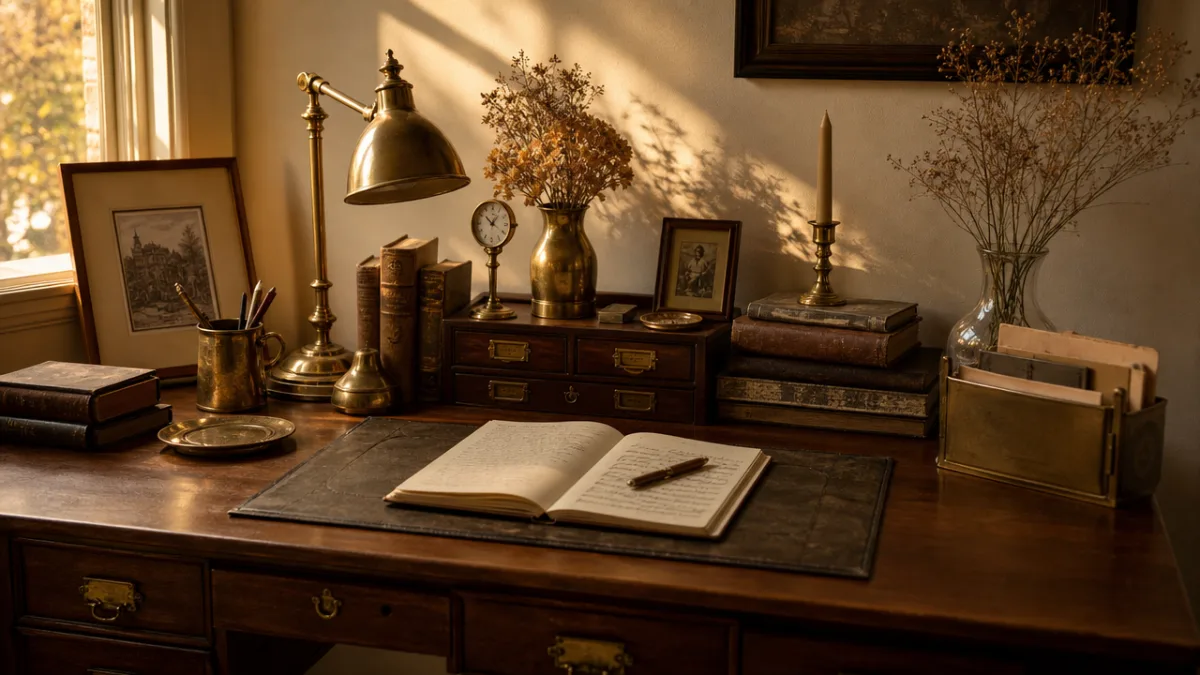
The accessories and items you choose to place on and around your desk contribute enormously to the cohesive finished look. Style your desk thoughtfully with objects that reinforce the vintage aesthetic without overcrowding the workspace. A small ceramic vase with dried florals, a vintage-style table lamp with a warm Edison bulb, a leather-bound journal or a stack of old books, a brass or copper pen holder, and a small framed vintage botanical print all work beautifully together without feeling forced. The goal is a space that feels curated and personal, as though the objects have been gathered over time rather than purchased all at once specifically for the purpose.
Maintaining Your Vintage Desk and Troubleshooting Common Issues
A well-finished and properly sealed vintage desk should give you many years of beautiful service, but like any piece of furniture it benefits from a little thoughtful care and maintenance. The most important daily habit is simply keeping it clean. Dust regularly with a soft, dry cloth rather than a feather duster, which tends to spread dust around rather than remove it. For slightly more thorough cleaning, a barely damp cloth followed immediately by a dry one works well. Avoid harsh chemical cleaners, which can strip wax sealers and dull paint finishes over time, and instead opt for a gentle, pH-neutral soap diluted significantly in water if needed.
Wax-sealed pieces benefit from periodic re-waxing, typically once or twice a year depending on how heavily the desk is used. You will know it is time to re-wax when water no longer beads on the surface and instead absorbs into the finish. Simply clean the desk thoroughly, allow it to dry, and apply a thin coat of the same furniture wax you used originally. Buff it to a soft sheen with a clean cloth. This process not only refreshes the protective layer but also revives the color and luster of the painted finish, keeping it looking fresh and beautiful for years to come.
Chips and scratches are an inevitable part of owning and using any piece of furniture, but on a distressed vintage piece they can often be incorporated naturally into the aesthetic or touched up with minimal effort. Keep a small jar of your original paint color for touch-ups, applying it with a fine artist’s brush and feathering the edges gently so the repair blends seamlessly. If the distressed appearance means that you actually want a chip or scratch to look intentional rather than accidental, simply extend the existing distressing pattern slightly at the damaged area. This forgiving quality is one of the genuine practical advantages of the vintage distressed aesthetic over more pristine modern finishes.
Inspiring Variations and Taking Your Makeover Further
Once you have completed your first vintage desk makeover and experienced the deep satisfaction that comes with it, you will likely find yourself looking at other furniture pieces in your home or at thrift stores with entirely new eyes. The skills and techniques you have learned are transferable to virtually any piece of wooden furniture, and each new project builds your confidence and refines your technique. Dressers, nightstands, bookshelves, dining chairs, and side tables all respond beautifully to the same vintage makeover approach, and together they can form a cohesive, collected aesthetic throughout your home.
For those who want to take their desk makeover even further, consider exploring more advanced decorative techniques. Decoupage involves adhering paper images, vintage sheet music, old maps, botanical prints, or decorative tissue paper to the furniture surface using a specialized medium, then sealing everything under a topcoat for a stunning mixed-media effect. Stenciling allows you to add intricate repeating patterns in contrasting colors to drawer fronts, the desktop, or chair backs. Gold leaf application adds a touch of genuine luxury and looks particularly stunning on carved details of more ornate vintage pieces.
The DIY furniture community is incredibly generous with knowledge, inspiration, and encouragement, and connecting with it can take your skills and creativity to new heights. Platforms like Pinterest, Instagram, and YouTube are overflowing with tutorials, before-and-after reveals, and technique demonstrations from creators at every skill level. Consider documenting your own makeover process from start to finish and sharing it, both to contribute to this generous community and to inspire others who are standing at the beginning of their own furniture transformation journey, just as you were when you first picked up this guide and began to imagine what was possible.








What do you think?
It is nice to know your opinion. Leave a comment.