










DIY Gazing Balls: Create Stunning Garden Art That Reflects Beauty
What Are Gazing Balls and Why Every Garden Needs One
Gazing balls have graced gardens for centuries, tracing their origins back to 13th-century Venice where skilled glassblowers first crafted these luminous orbs for European nobility. The reflective spheres were believed to ward off evil spirits, attract good luck, and bring prosperity to households that displayed them prominently in their outdoor spaces. Over the decades, they evolved from mystical talismans into beloved garden ornaments that add a magical, eye-catching focal point to any landscape, patio, or flower bed.
A gazing ball works by reflecting the surrounding garden in a continuous, panoramic view, creating an almost dreamlike distortion of colors, plants, and sky. When sunlight catches the surface, the entire garden seems to come alive in miniature form within that single glowing sphere. Placed strategically among flowers, beside a water feature, or at the center of a garden path, a gazing ball draws the eye and adds dimension and movement to what might otherwise be a static planting bed or bare corner of the yard.
The wonderful news for budget-conscious gardeners and creative DIY enthusiasts is that you absolutely do not need to spend a fortune on store-bought gazing balls. With some simple materials, a bit of patience, and the creative techniques outlined in this guide, you can craft your own stunning gazing balls that rival anything found in a high-end garden center. Whether you prefer a classic mirrored look, a mosaic-style finish, or a bold painted design, there is a DIY method perfectly suited to your skill level and personal style.
The History of Gazing Balls in Garden Design
Garden historians trace the widespread popularity of gazing balls in American gardens to the Victorian era, when wealthy homeowners began importing decorative glass spheres from Europe as status symbols and conversation pieces. By the early 20th century, gazing balls had trickled down from estate gardens to middle-class suburban yards, becoming a staple of the classic American garden aesthetic. Their shimmering presence in black-and-white photographs of period gardens speaks to their enduring visual appeal across generations of gardeners.
Throughout the 20th century, gazing balls fell in and out of fashion, sometimes dismissed as kitschy yard decorations and other times celebrated as charming vintage accents. Today, they enjoy a full-blown renaissance thanks in large part to the DIY craft movement, social media inspiration boards, and a renewed appreciation for handmade garden art. Contemporary gardeners embrace gazing balls not just as nostalgic throwbacks but as genuine artistic statements that reflect — quite literally — the personality and creativity of the gardener who made them.
Materials You Will Need for Your DIY Gazing Ball Project
Before you begin crafting your gazing ball, gathering the right materials is essential to achieving a polished, professional-looking result that will hold up to outdoor weather conditions. The base of your gazing ball can be made from several different objects, and the beauty of this project is its flexibility. Bowling balls are perhaps the most popular choice because of their perfect spherical shape, smooth surface, and surprising availability at thrift stores for just a few dollars each. Other excellent options include large glass Christmas ornaments, smooth decorative foam balls, or even old bocce balls found at yard sales.
For the reflective, mirrored finish that gives gazing balls their classic look, you have a few different routes to choose from depending on your desired aesthetic and budget. Broken mirror pieces, small mirror tiles, and mirror mosaic chips all work beautifully and can be found at craft stores or home improvement retailers. Alternatively, metallic spray paints specifically formulated for outdoor use can create a surprisingly convincing chrome-like finish at a fraction of the cost of actual mirror glass. Reflective window film, normally used to tint windows, can also be cut and applied to a smooth ball surface for a sleek, modern result.
Beyond the base and reflective materials, you will need a strong waterproof adhesive designed for outdoor use, such as a quality tile adhesive or construction-grade craft glue. Grout designed for outdoor tile projects will be necessary if you are creating a mosaic style ball. You will also want sandpaper to roughen slick surfaces for better adhesion, painter’s tape for clean edges, spray sealer to protect your finished work from moisture and UV damage, and of course, protective gloves and safety glasses when working with broken glass or mirror pieces.
- Bowling ball, large ornament, or smooth foam sphere as your base
- Mirror tiles, mosaic chips, or broken mirror pieces for reflective coverage
- Strong waterproof outdoor adhesive or tile mastic
- Unsanded grout in your choice of color for mosaic styles
- Metallic spray paint as an alternative finishing method
- Clear outdoor-grade sealer to protect the finished surface
- Safety gloves and eye protection for working with glass
- Sandpaper (medium grit) for surface preparation

Step-by-Step Instructions for the Classic Mirror Mosaic Gazing Ball
The mirror mosaic gazing ball is the most iconic version of this garden art project and remains a perennial favorite for very good reasons. The small fragments of mirrored glass catch light from every angle, sending glittering reflections dancing across nearby plants, fences, and garden paths at all times of day. The mosaic technique is also wonderfully forgiving for beginners because the irregular, fragmented nature of the design means small imperfections in your tile placement simply become part of the beautiful, organic whole rather than obvious mistakes.
Begin your project by thoroughly cleaning your ball base with soap and water, removing any oil, dust, or debris that might prevent proper adhesion. Once clean and fully dry, use medium-grit sandpaper to gently roughen the entire surface of the ball, especially if it has a very smooth or glossy finish. This scuffing step is often skipped by eager beginners but is genuinely crucial — the adhesive needs a slightly textured surface to grip properly, and skipping this step is one of the most common reasons DIY gazing balls eventually shed their tiles outdoors.
Working in small sections of about four to six inches at a time, apply your waterproof adhesive to the ball surface using a small palette knife or craft stick. Press your mirror pieces firmly into the adhesive, leaving small, consistent gaps between each piece to allow for grout application later. Vary the sizes and orientations of your mirror fragments to create an interesting, dynamic visual texture. Continue working around the entire ball, letting sections partially cure as needed before rotating the ball to work on adjacent areas. Allow the completed ball to cure for the full time recommended by your adhesive manufacturer before proceeding to grouting.
Grouting and Finishing Your Mosaic Ball
Once your adhesive has fully cured and all mirror pieces are firmly bonded to the ball surface, it is time to apply grout, which fills the gaps between tiles and gives your mosaic its finished, cohesive appearance. Mix your unsanded outdoor grout according to the package directions until it reaches a smooth, peanut butter-like consistency — too dry and it will crack, too wet and it will be difficult to work with and slow to cure. Wearing protective gloves, use your fingers or a small grout float to press the grout mixture firmly into all the gaps between mirror pieces, working it thoroughly into every crevice.
After applying grout across the entire surface, allow it to begin setting for about fifteen to twenty minutes before beginning the cleanup process. Using a damp sponge, gently wipe away excess grout from the mirror surfaces, being careful not to pull grout out of the joints you just filled. You will likely need to rinse your sponge frequently and make several passes over the ball to fully reveal the clean, shining mirror surfaces beneath. A light haze may remain after the first pass — this is completely normal and will wipe away cleanly once the grout has cured for another hour or two.
After the grout has fully cured according to package directions, typically twenty-four to forty-eight hours, apply two to three coats of a clear outdoor sealer over the entire surface of the ball. This step is non-negotiable for any gazing ball that will live outdoors year-round, as it protects the grout from moisture penetration, freeze-thaw cracking, and UV fading that can dull the grout color over time. Allow each coat of sealer to dry fully before applying the next, and plan to reseal your gazing ball at the beginning of each garden season to maintain its beauty and structural integrity.
Alternative Techniques: Spray Paint and Gem Embellished Gazing Balls
Not everyone has the time or inclination for a full mosaic project, and the good news is that there are several faster, equally stunning alternatives that can produce a gorgeous gazing ball in an afternoon. The metallic spray paint method is perhaps the easiest approach of all, requiring no cutting, gluing, or grouting — just careful masking, good technique, and the right paint products. Chrome, gold, copper, and bronze metallic spray paints formulated for outdoor use can transform a plain bowling ball into a glamorous reflective orb that looks remarkably like its expensive store-bought counterpart.
For the spray paint method, begin with the same cleaning and scuffing preparation described for the mosaic technique. Apply a coat of primer designed for the material of your ball — plastic primer for foam or plastic balls, and a bonding primer for very smooth surfaces like bowling balls. Once the primer is dry, apply your metallic topcoat in multiple thin, even layers, allowing each coat to dry completely before applying the next. Three to four thin coats will build up a much more even, professional finish than one or two heavy coats, which tend to drip, run, and look uneven once dry.
For those who love a more decorative, jewel-encrusted aesthetic, flat-backed glass gems, decorative marbles, glass nuggets, and even large rhinestones can be adhered to a ball surface using clear outdoor-grade adhesive for a truly spectacular result. These embellished balls catch light differently than mirror mosaic versions, scattering colorful prismatic light rather than sharp mirror reflections. Mix gem colors intentionally to complement your garden’s existing color palette, or go wild with a rainbow assortment for a playful, exuberant look that delights children and adults alike.
- Clean and sand your ball base to prepare the surface for adhesion
- Apply an appropriate primer and let dry fully before adding color or embellishment
- For spray paint versions, apply three to four thin metallic coats
- For gem versions, plan your color arrangement before applying adhesive
- Work in small sections to prevent adhesive from drying before gems are placed
- Allow full cure time before moving the ball to its display location
- Seal the finished ball with outdoor-grade clear coat for weather protection

Displaying Your Gazing Ball: Stands, Placement, and Garden Styling Tips
A beautiful handmade gazing ball deserves an equally thoughtful display, and the right stand or pedestal makes all the difference between a gazing ball that looks intentional and artfully placed versus one that simply sits awkwardly on the ground. Purpose-built gazing ball stands are available at garden centers and online, typically in wrought iron, powder-coated steel, or cast concrete, and they elevate your ball to eye-catching height while protecting it from being knocked over by the wind or by curious pets and children. For a more rustic or eclectic look, you can repurpose a large terracotta pot turned upside down, a section of wood log, a decorative garden urn, or even a cluster of large smooth stones as a natural pedestal.
Placement within your garden has a significant impact on how your gazing ball performs visually throughout the day and across different seasons. Ideally, position your gazing ball where it will receive sunlight for at least part of the day, as this is when the reflective surface truly comes alive with light and color. A spot where the ball can reflect a particularly beautiful element of the garden — a flower bed in full bloom, a wooden arbor draped in climbing roses, or a stretch of blue sky — will make the most of the panoramic reflective quality that makes gazing balls so captivating in the first place.
Consider placing your gazing ball at varying heights throughout the garden to create visual layers and interest. A ball at ground level nestled among low-growing ground cover creates one kind of effect, while a ball elevated on a pedestal at chest height in the center of a circular garden bed creates quite another. Multiple gazing balls of different sizes, finishes, or colors grouped together in a single vignette can create a striking art installation effect that becomes a true destination within the larger garden, drawing visitors and their eyes back repeatedly throughout a visit.
Seasonal Care and Winterizing Your Gazing Ball
With proper care, a well-crafted DIY gazing ball can bring joy to your garden for many years, but outdoor conditions — particularly winter weather in cold climates — can take a toll on even the most carefully made garden art. Water that seeps into tiny cracks in the grout or adhesive layers and then freezes can expand and cause tiles or gems to pop off over winter, and repeated freeze-thaw cycles can eventually compromise the structural integrity of the decorative surface. The simplest solution is to bring your gazing ball indoors or into a protected garage or shed before the first hard frost of the season arrives.
If you prefer to leave your gazing ball outdoors year-round, there are precautions that will help it survive winter weather with minimal damage. Apply an extra coat or two of clear outdoor sealer at the end of each fall season, paying particular attention to any visible grout lines or areas where the decorative surface meets the base. Placing a weatherproof cover over the ball during periods of extreme cold or ice storms provides an additional layer of protection. Some gardeners wrap their gazing balls loosely in burlap during winter months, which buffers against temperature extremes while still allowing some air circulation to prevent moisture buildup beneath the covering.
Spring is the ideal time to inspect your gazing ball thoroughly after winter, making note of any tiles that have loosened, grout that has cracked, or areas of sealer that have worn away. Touching up small areas of damage is far easier than allowing problems to compound over multiple seasons until a full refurbishment becomes necessary. Re-adhering a few loose tiles, filling small cracks in grout with fresh material, and applying a fresh coat of sealer takes only an hour or two at the start of the garden season and keeps your handcrafted gazing ball looking as beautiful as the day you first created it.
Inspiring Ideas and Creative Variations to Make Your Gazing Ball Unique
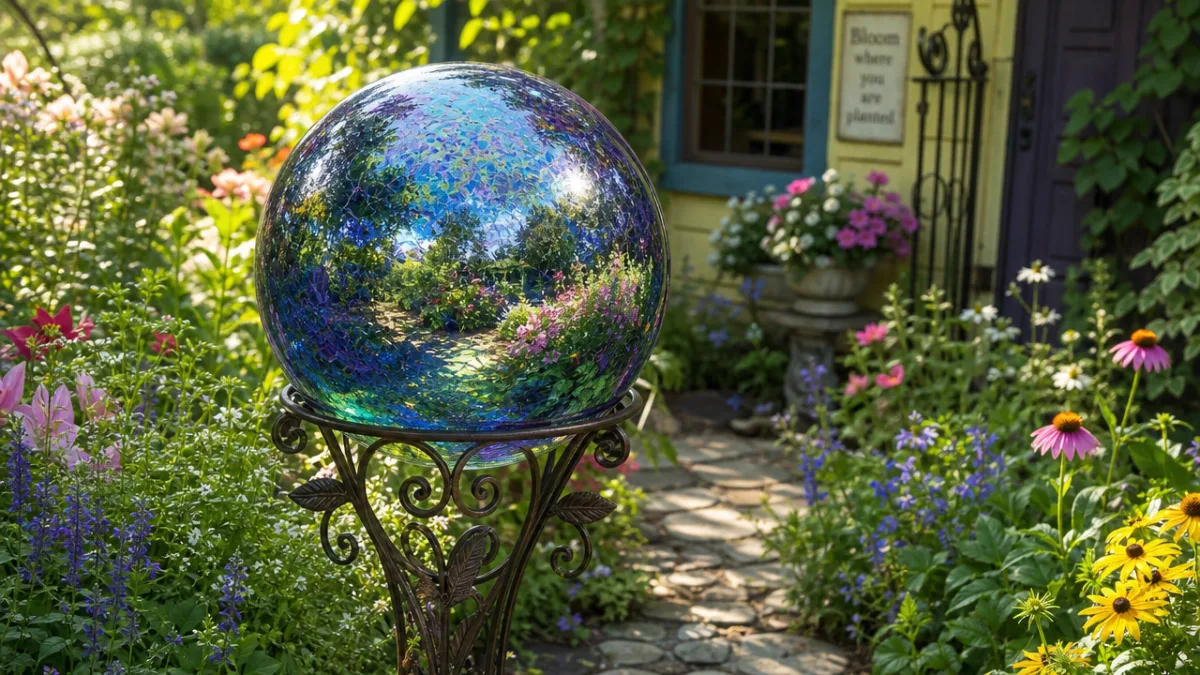
One of the greatest joys of the DIY gazing ball project is the almost unlimited creative freedom it offers, allowing you to move far beyond the traditional silver mirror finish into truly personal, imaginative territory. Consider using stained glass pieces in rich jewel tones of ruby, sapphire, and emerald for a gazing ball that glows with saturated color in direct sunlight rather than simply reflecting its surroundings. A ball made entirely from pieces of vintage china plates, their painted floral patterns arranged so that they peek through the spaces between fragments, creates a unique folk-art aesthetic with wonderful nostalgic charm.
Seasonal and holiday-themed gazing balls offer a fun way to refresh your garden decor throughout the year with relatively minimal investment of time and materials. A ball decorated in shades of orange, gold, and deep burgundy with leaf-shaped glass pieces becomes a stunning autumn accent; a white and silver version embedded with pale blue sea glass imitates the look of a frozen winter moon. You can even create a series of smaller gazing balls, each representing one season, and rotate them through the garden year-round to mark the turning of the calendar in a beautiful, tangible way.
For gardeners interested in combining functionality with art, gazing balls can be enhanced with solar-powered LED lights installed inside hollow ball forms, transforming them from daytime-only decorations into magical glowing orbs that illuminate garden paths and seating areas after dark. Glass fishing floats, available in various sizes at coastal gift shops and online, make spectacular gazing balls with essentially no crafting required beyond placing them on a suitable stand, and their aged, sea-worn appearance lends an organic authenticity that perfectly suits cottage, coastal, and naturalistic garden styles. However you choose to make or personalize your gazing ball, the finished piece will carry the special quality that only handmade things possess — it will be entirely, unmistakably yours.
Sharing Your Creations and Finding Further Inspiration
The DIY garden art community is remarkably generous and enthusiastic, and sharing photographs of your completed gazing balls on social platforms like Pinterest, Instagram, and gardening forums almost always results in an outpouring of encouragement, questions, and creative ideas from fellow makers around the world. Documenting your process as you go, from the unadorned ball base through each stage of decoration and finishing, provides a satisfying record of your creative journey and gives others who want to try the project valuable visual guidance they may not find in written instructions alone. Your unique approach and the specific materials you chose might inspire someone else to try a variation they would never have thought of independently.
Beyond the satisfaction of creating something beautiful with your own hands, DIY gazing balls make remarkably thoughtful and personal gifts for fellow garden lovers. A gazing ball crafted from tiles in someone’s favorite colors, or using pieces of china that once belonged to a shared family memory, carries emotional resonance that no store-bought item can match. Presenting a handmade gazing ball as a housewarming gift, a birthday present, or a thank-you to a generous neighbor communicates not just affection but the gift of many hours of careful, loving creative work — something increasingly rare and precious in a world of mass-produced goods.
Whether this is your first foray into garden art or you are an experienced maker looking for a new challenge, the DIY gazing ball project rewards you generously for your effort. The skills you develop — working with adhesive and grout, thinking about light and reflection, planning a mosaic layout — transfer naturally to dozens of other garden art and mosaic projects that can continue enriching your outdoor space for years to come. Most importantly, every time you step into your garden and see that handcrafted sphere glimmering in the sunlight, reflecting back to you the living beauty of the space you have created and tended, you will feel the particular and irreplaceable satisfaction of the maker who has added genuine, lasting beauty to the world.








What do you think?
It is nice to know your opinion. Leave a comment.