










Introduction to Concrete Gnome Lady Crafting
There is something undeniably magical about garden gnomes. These charming little figures have been delighting outdoor spaces for centuries, and the tradition of crafting them by hand makes them even more special. A concrete gnome lady, in particular, brings a whimsical femininity to any garden, patio, or doorstep. Whether you are a seasoned crafter or a curious beginner, making your own concrete gnome lady is a deeply satisfying project that combines artistry, patience, and a touch of imagination.
Concrete as a crafting medium has surged in popularity over recent years, and for very good reason. It is durable, weather-resistant, and surprisingly versatile. Unlike resin or plaster alternatives, a well-made concrete gnome can withstand freezing winters, scorching summers, and relentless rain without losing her charm. This longevity means your creation will grace your garden for years, perhaps even decades, becoming a beloved fixture that visitors remember and admire every single time they stop by.
This guide walks you through everything you need to know to create your very own adorable concrete gnome lady from scratch. From gathering the right materials and mixing your concrete to sculpting delicate features, painting lifelike details, and sealing your finished piece for outdoor durability, every step is covered in approachable, practical detail. By the time you reach the end, you will have all the knowledge and confidence needed to bring this delightful little character to life.
Why Make a Concrete Gnome Lady?
Handmade garden art carries a sentimental value that store-bought decorations simply cannot replicate. When you craft something with your own hands, you pour your personality, creativity, and effort into every detail. A concrete gnome lady you have made yourself becomes a story — a conversation piece that invites people to ask where she came from and allows you to proudly say you made her yourself. That sense of pride and ownership transforms an ordinary garden ornament into something truly meaningful.
Beyond the emotional value, making your own concrete gnome is also remarkably cost-effective. Commercial garden statues of similar quality and size can cost anywhere from thirty to well over a hundred dollars. With a modest investment in basic supplies, many of which you may already own, you can produce a comparable or even superior result at a fraction of the price. This makes the project especially appealing for those who love decorating their outdoor spaces but want to do so on a thoughtful budget.
Gathering Your Materials and Tools
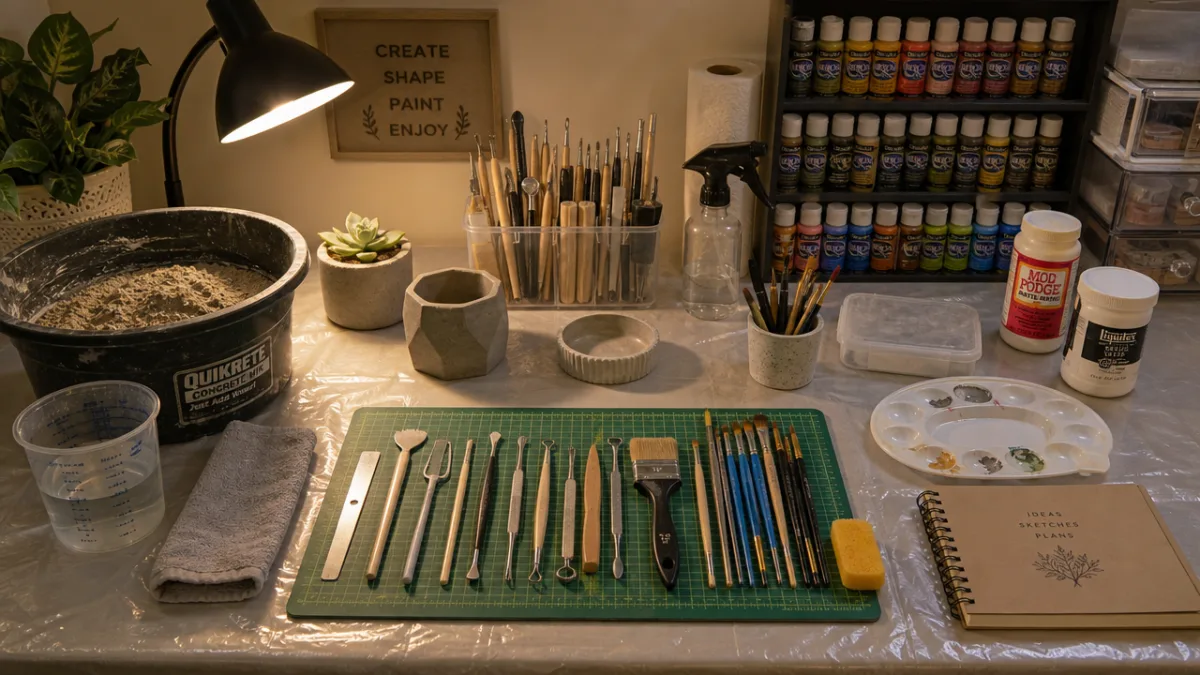
Before you begin sculpting, it is essential to assemble all the necessary materials so that your workflow remains smooth and uninterrupted. Concrete crafting requires a specific set of supplies, and having everything within reach before you start will save you considerable frustration once your hands are coated in mix. Take the time to read through the complete materials list carefully, sourcing items from your local hardware store, craft supplier, or online retailer ahead of your crafting day.
The core ingredient, of course, is concrete mix. For a project like this, a fine-grade concrete or hypertufa mix works best because it allows for greater detail and smoother texture than coarser construction-grade alternatives. You want a mix that is workable and holds its shape during sculpting without crumbling or cracking as it dries. Some crafters prefer to add a small amount of fiber reinforcement or acrylic bonding agent to their mix to improve strength and flexibility, which is a worthwhile consideration for a project intended to live outdoors year-round.
In addition to your concrete mix, you will need a variety of other supplies to complete this project successfully. Having everything organized before you begin is the mark of a prepared and confident crafter. Below is a comprehensive list of what to gather:
- Fine-grade concrete or hypertufa mix — approximately two to three pounds for a medium gnome
- Plastic mixing bowl or bucket dedicated to crafts only
- Rubber gloves and safety glasses for protection
- Sculpting tools such as small palette knives, wooden skewers, and silicone-tipped tools
- A wire armature or foam base to provide internal structure
- Plastic wrap or a damp cloth to slow drying during the sculpting process
- Acrylic paints in a range of colors including flesh tones, red, white, green, and brown
- Small and medium paintbrushes including a fine-tip detail brush
- Outdoor-grade sealant spray or brush-on sealer
- A spray bottle filled with water to keep your concrete workable
Choosing the Right Workspace
Your working environment matters more than many beginners realize. Concrete is sensitive to temperature and humidity, both of which affect how quickly it sets and how smoothly it can be worked. Ideally, you want a space that is cool, slightly humid, and well-ventilated. Working outdoors on a mild day is perfect, but if you are inside, ensure good airflow to disperse any dust particles that arise from the dry mix during preparation and handling.
Protect your surfaces generously before you begin. Lay down plastic sheeting, old newspaper, or a dedicated craft mat to catch spills and drips. Concrete is notoriously difficult to remove from fabric, wood, and carpeting once it has dried, so prevention is far easier than cleanup. Wearing old clothing you do not mind staining is also strongly recommended, and keep paper towels or rags nearby so you can wipe your tools clean between steps and maintain precision throughout the sculpting process.
Building the Armature and Base Form
Every successful concrete sculpture begins with a solid internal structure, commonly known as an armature. For a gnome lady standing approximately eight to twelve inches tall, a simple wire armature is usually sufficient. Twist and shape heavy-gauge wire into the basic silhouette of a small female figure — a rounded body, a suggestion of arms, and a stable base. This skeleton provides something for the concrete to grip onto and prevents the sculpture from cracking or collapsing under its own weight as it cures.
Some crafters choose to supplement the wire armature with a foam core, particularly for larger or more complex figures. Carving the rough form out of rigid foam and then covering it with a layer of concrete creates a lighter finished piece without sacrificing structural integrity. This approach is especially useful if you intend to place your gnome lady on a surface that might not support a fully solid concrete figure, such as a wooden deck shelf or a delicate planter edge. The foam-and-concrete combination offers the best of both worlds: strength and lightness.
Once your armature is in place, you can begin building up the basic form of your gnome lady using a relatively stiff concrete mix. Apply the first layer generously around the wire skeleton, pressing firmly to ensure good adhesion and eliminating any air pockets that could weaken the structure later. At this stage, you are not worrying about fine detail — your goal is simply to establish the correct overall proportions and mass. Think of this as the rough draft stage, where broad shapes take precedence over precise features, and embrace the process of building something from nothing.
Establishing the Gnome Lady’s Proportions
The charming, slightly exaggerated proportions of a classic gnome are a significant part of what makes these figures so endearing. A gnome lady typically features a large, rounded head that takes up roughly one-third of her total height, a plump, rounded body with short arms, and small sturdy legs or a wide, stable skirt that conceals them entirely. Her hat — the signature gnome accessory — should be tall, conical, and slightly floppy, adding considerable height and personality to her silhouette.
When building your gnome lady’s form, pay particular attention to the relationship between her head and hat, as this pairing is the most visually impactful element of the entire sculpture. The hat should flow naturally from the top of her head, curving slightly to one side or tilting forward at a jaunty angle that suggests movement and personality. Take your time shaping this element carefully, using your fingers and tools to smooth the transition between the rounded head and the elongated hat form, ensuring the junction looks organic rather than added on as an afterthought.
Sculpting Facial Features and Clothing Details
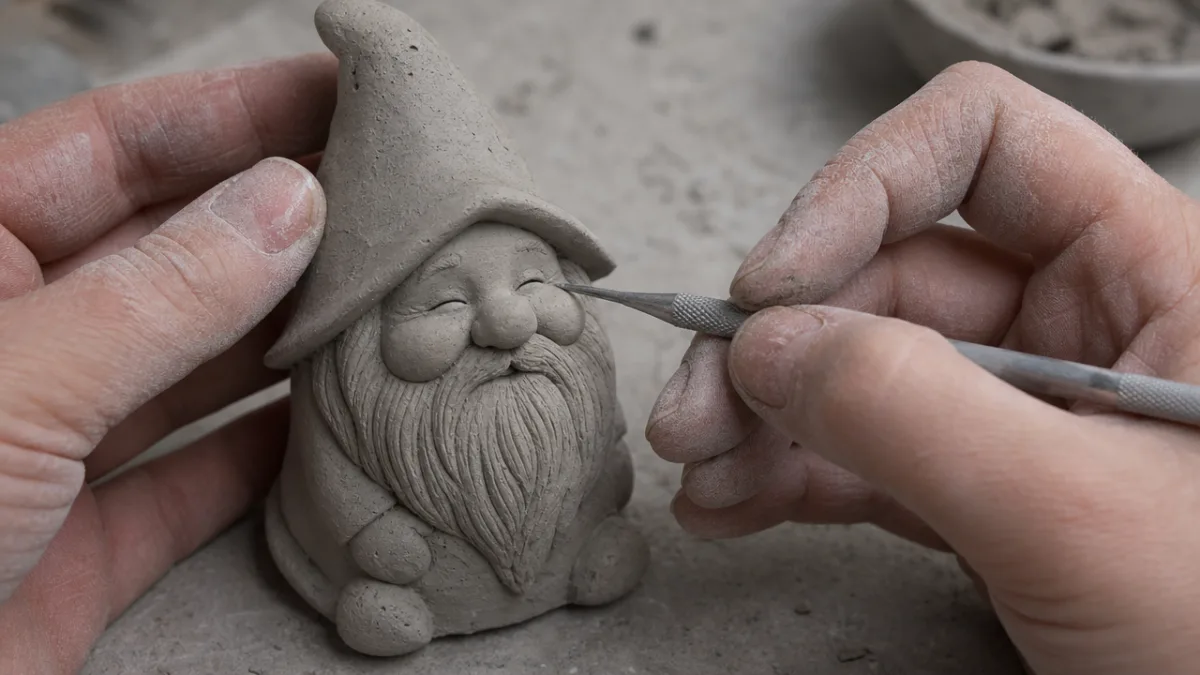
With your basic form established and the first layer partially set, it is time to begin adding the details that will transform a lumpy concrete shape into an adorable, characterful gnome lady. Facial features are the most technically challenging aspect of this project, but they are also the most rewarding. A well-placed smile, a hint of rosy cheeks, and expressive eyes can give your gnome lady a personality that feels genuinely alive and engaging. Take your time with this stage, working slowly and deliberately with your finest sculpting tools.
Apply a fresh, slightly softer layer of concrete mix over the facial area to give yourself a workable surface. Using a fine-tipped sculpting tool or a wooden skewer, press in the eye sockets gently, creating slight indentations that will receive painted eyes later. Build up a small, round nose by adding a tiny ball of concrete and blending the edges smoothly into the surrounding surface. For the mouth, press a gentle upward curve with your tool, then slightly deepen the corners to create the suggestion of a warm smile that will be enhanced with paint during the finishing stage.
Clothing details are equally important to the overall character of your gnome lady. A pinafore apron over a simple dress, indicated by incised lines and subtle surface texture, immediately reads as charming and homely. You can suggest the folds of fabric by pressing your tool into the surface in soft, flowing curves that follow the natural drape of clothing. Add small buttons down the front of her dress, a pocket on her apron, or even a tiny embossed flower for extra personality. These small touches are what elevate a basic figure into a truly delightful piece of handcrafted art.
Adding Hair and Accessory Details
A gnome lady’s hair peeking out from beneath her tall hat is a charming and distinctive feature that deserves careful attention. You can suggest hair texture by pressing fine lines into the concrete along the sides and back of the head using a comb, a fork, or a fine-tipped tool. Whether you want your gnome to have neat braids coiled around her ears, soft wavy locks framing her face, or a tidy bun at the nape of her neck, the texture lines you create at this stage will be dramatically enhanced when you apply contrasting paint colors during the finishing process.
Consider adding a few small accessories to further personalize your gnome lady and make her truly unique. A tiny basket held in one arm, a small flower clutched in her hands, a miniature watering can at her feet, or a little bird perched on her hat are all possibilities that add narrative interest and storytelling depth. These accessories can be sculpted directly from the same concrete mix and attached while the main form is still slightly damp, ensuring a strong bond. Keep accessory forms simple and chunky rather than delicate and thin, as fine concrete elements are prone to chipping and breaking over time.
Curing, Painting, and Finishing Your Gnome Lady
After you have finished sculpting every detail you want to include, your gnome lady must cure properly before painting can begin. Curing is the chemical process by which concrete hardens and reaches its full structural strength, and it requires both time and careful management of moisture levels. Wrap your finished sculpture loosely in plastic wrap or cover it with a damp cloth, then allow it to cure slowly in a shaded, cool location for at least twenty-four to forty-eight hours. Slow curing reduces the risk of surface cracking, which can occur when concrete dries too quickly in heat or direct sunlight.
After the initial cure period, unwrap your gnome lady and inspect her carefully for any cracks or areas that need touching up. Small surface cracks can be filled with a thin slurry of concrete mix applied with a fine brush and allowed to cure again. Once you are satisfied with the surface quality, allow the sculpture to continue curing for a full week before painting begins. Fully cured concrete provides a much more stable and receptive painting surface than concrete that is still green, and the paint will bond more reliably and last considerably longer as a result.
Painting your gnome lady is where her personality truly blossoms, and the experience is enormously enjoyable. Begin with a base coat of neutral gray or light tan acrylic paint applied all over to serve as a primer layer and unify the surface. Once dry, build up color in layers, starting with the largest areas such as her dress, hat, and skirt before moving to smaller details like her face, hair, and accessories. Use thin, translucent washes of color for shadows and deeper hues, and build up lighter, more opaque layers for highlighted areas. This layering technique gives the finished piece a sense of depth and dimension that flat, opaque color cannot achieve.
Sealing for Outdoor Durability
Sealing your finished gnome lady is the final and critically important step before placing her in her new outdoor home. Even fully cured concrete is somewhat porous and will absorb moisture over time if left unsealed, which can lead to internal cracking when that moisture freezes and expands during cold weather. A good outdoor-grade concrete sealer creates a protective barrier that repels water, resists UV fading, and helps preserve the vibrancy of your painted colors through seasons of sun, rain, and frost.
Apply your chosen sealer in two thin, even coats rather than one thick application, allowing full drying time between coats as specified by the manufacturer. Pay particular attention to the base of your gnome lady, as this area is most exposed to ground moisture and is therefore most vulnerable to freeze-thaw damage over time. A matte or satin finish sealer tends to look most natural on a hand-crafted garden ornament, preserving the charming, artisanal appearance without introducing a plasticky shine that would undermine the handmade aesthetic you have worked so hard to achieve.

Displaying and Caring for Your Concrete Gnome Lady
Choosing the right location for your gnome lady is an important final consideration that will significantly affect both her visual impact and her longevity. A shaded or partially shaded spot is generally preferable to full direct sunlight, as UV exposure will gradually fade even sealed acrylic paint over time. A position nestled among low-growing plants, tucked beside a garden path, or presiding over a container garden creates a naturalistic setting that makes her feel at home rather than simply placed and forgotten in an empty corner.
Display her at a height and angle where she can be appreciated up close, as the hand-sculpted facial details and fine painting work deserve to be seen rather than glimpsed from a distance. A low garden wall, a planter edge, or a dedicated garden shelf brings her to a level where curious visitors can stop and really look at her. Consider the surrounding colors when choosing her position too — a gnome dressed in red and green will pop against silvery foliage or pale stone, while one painted in softer, earthier tones will blend beautifully into a cottage-style planting scheme rich with texture and organic color.
Caring for your concrete gnome lady over the long term is pleasingly straightforward and requires very little effort on your part. A gentle rinse with a garden hose in spring to remove winter grime, followed by an inspection for any chips or cracks that may need touching up, is generally all the maintenance she requires. Reapply sealer every two to three years to maintain full weather protection, and touch up any areas of paint that have faded or chipped using the same acrylic colors you used originally. With this minimal care routine, your handcrafted gnome lady will remain a delightful garden companion for many years to come.
Inspiring Variations and Future Projects
Once you have successfully completed your first concrete gnome lady, the natural next step is to explore the wonderful variations and companion pieces you might create to build out your garden gnome world. A gnome gentleman with a fishing rod, a pair of gnome children playing, or a gnome family group can transform a single charming figure into an entire narrative installation that evolves over time as you add new characters. Each successive piece will benefit from the skills and confidence you have developed, making each gnome better than the last.
You might also experiment with different scales, surface treatments, and stylistic approaches as your skills develop. Larger gnomes with more complex sculpted details, gnomes incorporating mosaic tile accents, or figures with embedded glass gems that catch the light are all exciting directions to explore. Some crafters even incorporate planters into their gnome designs, creating figures with hollow interiors that can be planted with small succulents or trailing flowers, merging functional garden design with whimsical decorative art in a way that is genuinely innovative and endlessly appealing.
Sharing your handmade gnome lady on social media, gifting her to a friend or family member with a love of gardens, or displaying her at a local craft fair are all wonderful ways to spread the joy this project generates. Handmade art has a quality of warmth and intention that mass-produced objects simply cannot replicate, and the people who receive or admire your gnome lady will feel that quality immediately. Your concrete gnome lady is not just a garden ornament — she is a small, sturdy, wonderfully cheerful ambassador for the enduring human delight in making things by hand.








What do you think?
It is nice to know your opinion. Leave a comment.