










Have Empty Paper Rolls at Home? Try This Festive DIY!
There is something deeply satisfying about transforming everyday household waste into something beautiful, especially when the holidays are just around the corner. Empty paper rolls — the cardboard tubes left behind from toilet paper, paper towels, or wrapping paper — are one of the most underrated crafting materials you probably already have in abundance. Instead of tossing them into the recycling bin, you can turn them into stunning festive decorations that will genuinely impress your guests and add a warm, handmade charm to your home.
Crafting with cardboard tubes is not a new concept, but the creative possibilities have expanded enormously over the years thanks to a surge in DIY culture and the growing appeal of sustainable living. People around the world are discovering that with a little paint, some glue, ribbon, and imagination, these humble cylinders can become advent calendars, Christmas tree ornaments, garlands, candle holders, and so much more. The festive season is the perfect time to explore what your recycling pile can become.
This article will walk you through everything you need to know to get started with paper roll crafting, from gathering your supplies and preparing your workspace to completing specific holiday projects that are fun for adults and children alike. Whether you are a seasoned crafter or a complete beginner, you will find that cardboard tube crafts are forgiving, affordable, and endlessly customizable to match your personal style and holiday color palette.
Why Cardboard Tube Crafts Are Perfect for the Holidays
The holiday season tends to inspire a desire for warmth, togetherness, and creativity. Cardboard tube crafts check all three of those boxes beautifully. They are inherently a family-friendly activity, meaning children as young as three or four years old can participate in painting, sticking, and decorating alongside adults. This makes them far more than just a crafting project — they become a shared memory, a tradition you can revisit year after year with different results each time as skills and ideas evolve.
From an environmental perspective, paper roll crafts are one of the most sustainable forms of DIY decoration. Rather than purchasing mass-produced plastic ornaments that may end up in landfill after a season or two, you are giving new life to materials that would otherwise be discarded. Many families are actively trying to reduce their holiday waste footprint, and embracing handmade decor from recycled materials is one of the most impactful and enjoyable ways to do that. Your decorations will carry a story and a sense of purpose that store-bought items simply cannot replicate.
There is also a compelling financial argument for paper roll crafts. The cost of holiday decorating can spiral quickly when you are shopping retail, but these projects require only modest additional investment. A few bottles of acrylic paint, a hot glue gun, some ribbon, craft paper, and perhaps a handful of embellishments like glitter, sequins, or small baubles are all you really need. Most of these items are inexpensive and reusable across multiple projects, meaning the per-decoration cost can be just a few cents — a remarkable value compared to anything you would find in a shop.
Gathering Your Materials and Setting Up Your Workspace
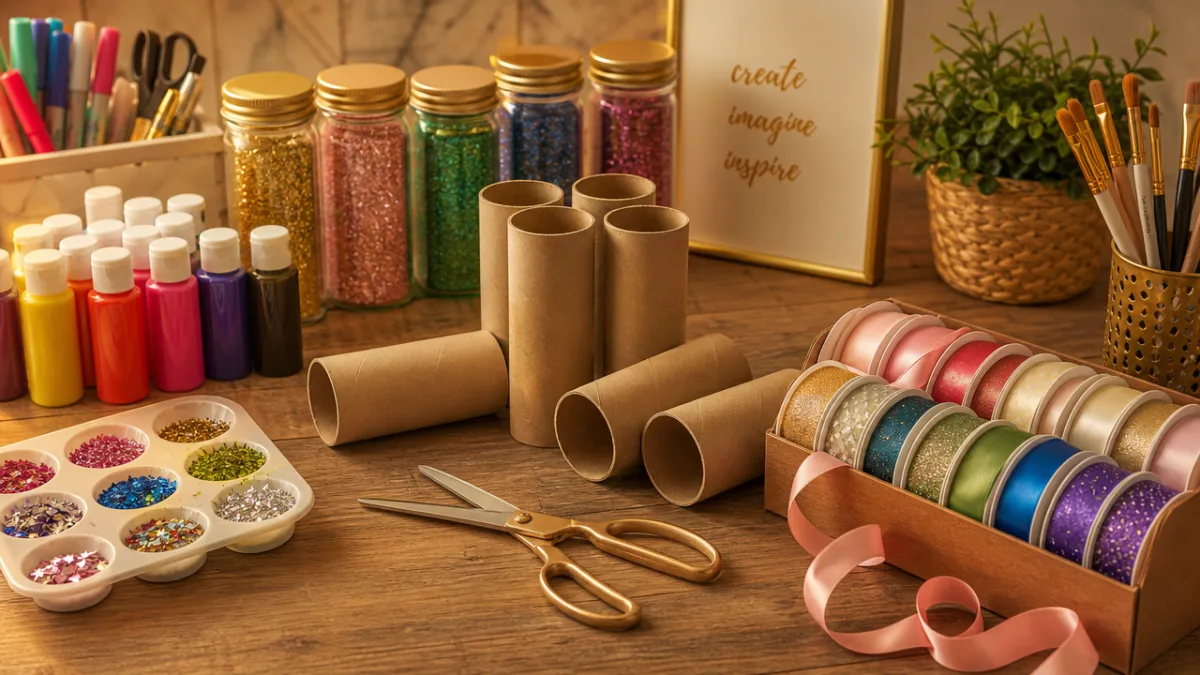
Before diving into any specific project, it pays to take a little time to collect and organize your materials. Start saving your cardboard tubes well in advance of the holiday season — toilet paper rolls accumulate quickly in most households, but you can also ask friends, family members, or neighbors to save theirs for you. Paper towel rolls are larger and offer different structural possibilities, while the tubes from wrapping paper or kitchen foil are longer still and ideal for more ambitious projects like advent calendars or star garlands.
Once you have a good collection of tubes, give them a quick inspection and flatten any that have been crushed, reshaping them gently by hand if necessary. For most painting projects, you will want to start with a base coat of white or cream acrylic paint, which helps any subsequent colors appear vivid and true rather than muted by the brown cardboard underneath. Allow each coat to dry fully before proceeding, and consider setting up a simple drying rack using a wire cooling rack or a piece of cardboard with skewers poked through it to hold the tubes upright without smudging.
Your workspace matters more than you might think. Cover your table with a disposable plastic sheet or old newspaper to protect it from glue and paint, and keep a cup of water nearby for rinsing brushes between colors. Gather all of your tools before you begin rather than searching for scissors or a ruler mid-project — this keeps the creative momentum going and makes the experience more enjoyable. Good lighting, a comfortable chair, and perhaps some holiday music in the background will set the mood perfectly for an afternoon of festive crafting.
Five Festive Projects to Try with Paper Rolls
One of the most beloved paper roll projects is the classic advent calendar. To make one, you will need twenty-four toilet paper rolls and a long piece of ribbon or a wooden dowel to hang them from. Flatten each roll slightly and fold the ends inward like a cracker, filling each one with a small treat, note, or trinket before sealing. Arrange them in a 4×6 grid or a Christmas tree shape and label them from one to twenty-four with a gold or silver paint pen. The result is a charming, fully customizable advent calendar that costs a fraction of any retail version.
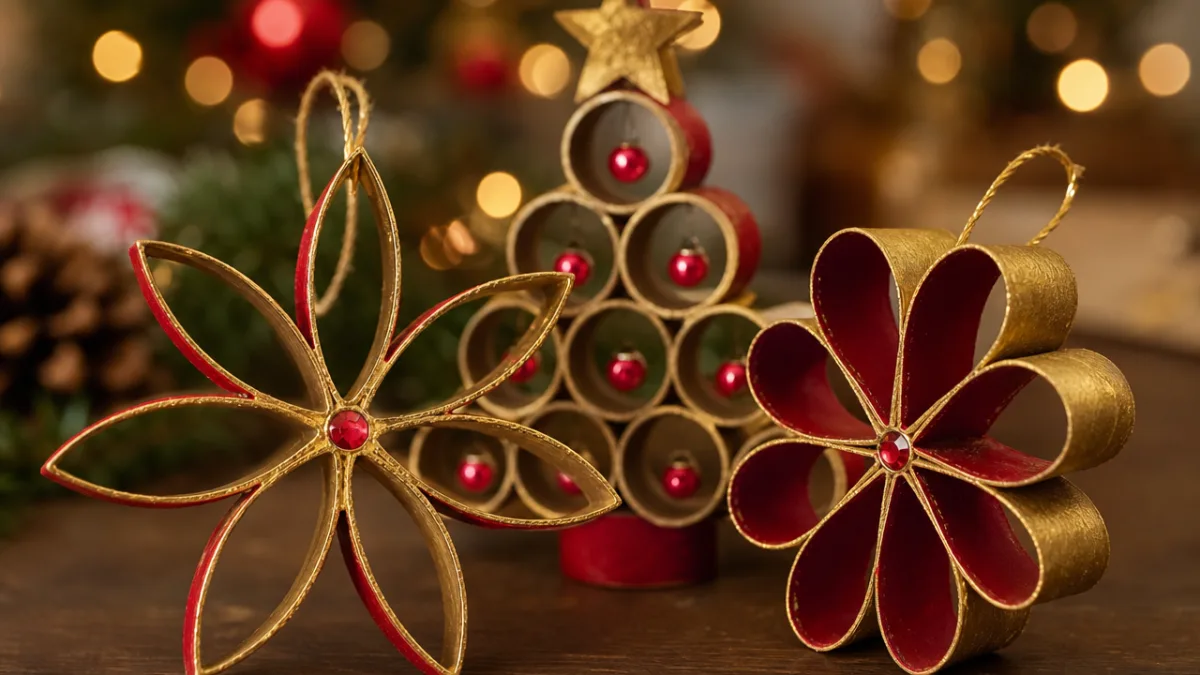
Paper roll snowflakes and stars make gorgeous window or wall decorations and require very little additional material. Simply cut toilet paper rolls into rings of roughly one centimeter each, then pinch each ring into a petal or diamond shape. Arrange these shapes into a star or snowflake pattern on a flat surface, glue them together at their touching points, and once dry, spray paint the whole piece white, silver, or gold. Add a loop of ribbon for hanging and perhaps a few touches of glitter for sparkle. These look stunning when hung in multiples at varying heights in a window.
For a more structural project, consider making a small decorative Christmas tree from paper towel rolls. Stack and glue rings of decreasing size — cut from a paper towel tube — on top of one another to create a tiered tree shape. Paint the entire structure green, then decorate with tiny dots of paint or miniature baubles for ornaments. A small star cut from gold cardstock completes the top. These mini trees look wonderful grouped together on a mantelpiece or used as table centerpieces at a holiday dinner, and each one takes less than an hour to make.
Cardboard roll angels and Santas are another perennial favorite, particularly for families with young children. The tube forms the body, and a circle of white card stock rolled into a cone creates the head. Paint the body in your chosen colors — red and white for Santa, white and gold for an angel — and add details with a fine brush or felt-tip pen. Hair can be created from cotton wool, yarn, or shredded tissue paper. Wings for the angel can be cut from card stock and glued to the back. These figures make lovely tree ornaments or nativity scene additions, and children can design and paint their own characters with minimal guidance.
Finally, a paper roll lantern is an elegant and atmospheric decoration that looks particularly beautiful when used in multiples along a windowsill or outdoor balcony railing. Cut vertical slits down the length of a toilet paper roll from one end to about halfway, then gently press the bottom of the roll against a flat surface to fan the slits outward into a flower or flame shape. Paint the roll in a metallic color — copper, gold, or silver — and place a battery-operated tea light candle inside. The slits allow the soft light to glow warmly through the gaps, creating a magical flickering effect without any fire risk.
Tips for Elevating Your Paper Roll Creations
The difference between a craft that looks homemade in the charming sense and one that looks simply unfinished often comes down to a few key finishing techniques. One of the most impactful is the application of a sealer or varnish once your project is complete and fully dry. A light coat of Mod Podge, clear acrylic spray, or even plain white school glue diluted with a little water will give your decorations a professional sheen, help them resist humidity and handling, and make colors pop with added vibrancy. This step takes only a few minutes but makes a substantial difference to the final appearance.
Color palette cohesion is another element worth considering when making multiple decorations for the same space. Rather than painting each piece in a completely different color scheme, choose two or three complementary colors — perhaps deep red, forest green, and gold for a traditional look, or ice blue, white, and silver for a more contemporary Scandinavian aesthetic — and apply these consistently across all of your pieces. The result will be a curated, intentional collection of decorations that look as though they belong together, elevating the overall impression of your holiday decor significantly.
Texture is your friend when working with cardboard tubes. Because the base material is plain and cylindrical, adding tactile interest through layers of twine wrapped around sections, small pieces of torn tissue paper applied in a decoupage style, or stamped patterns using a cut potato or foam stamp can make each piece feel handcrafted in the best possible way. Embossed textures can also be created by pressing the tube against patterned fabric or bubble wrap while the base coat is still slightly tacky. Experimenting with texture costs nothing extra but opens up a much wider range of visual effects.
Consider the finishing details that pull everything together: a tiny sprig of dried rosemary tied with twine, a small bell threaded onto a loop of ribbon, a miniature bow made from washi tape, or a stamped tag with a festive message. These small additions take only seconds to apply but communicate care and thoughtfulness to anyone who looks closely at your work. The holidays are a time when attention to detail resonates especially strongly, and handmade decorations that clearly involved time and love tend to become keepsakes that families hold onto long after mass-produced equivalents have been discarded.
Getting the Whole Family Involved
One of the greatest joys of a DIY holiday crafting session is the opportunity it creates for meaningful time together. Setting up a dedicated crafting afternoon or evening — perhaps on a weekend in early December — gives everyone in the household something to look forward to. Children respond particularly well to having their own designated materials and creative autonomy: give each child a few tubes, their own small palette of paint colors, and freedom to decorate however they like. You will likely be amazed at the results, and children take immense pride in seeing their handmade creations displayed as part of the family’s holiday decor.
For households with teenagers, paper roll crafting can feel more appealing when framed as a design challenge rather than a simple kids’ activity. Challenge them to research a theme — perhaps Art Deco, woodland creatures, or a specific color story they love — and create a cohesive set of decorations based on that concept. This kind of creative brief engages older children’s sense of personal style and gives them a degree of ownership over the aesthetic outcome. The results often surprise parents with their sophistication and originality, and the process builds genuine artistic confidence.
Grandparents and older relatives often find great pleasure in paper roll crafts as well, particularly if they have a background in sewing, art, or traditional handcrafts. These activities require fine motor skill and patience — areas where experienced crafters genuinely excel — and the results of their expertise are often extraordinary. Creating a multi-generational crafting session where different family members bring different skills to the table — one person cuts, another paints, another assembles — turns the activity into a collaborative production line that is both efficient and deeply enjoyable as a shared experience.
Displaying and Storing Your Handmade Decorations
Once your paper roll creations are complete, taking a little care with how you display them will maximize their visual impact. Group similar pieces together for a stronger collective impression rather than scattering individual items around the home. A cluster of paper roll lanterns on a windowsill, a row of small Christmas trees along a mantelpiece, or a garland of paper roll stars strung across a doorway will read as a deliberate design choice rather than a random collection. Varying the heights within a grouping — using books, small boxes, or wooden blocks as risers — adds dimension and keeps the eye moving across the arrangement.
Lighting plays a crucial role in how your decorations are perceived, and this is particularly true for paper roll crafts given their often cylindrical and slightly translucent nature. Positioning your paper roll lanterns near warm-toned LED string lights, or placing metallic-painted decorations where they catch the light from candles or fairy lights, will bring them to life in ways that are genuinely magical in a dimly lit holiday room. Even decorations that seem modest in bright daylight can look breathtaking when seen by candlelight, so experiment with placement during the evening hours to find the most flattering arrangement.
After the holiday season, proper storage will ensure your handmade decorations survive to be enjoyed again the following year. Unlike fragile glass baubles that require careful individual wrapping, paper roll creations are relatively robust and can be stored in a shoebox or a small cardboard box lined with tissue paper. Keep them away from moisture, which can cause the cardboard to warp, and avoid crushing them under heavier items. A label on the outside of the box noting its contents will save you the annual frustration of rifling through multiple storage boxes to locate your treasured handmade pieces when the next holiday season comes around.
The fact that these decorations are made from recycled materials also means there is very little guilt attached to replacing or updating them each year if you choose to. Unlike expensive ornaments that feel wasteful to discard, paper roll decorations can be composted or recycled at the end of their useful life, and you can begin the process of collecting new tubes and creating a fresh collection whenever the inspiration strikes. This flexibility is part of what makes the tradition so sustainable and so easy to maintain — each year’s collection can reflect where you are in life right now, making your holiday decor a living, evolving expression of your creativity and values.








What do you think?
It is nice to know your opinion. Leave a comment.